10
1. Overview 2. Installation
3. Optional
Installation
The dimensions of the Topcat are 1’ x 2’ and is designed to fit into any standard
2’ x 2’ or 2’ x 4’ suspended ceiling tile grid.
a. The ceiling tile will need to be cut to accommodate the Topcat.
b. Set the ceiling tile on a flat work surface with the patterned side facing down.
c. Using a straight edge, cut a 1’ x 2’ section from the ceiling tile, leaving a 1’ x 2’
section and a 2’ x 3’ section (see figure 2), or two 1’ x 2’ sections (see figure 4).
d. Locate the 2’ ceiling grid t-bar provided. Locate the attachment slots in
the existing ceiling grid and snap the new t-bar into place to create two
openings to create a 1’ x 2’ and a 2’ x 3’ opening (see figure 3) or
two 1’ x 2’ openings (see figure 5).
2a. TOPCAT INSTALL FOR U.S. & CANADA
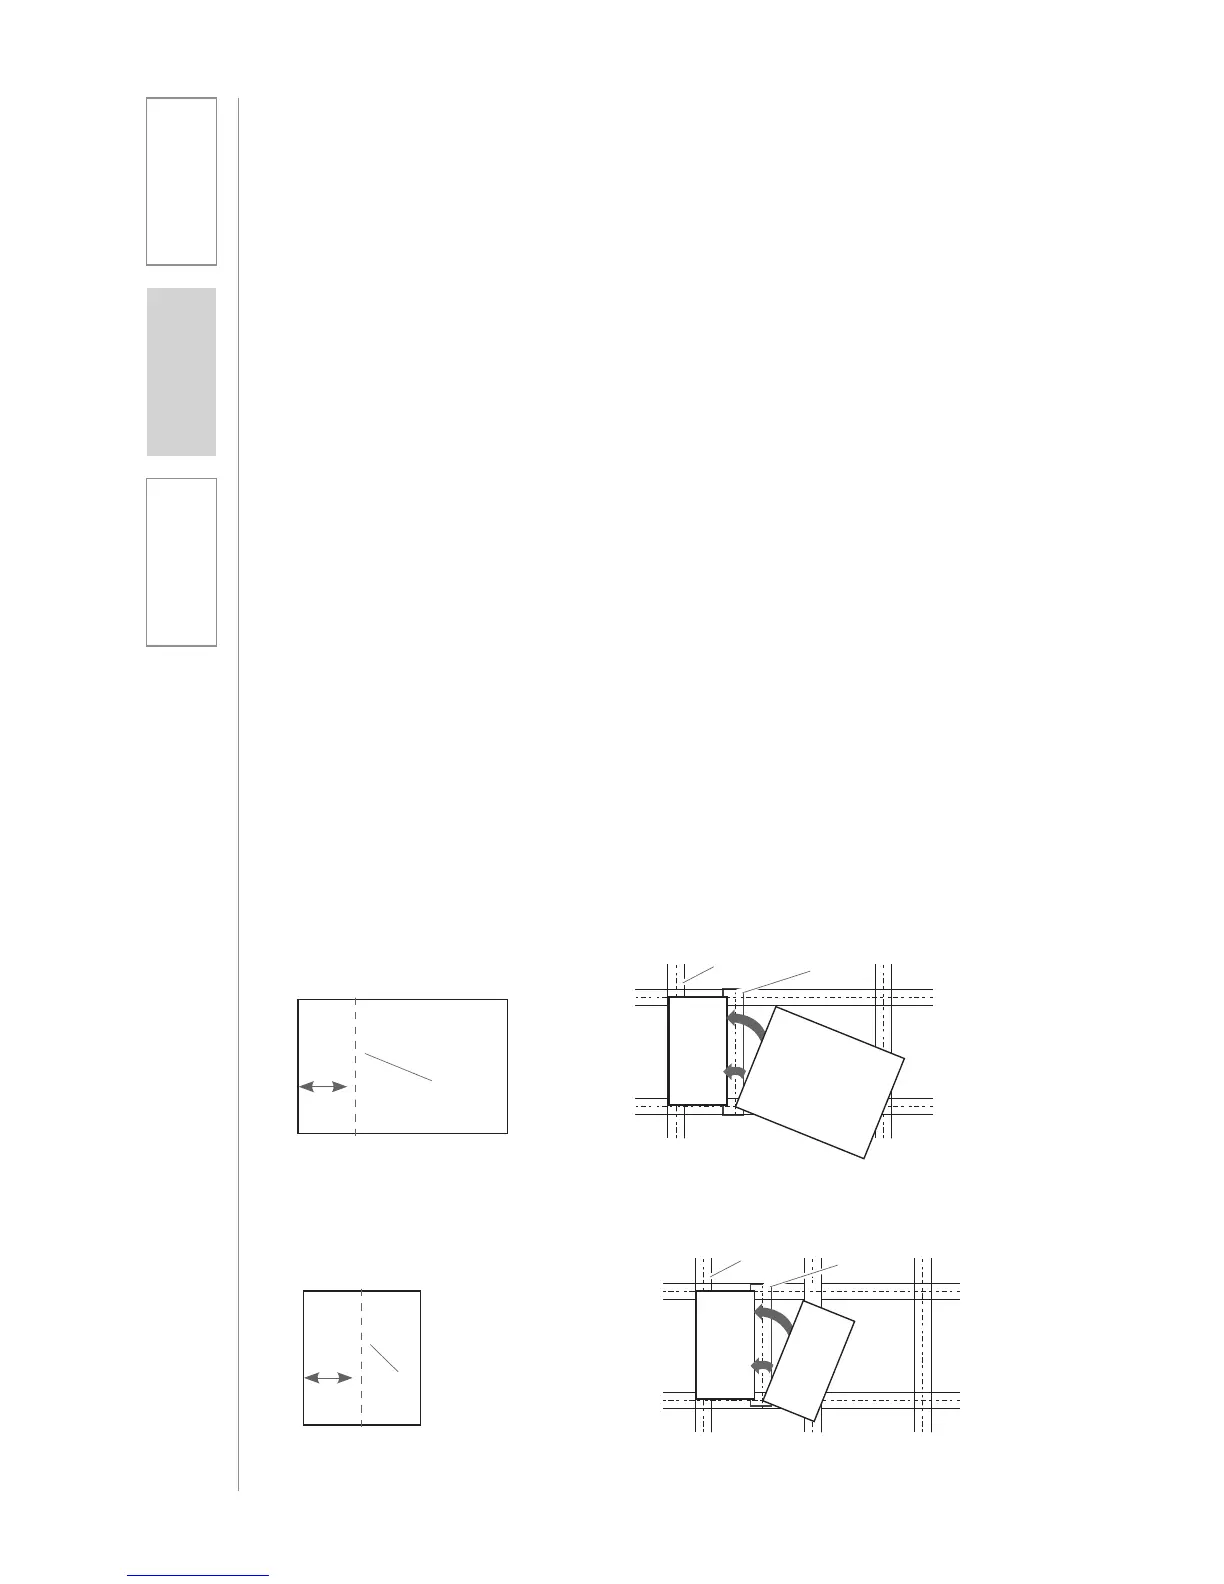
Figure 2:
Cut the 2’ x 4’ tile to create a 1’ x 2’
section and a 2’ x 3’ section.
Throw Away
Remaining Ceiling Tile
Cut with
straight edge
12”
Figure 3:
Create a 1’ x 2’ opening and a 2’ x 3 opening
New T-Bar
Existing
Tile Grid
Topcat
3/4 T
ile
2’ X 2’ AND 2’ X 4’ CEILING GRID
2b. TOPCAT INSTALL (OUTSIDE U.S. &
CANADA)
The Topcat has spacer brackets mounted on each of the four sides. With these
brackets installed and the ceiling tile is cut in half, the Topcat will fit into a
standard 2’ x 2’ suspended ceiling grid with and additional tile support. With the
brackets removed, it will fit a 300mm x 600mm ceiling grid with an additional tile
support. (see Figure 4 and Figure 5)
Remove the spacer brackets from each of the four sides of the Topcat. (see
Figure 1 pg 13)
NOTE: If your ceiling grid is any other dimension than mentioned above, contact
your local Lightspeed Representative.
600MM X 600MM CEILING GRID
New T-Bar
Existing
Tile Grid
Topcat
1/2 T
ile
Throw Away
Remaining
Ceiling Tile
Cut with
straight
edge
12”
Figure5:
Create two 1’ x 2’ openings
Figure 4:
Cut the 2’ x 2’ tile to create
two 1’ x 2’ sections.

 Loading...