24
1. Overview 2. Installation
3. Optional
Installation
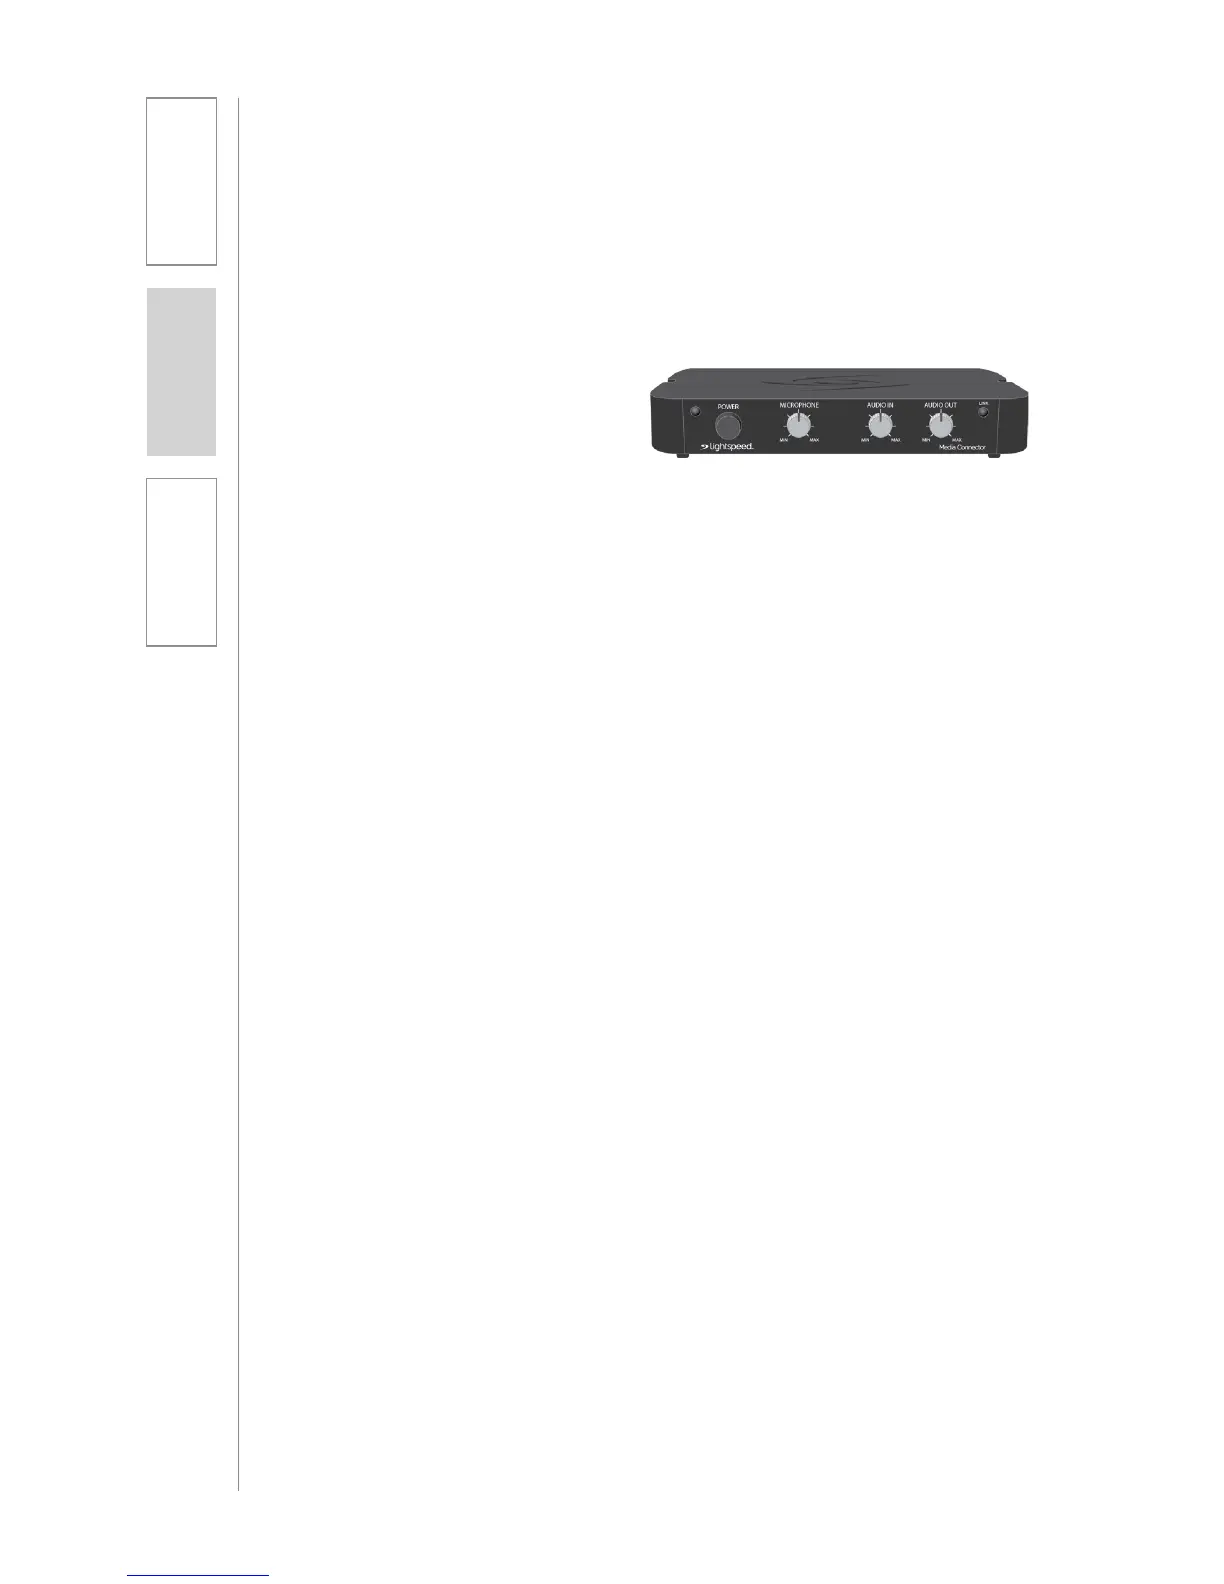
The Media Connector can be used as the primary volume control for the audio
sources you’ve connected.
1. Connect the audio source(s) to the
Media Connector using the 3.5mm
cables provided.
2. Press and hold the power button
to power on the unit.
3. Set the audio source volume to
provide sound through the Topcat.
4. Use the Media Connector AUDIO
IN volume control to increase or
decrease the sound level.
8. VOLUME ADJUSTMENT FOR THE MEDIA
CONNECTOR
NORMALIZING AUDIO SOURCE VOLUME LEVELS
Use the Media Connector as the master audio volume control for the classroom.
When two or more audio sources are connected, you will need to normalize
volume settings by setting all connected audio sources to the same sound level
while leaving the Media Connector AUDIO IN volume control set to its center
setting. The Media Connector is an audio mixer using a master volume control
to adjust the volume of all audio sources at once. Use the following procedure to
set audio source volumes:
1. Connect the multimedia audio sources to the Media Connector using the
3.5mm cables provided.
2. Set the AUDIO IN volume control on the Media Connector to its center
position.
3. Turn on an audio source that does not have an accessible audio level control.
(DVD, VCR player)
4. Adjust the Media Connector AUDIO IN volume control so the audio level
playing through the speaker is appropriate for the classroom.
5. Turn off the first audio source.
6. Turn on the second audio source. Use its volume control to balance the audio
output to the same audio level played through the speaker as the first source.
7. Repeat steps 5 and 6 for the remaining audio sources.
8. Now, the Media Connector’s AUDIO IN volume can be used to increase or
decrease the volume level for all audio sources as desired.
NOTE ON REGISTRATION: The Topcat and Media Connector are pre-registered
together as a pair at the Lightspeed factory as required for proper operation.
If paired Topcat and Media Connector are separated and swapped during the
installation process, they must be re-registered. Please refer to the registration
instructions in the Troubleshooting section of the User Manual.