22
1. Overview 2. Installation
3. Optional
Installation
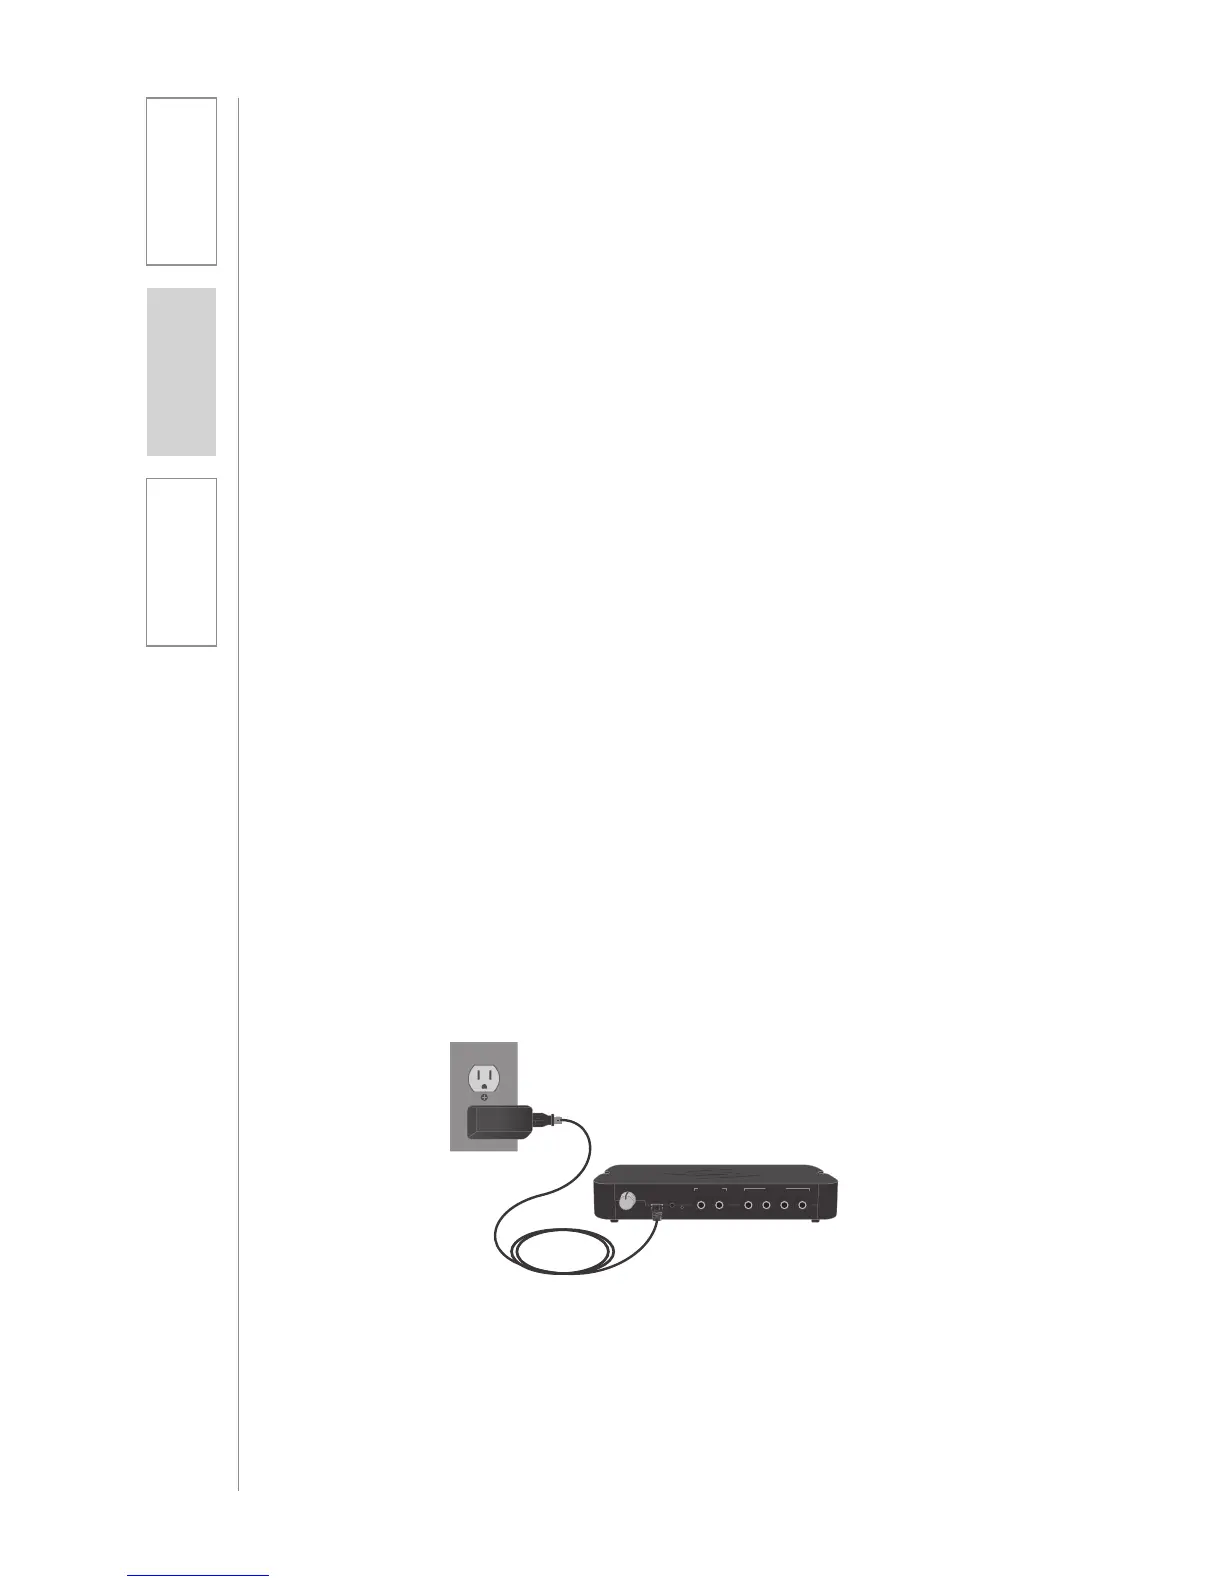
1. Locate the USB port on the Media Connector.
2. Connect the USB power cable into this port.
3. Plug the power adaptor into an electrical outlet or into a
computer USB port.
4. Press and hold the power-on button located on the front of
the Media Connector to power on and power off the unit.
6. CONNECTING THE POWER SUPPLY
B. WALL MOUNTING
• Find a location on the wall that is near the computer or other AV
equipment that will be connected to the Media Connector.
• Power for the Media Connector must be within 6 ft of this location.
1. Hold Media Connector up to the wall and ensure that it is
level. Mark the mounting holes with a pencil. The back of the
Media Connector that contains the inputs may be mounted in
any position that is desirable.
2. For sheetrock walls, use screw-in sheetrock anchors and
screws (not supplied) to secure the Media Connector to the
wall. It is best to drill a 1/4” pilot hole at the two mounting
locations before inserting the anchors.
3. Once the anchors are installed, place the Media Connector
over the mounting anchors and insert the provided screws
through the mounting holes and into the anchor.
4. If walls are concrete or cinder block, appropriate mounting
hardware should be purchased locally.
1 4
322
1
AUDIO INAUDIO OUT
REGISTER
USB POWER
5V/1.5A
TONE
TREBLE BASS