13
1. Overview 2. Installation
3. Optional
Installation
3b. SECURING THE TOPCAT (OUTSIDE U.S.
& CANADA)
To comply with Building Codes, the Topcat MUST be secured with 2 safety wires
and to the ceiling grid with four screws.
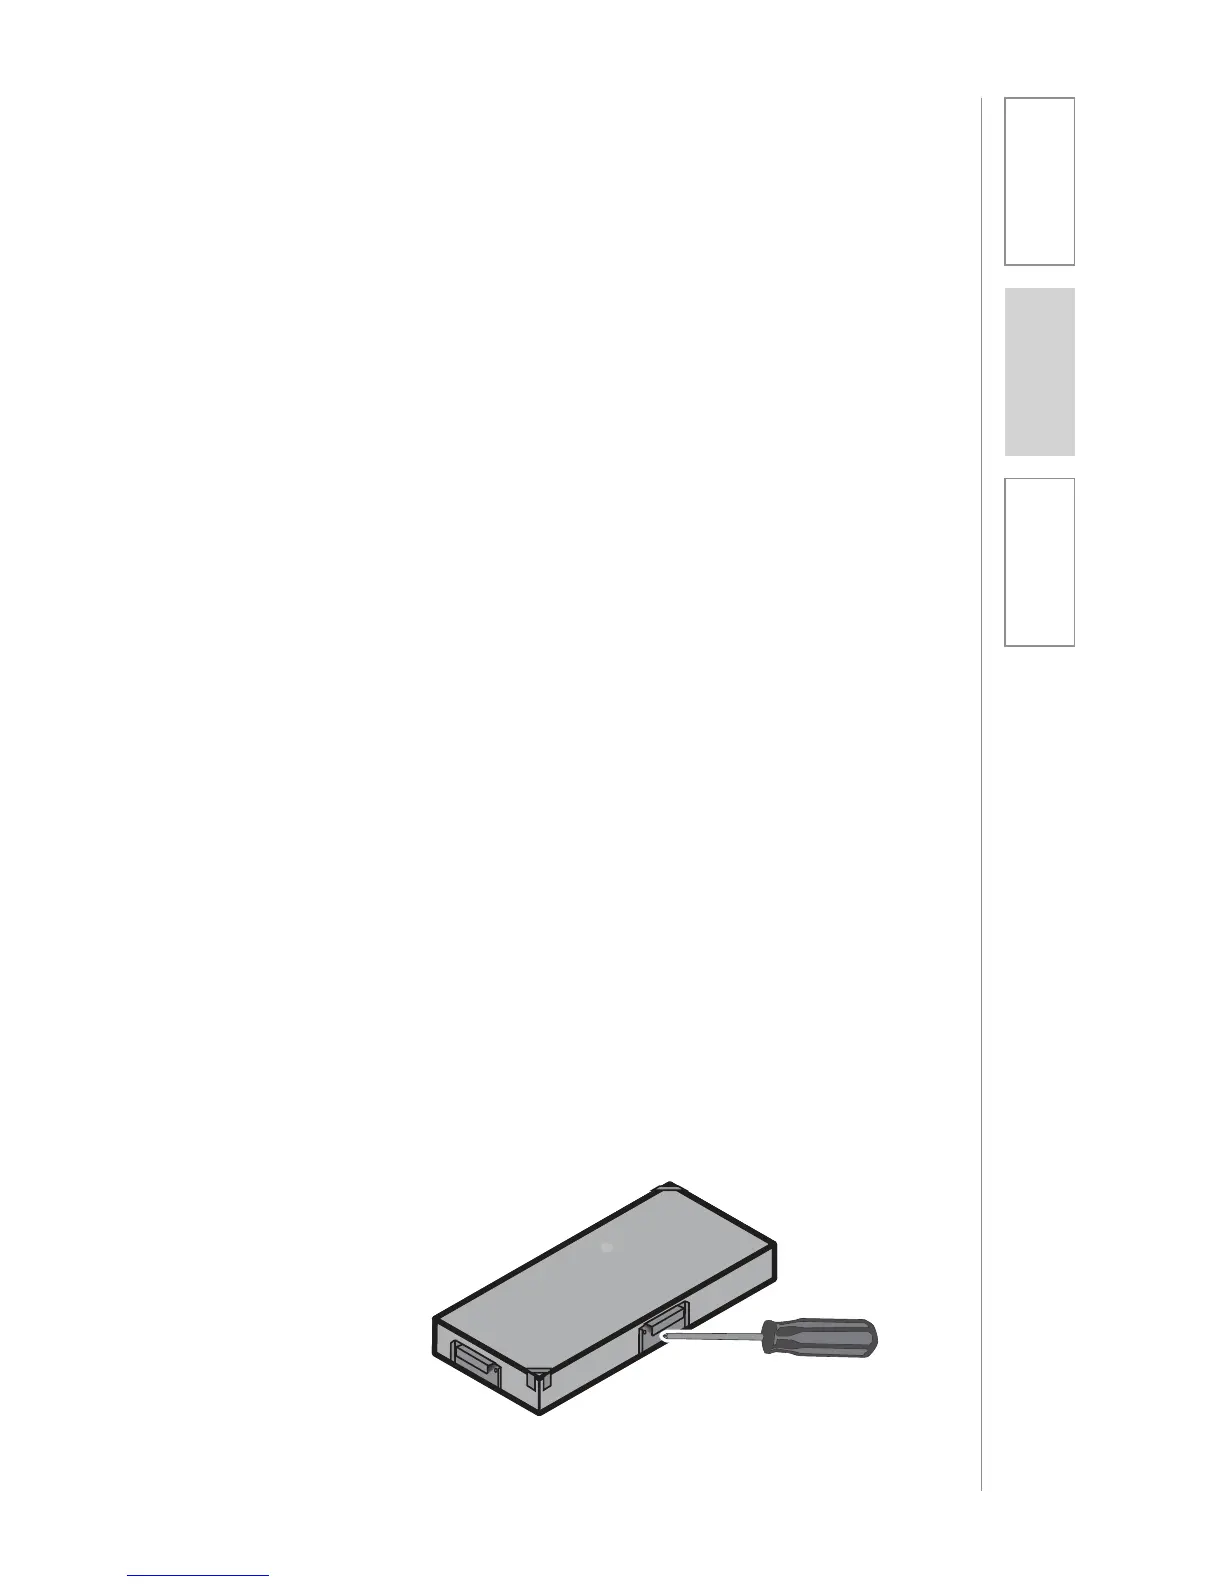
a. Remove the spacer brackets from each of the four sides of the Topcat (see
Figure 1 below).
b. Locate the 6m (20ft) length of safety wire. The safety wire needs to be
permanently attached to the solid building structure above.
c. Cut the 6m (20ft) safety wire in half, leaving two 3m (10ft) pieces.
d. Install anchors (or eye screws if necessary) into the building structure.
e. Loop one end of the safety wire through the anchor (or eye screw), then twist
it around itself at least five times (Figure 1). Repeat for second anchor. Repeat
for second eye screw.
f. Lift the Topcat up and lay it into the desired grid location (Figure 4).
CAUTION: make sure the Topcat is stable on the grid rails. If not stable there
could be a danger of it falling until safety wires are attached.
g. Loop the other end of the safety wire through one of the tab on the Topcat
(located in opposite corners). Pull the wire through until it is taut and twist it
around itself at least five times to secure the Topcat. Cut off any excess wire if
needed.
h. Repeat with securing the second safety wire to the other tab. (see figure 5).
i. Locate the four (4) self-drilling sheet metal screws.
j. Utilizing existing holes on the vertical section of the ceiling rail (center of the
hole to the base of the rail must be a minimum of 15mm - see figure 5), drill
two screws on each 2’ side of the Topcat (see figure 4). NOTE: Do not drill in
the area designated with yellow tape.
k. When hard wiring AC power to Topcat, electrical codes require for the Topcat
to be permanently affixed to the ceiling rail. Utilizing existing holes on the
vertical section of the ceiling rail (center of the hole to the base of the rail
must be a minimum of 15mm) drill two screw on each 2’ side of the Topcat.
NOTE: Drilling these screws into the designated areas of the Topcat chassis
will not cause harm to the product. (see figure 3, page 14)
l. Continue to step 4 in the manual, Installing and Wiring Electrical Power.
Figure 1:
Remove Bracket