4
Product Overview
Business Internet Video Camera with Audio
Chapter 3
Chapter 3:
Product Overview
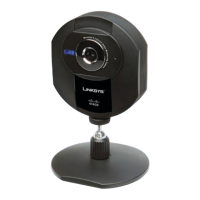
Front Panel
The LEDs and Camera lens are located on the front panel
of the Camera.
Front Panel
Lens The Camera includes a removable
CS-mount lens. For specifications on the
included lens, refer to the Specifications section
of this User Guide. For a list of recommended
lenses to use with this Camera, please refer to
the Quick Installation Guide.
Built-in microphone There is a built-in
microphone mounted on the front of the
Camera. The Camera also has a connection for
an external microphone on the rear. Connecting
an external microphone will disable the built-in
microphone.
Ready LED (Amber) The Ready LED has the
following states:
Off • Camera is powered off.
On • Camera is powered on.
Flashing • The Ready LED will flash during
start up. This will take 15 to 20 seconds.
Network LED (Green) The Network LED has
the following states:
Off • Network connection not detected.
On • Network connection detected.
Flashing • Sending/receiving data.
Back Panel
The ports and reset button are located on the back panel
of the Camera.
Back Panel - PVC2300
Back Panel - WVC2300
Antenna Connectors Antenna connectors
are only found on the WVC2300 Camera. The
connectors are used to attach the antennas to
the device for wireless connectivity.
Reset The reset button can be accessed with
a straightened paper clip or similar object. The
reset button has two functions:
Restore Factory Defaults • To restore the
factory default settings, press the Reset
button for more than 10 seconds. When you
let go of the button, the LEDs on the front
of the Camera will flash and then return to a
normal state when the Camera is ready.
Set Static IP Address • By default the
camera is set to receive an IP address from
a DHCP server. If you do not have a DHCP
server on your network, you can set a static
IP address by pressing the Reset button
on the camera for less than 10 seconds. A
default IP address of 192.168.1.99 will be
assigned to the camera.
 Loading...