16
Installing and Using the Viewer and Recorder Software
Business Internet Video Camera with Audio
Chapter 5
User (Name) • Enter a valid user name configured in the
Camera’s web-based utility (Administration > Users).
Password • Enter the password associated with the
user name that was defined in the web-based utility.
Stream Type • Select the desired video stream type
Enable Motion Detection • Select this option if you
wish to enable it.
Click 4. Add and the Camera will be added to the list of
cameras if it has been properly configured.
Repeat steps 1-3 to add additional Cameras.5.
Click 6. Exit to return to the Video Monitor screen.
Deleting a Camera
You can delete any of the sixteen cameras displayed from
the Setup screen by doing the following:
Select the camera you want to delete from the list in 1.
the box at the top of the screen.
Click the2. Delete button.
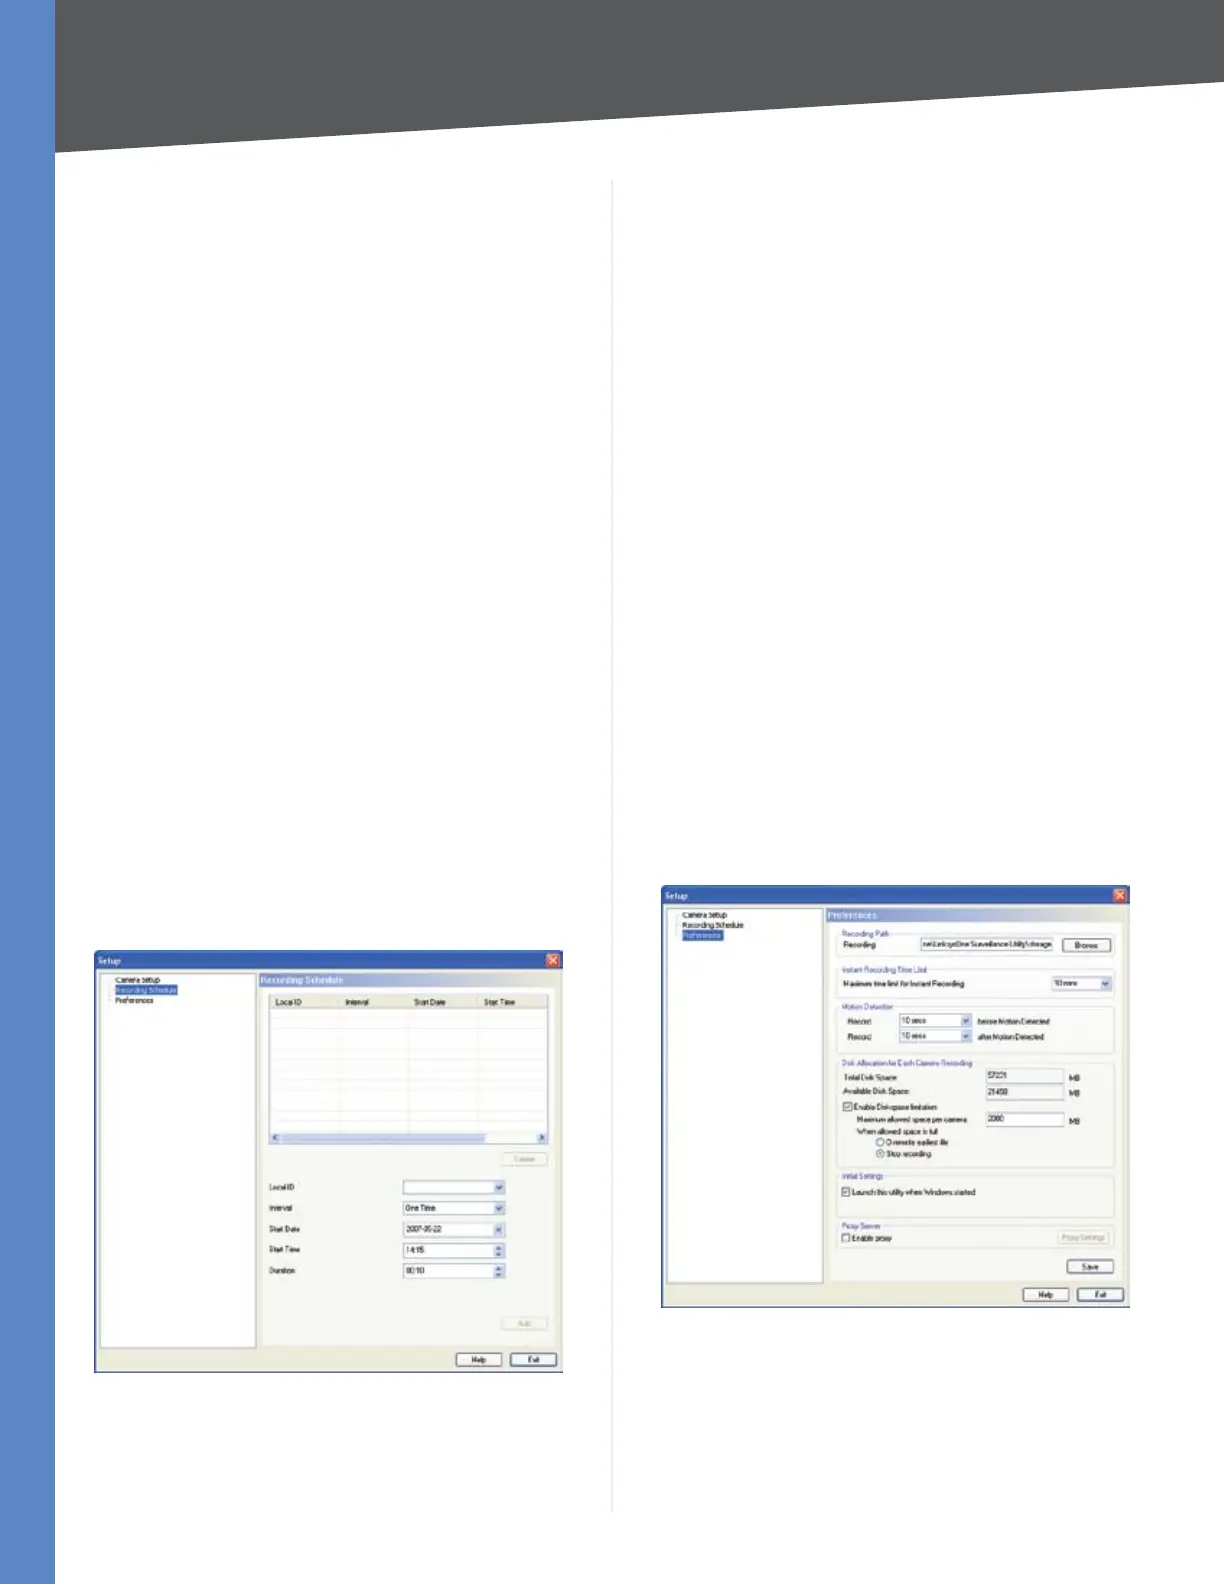
Recording Schedule
Schedule a Recording
You can record video while watching, or schedule
recordings to occur when you are absent. Recordings are
stored on the hard drive of the computer running the
Monitor application. Recordings can be played using the
Playback utility.
Monitor > Setup > Recording Schedule
To set the Recording Preferences:
Enter the recording schedule’s data into the drop-down 1.
fields on this screen:
Local ID • Select the Local ID of the Camera that you
want to schedule for recording.
Interval • Select when or how often you want this
recording to occur.
Start Date • From the calendar that appears when you
click the drop-down menu, select the date when this
schedule will begin.
Start Time • Enter the time when this schedule will
begin.
Duration • Enter the amount of time before this
schedule expires.
Click the line you wish to assign to the schedule in the 2.
box at the top of the screen.
Click the 3. Add button to schedule the recording.
Deleting a Schedule
You can delete any of the sixteen schedules displayed on
this screen by doing the following:
Select the camera you want to delete from the list in 1.
the box at the top of the screen.
Click the 2. Delete button.
Click the 3. Exit button to close the Setup screen.
Preferences
Monitor > Setup > Preferences
Refer to the following when changing preferences.
Recording Path
 Loading...