15
Installing and Using the Viewer and Recorder Software
Business Internet Video Camera with Audio
Chapter 5
Stop This terminates the connection
to the camera, halting viewing and
recording (if in progress). If stop is
pressed while recording, the first click
stops recording. The second click stops
video streaming.
Record Clicking this button begins
recording a video stream. While
recording, this button will be blue. To
stop recording, click the Stop button.
Snapshot Clicking this captures an
image from the current video.
Zoom Clicking this magnifies a section
of the window. Click the icon and then
click the portion of the screen you want
to magnify. Click the icon again to return
magnification to normal.
Flip Video Click this to have the image
swapped top-to-bottom.
Mirror Video Click this to have the
image swapped left-to-right.
Sound On/Off Toggles the sound on or
off.
Microphone Off Click this icon to turn
the microphone on.
Microphone On This icon will appear
when the microphone is on. The volume
slider below will appear. Click this icon
to turn the microphone off.
Volume When audio is available,
raising or lowering this bar will change
the volume.
Port 1 Off/On Allows you to manually
turn off or on the output for port 1.
Port 2 Off/On Allows you to manually
turn off or on the output for port 2.
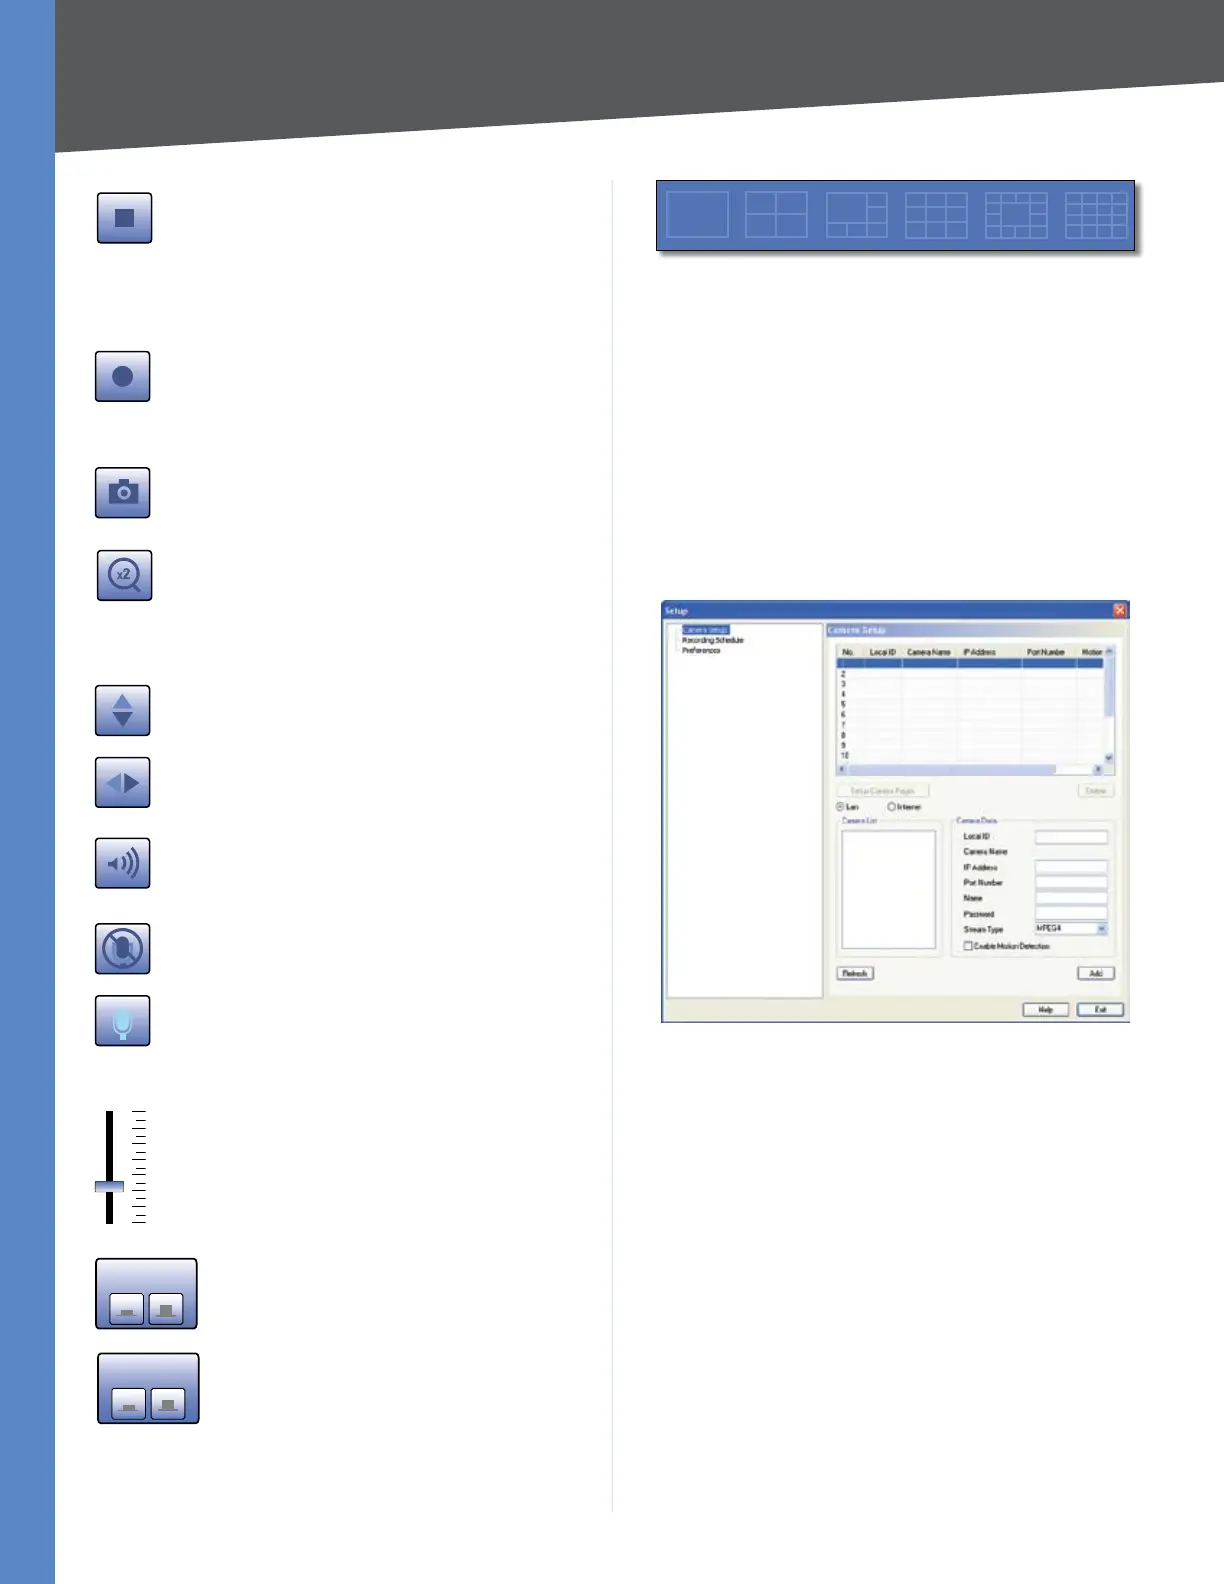
Screen Layout Select the number of Channels (Cameras)
to be displayed on screen.
Monitor > Screen Layout
Setting Up Cameras
The Camera’s setup functions are performed by clicking
the Setup button on the Video Monitor screen. This will
open the Setup screen.
Several setup options appear on the left-hand side of the
screen. They are Camera Setup, Recording Schedule, and
Preferences. Each of these options are described in the
following:
Camera Setup
Monitor > Setup > Camera Setup
Adding a Camera
To configure a camera for display on the main screen,
follow the directions below:
Select the appropriate Camera 1. No. to configure.
Click 2. LAN or Internet, depending upon how you are
accessing the Camera.
Enter the Camera’s data into the Camera Data fields:3.
Local ID • Enter a name for the camera (this name will
be the folder name for recorded video files).
IP Address • Enter the camera’s IP address here.
Port Number • Enter the port number assigned to this
camera. The port number is configured on the Setup >
Advanced Setup screen in the web-based utility.
 Loading...