Page 6 of 23 FA69350–2 English
Jun 2013
23
How To Create a Production Schedule
Linx 7900
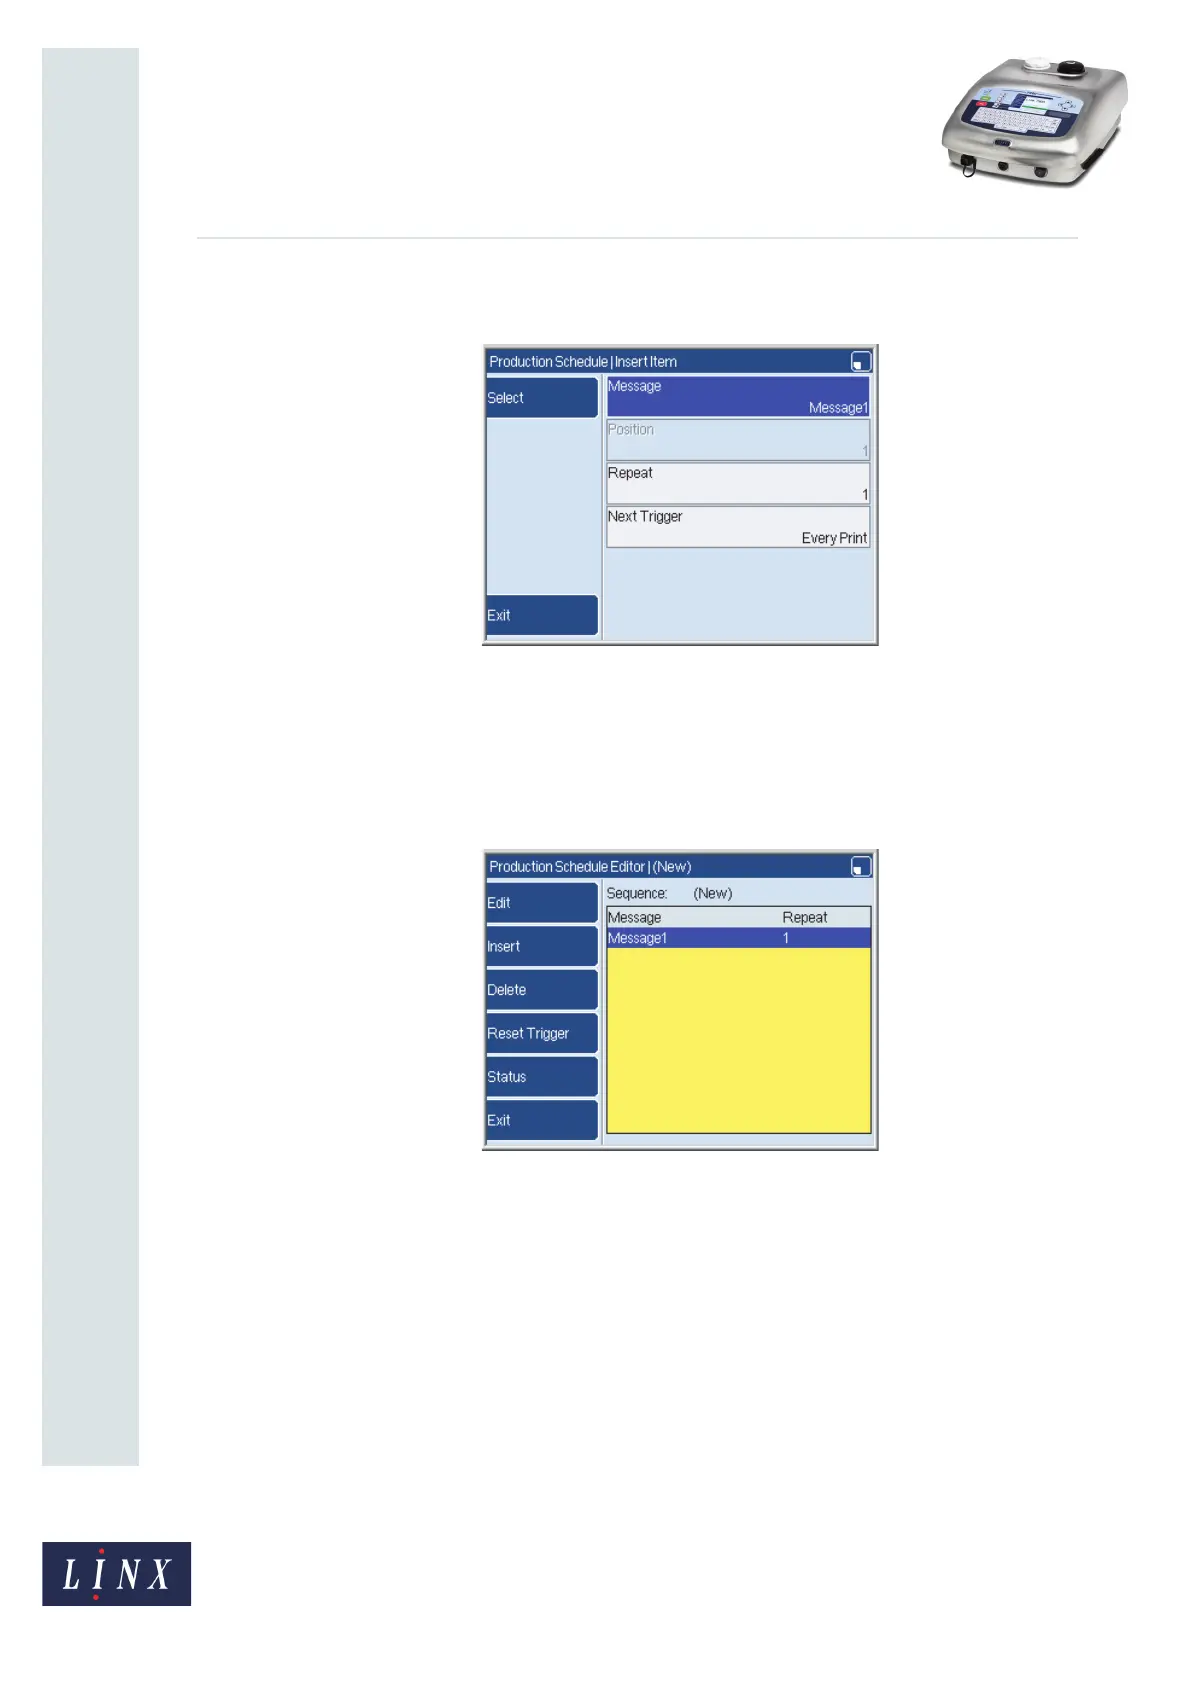
6 Highlight the required message then press the OK key to return to the Insert Item
page.
Figure 5. Insert Item page: first item
The Message option on the Insert Item page shows the name of the selected
message. The other options (Position, Repeat, and Next Trigger) are described in
‘Edit the production schedule’ on page 8.
7 Press the Exit key to return to the Production Schedule Editor page. This page
shows that the production schedule contains one message.
Figure 6. Production Schedule Editor page: first item
The options on this page are described in ‘Edit the production schedule’ on page 8.
8 Move the highlight downwards into the empty position.
69415
69416