Page 16 of 23 FA69350–2 English
Jun 2013
23
How To Create a Production Schedule
Linx 7900
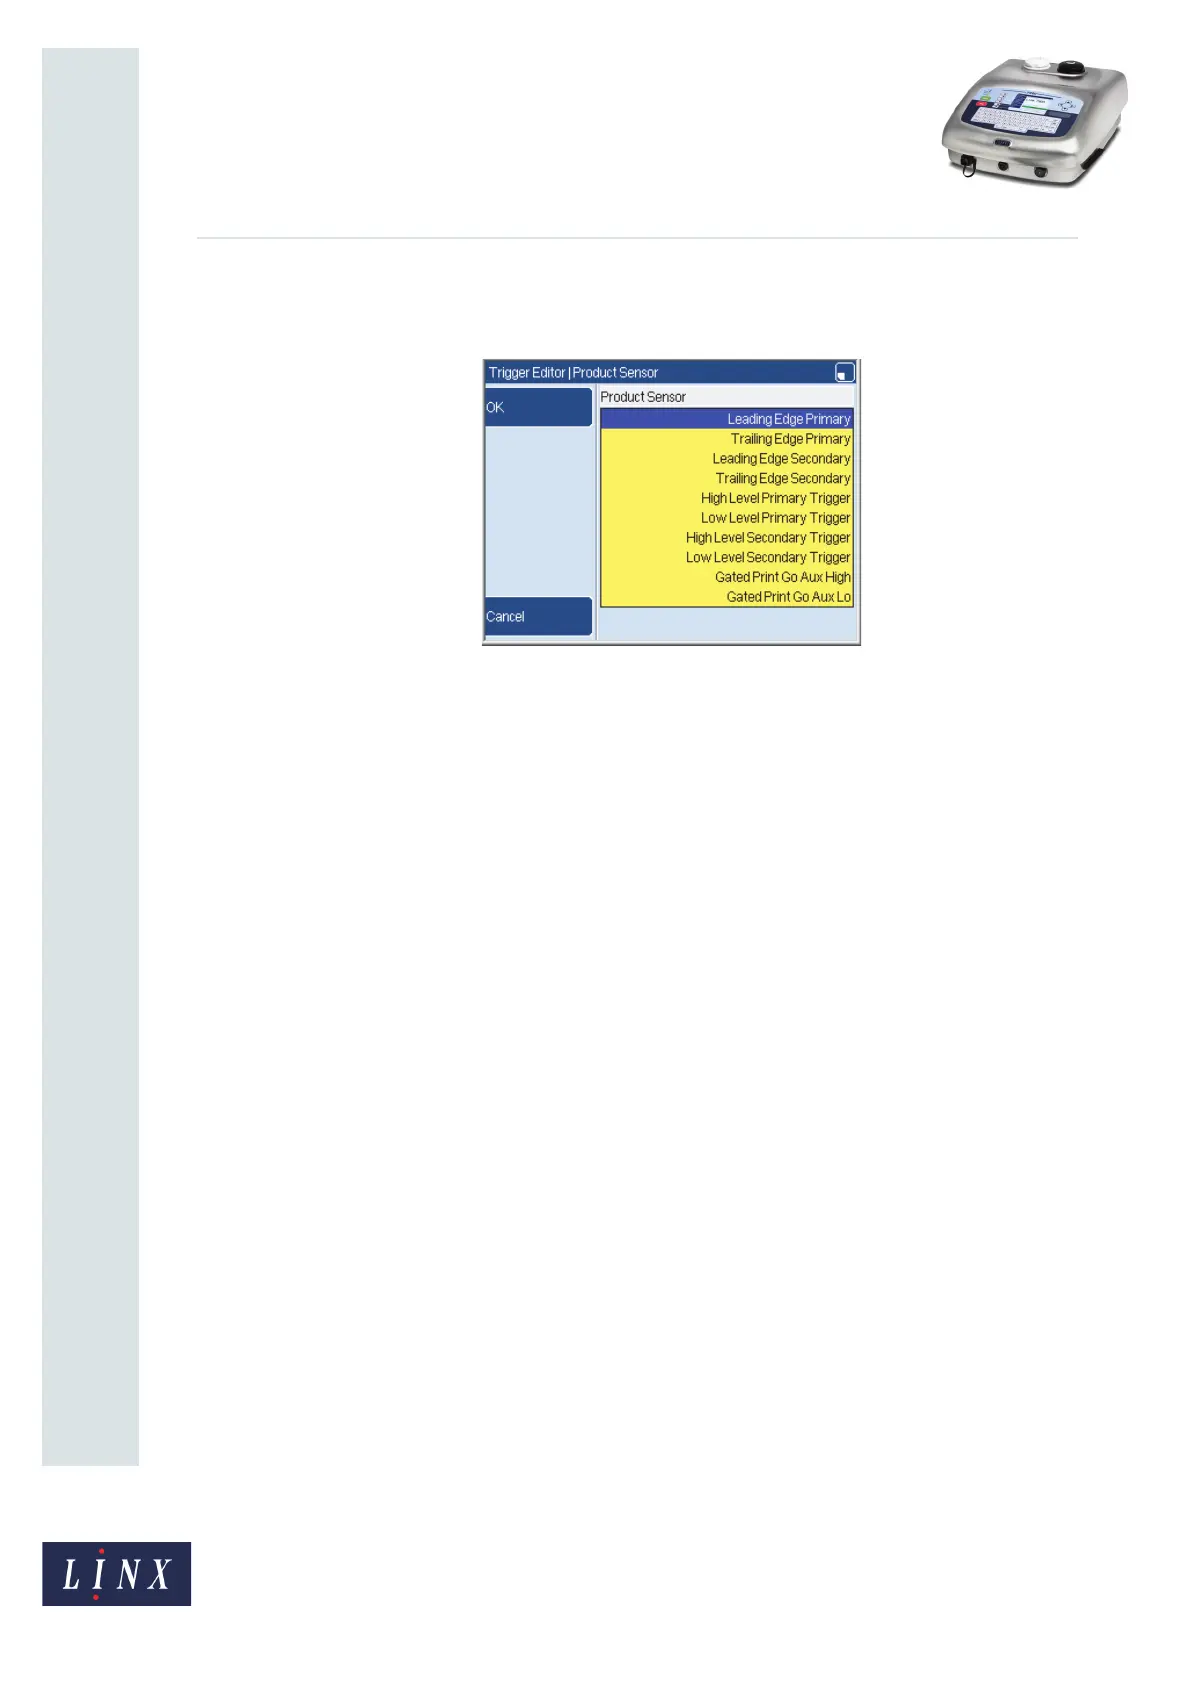
Product Sensor
Use the Product Sensor option to select the product sensor setup that you use.
Figure 19. Trigger Editor: Product Sensor page
Leading Edge Primary
The printer updates the production schedule counter when the primary product sensor
detects the leading edge of a product.
Trailing Edge Primary
The printer updates the production schedule counter when the primary product sensor
detects the trailing edge of the product.
Leading Edge Secondary
The printer updates the production schedule counter when the secondary product sensor
detects the leading edge of a product.
Trailing Edge Secondary
The printer updates the production schedule counter when the secondary product sensor
detects the trailing edge of the product.
High Level Primary Trigger or High Level Secondary Trigger
The printer continuously prints or updates the message while the product sensor detects
the presence of a product (the signal is active).
Low Level Primary Trigger or Low Level Secondary Trigger
The printer continuously prints or updates the message while the printer does not detect the
presence of a product (the signal is not active).
Gated Auxiliary Input Triggers
You can use an auxiliary input (the Secondary Trigger input) to control the operation of a
production schedule. The example in Figure 20 on page 17 shows the current state of the
production schedule counter: N, N+1, N+2... The ‘Print Go’ signal is the signal that starts
each print.