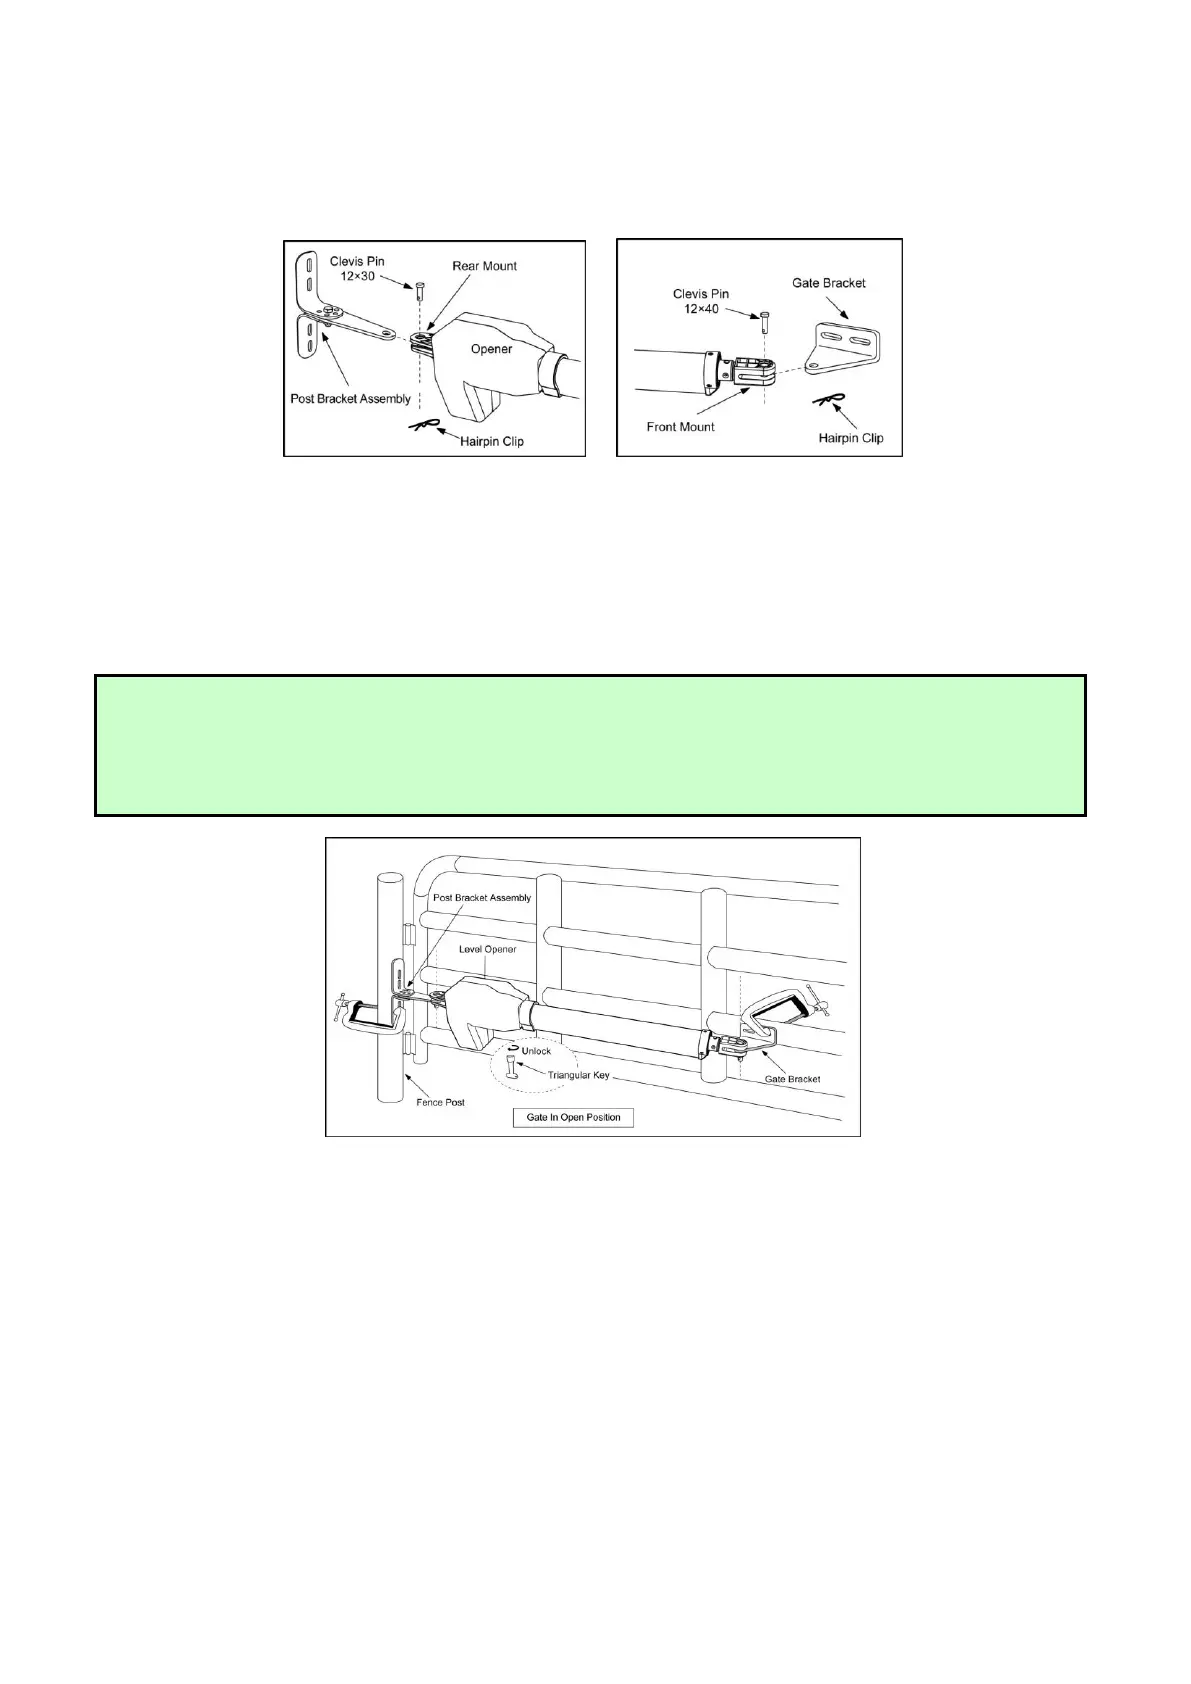
Step 2
Attach the gate bracket and post bracket assembly to the opener by inserting a clevis pin. Secure the
clevis pins using the hairpin clips.
Step 3
With the gate in their desired open positions (from 0° to 100° from the gate’s closed position) and with
the opener in their retracted positions, place the opener with the gate bracket and post bracket
assembly on the gate post and the gate. Position the gate bracket and the post bracket assembly so that
the gate opener is level with the horizontal cross member of the gate. While holding the opener in the
desired level position, temporarily secure it with two C-clamps.
Step 4
Determine the optimum position of the pivot bracket on the post bracket assembly by ensuring a
minimum 2.5cm (1 inch) distance exists between the gate and the gate opener in both the gate-open and
gate-closed positions. To ensure the minimum 2.5cm (1 inch) distance maintained in the gate-closed
position, remove the clevis pin from the gate bracket while holding the gate opener, then close the gate.
Move the gate opener so as the gate bracket and the opener are aligned.
NOTE: Ensure the gate opener and the pivot brackets do not bind in the gate –open and gate –closed
positions.
If you don’t have enough distance, or the gate opener is binding on the post pivot bracket, you may move
the post pivot bracket assembly slightly to the right or left to obtain the proper distance.
After you’ve identified the desired position of the pivot bracket, place the M8 x 30 bolt into the desired
pivot on the post bracket.
NOTE: There is an emergency release design. Use the triangular key to unlock the opener, you can
stretch the moving rod or retract it by using hand to pull or push the front mount assembly. Be sure that
the openers are both locked before you prepare to activate your openers. Other information
please refer to content in page 22.