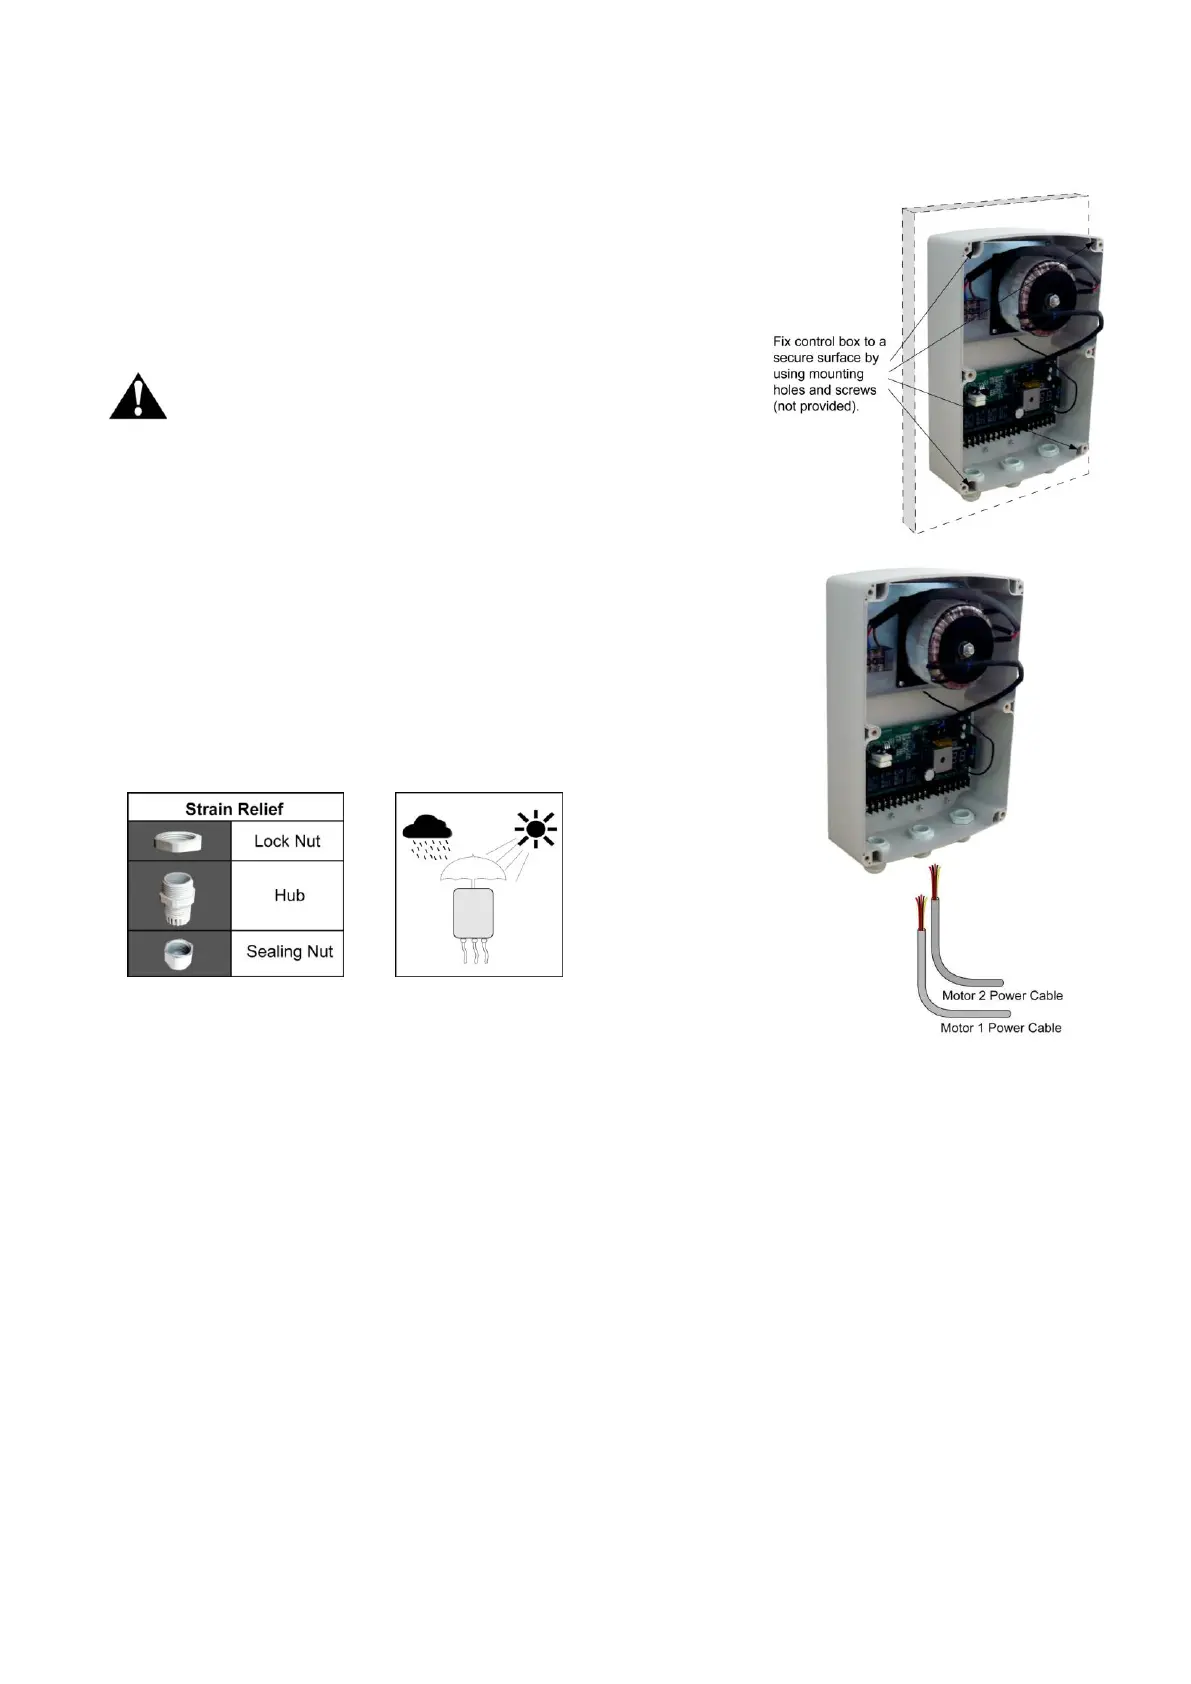
Mounting the Control Box
CAUTION: Install the Control Box in a well ventilated place protected against rain and sunlight.
NOTE: It is strongly suggested that the control box should be mounted in the side of opener 1(in the
right-hand side from a view inside the gate)so that the electric lock (optional accessory) can be properly
installed (See P9).
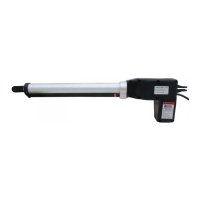
Step 3
Insert second gate opener cable and alarm lamp cables into the control box through middle strain relief
house. Then repeat step 2.
Step 4
Insert other cables into the control box through rightmost strain relief housing. Then repeat step 2.
Step 1
To install the control box use the deck screws (not provided).
Ensure the control box is installed in a secure surface and at least
100 cm (40 inches) above the ground to protect it from rain, snow,
etc. which probably cause damage to the control box.
Warning: Before connecting the AC power cable to the
control box, check the plug of power cable is disconnected from AC
power socket.
Step 2
Insert the power cable and cable of the first gate opener through the
front strain relief and into the control box by loosening the strain relief
screw located the leftmost of outside bottom of the control box and
feeding the cables into the control box. Check the length of cable is
longer enough to their respective terminal block in control box.
Retighten the sealing nut so that cables are well locked.