Step 1
Place the post pivot bracket between the two
post brackets. Insert the M10x30 bolt through the
center hole of the post bracket and post pivot
bracket as shown. Place a ¢10 washer , ¢10
lock washer and M10 nut on the bottom of the
bolt and hand tighten.
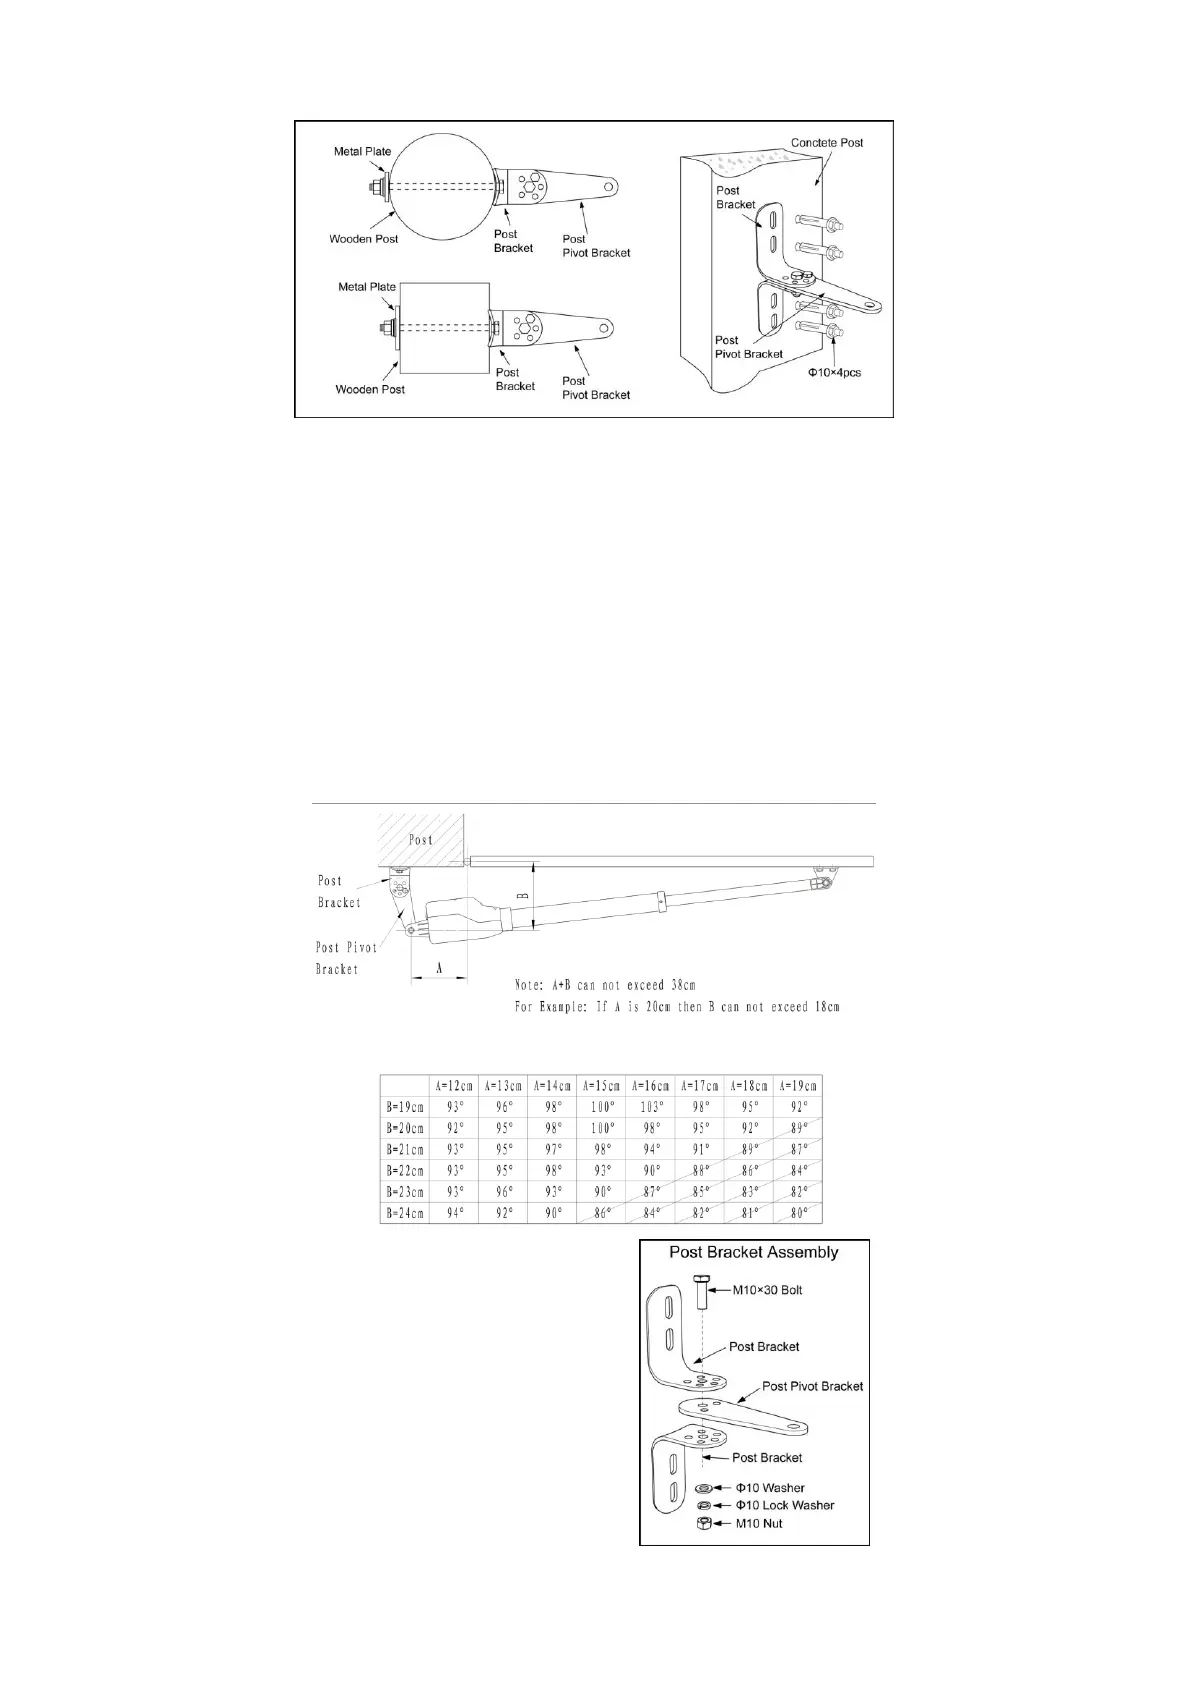
Both round and square post can be used because of the curved design of the post brackets. When mounting the
post brackets, use bolts long enough to pass through the entire post. When mounting the post brackets to wooden
posts, a larger-size washer or metal plate should be used between the bolts and the wood post to ensure the
stability of the fastening hardware when thrust is used.
If the gate post is smaller than 15 cm (6”) diameter or square, they should be made of metal and set in cement to
ensure the stability of the post.
Determining the Position of Mounting Hardware
NOTE: The following steps are intended for Pull-to-Open gate installation only.
You will find a series of sizes from following chart to determine the proper mounting position