15
* All images are for indication only; please refer to your individual unit for actual item.
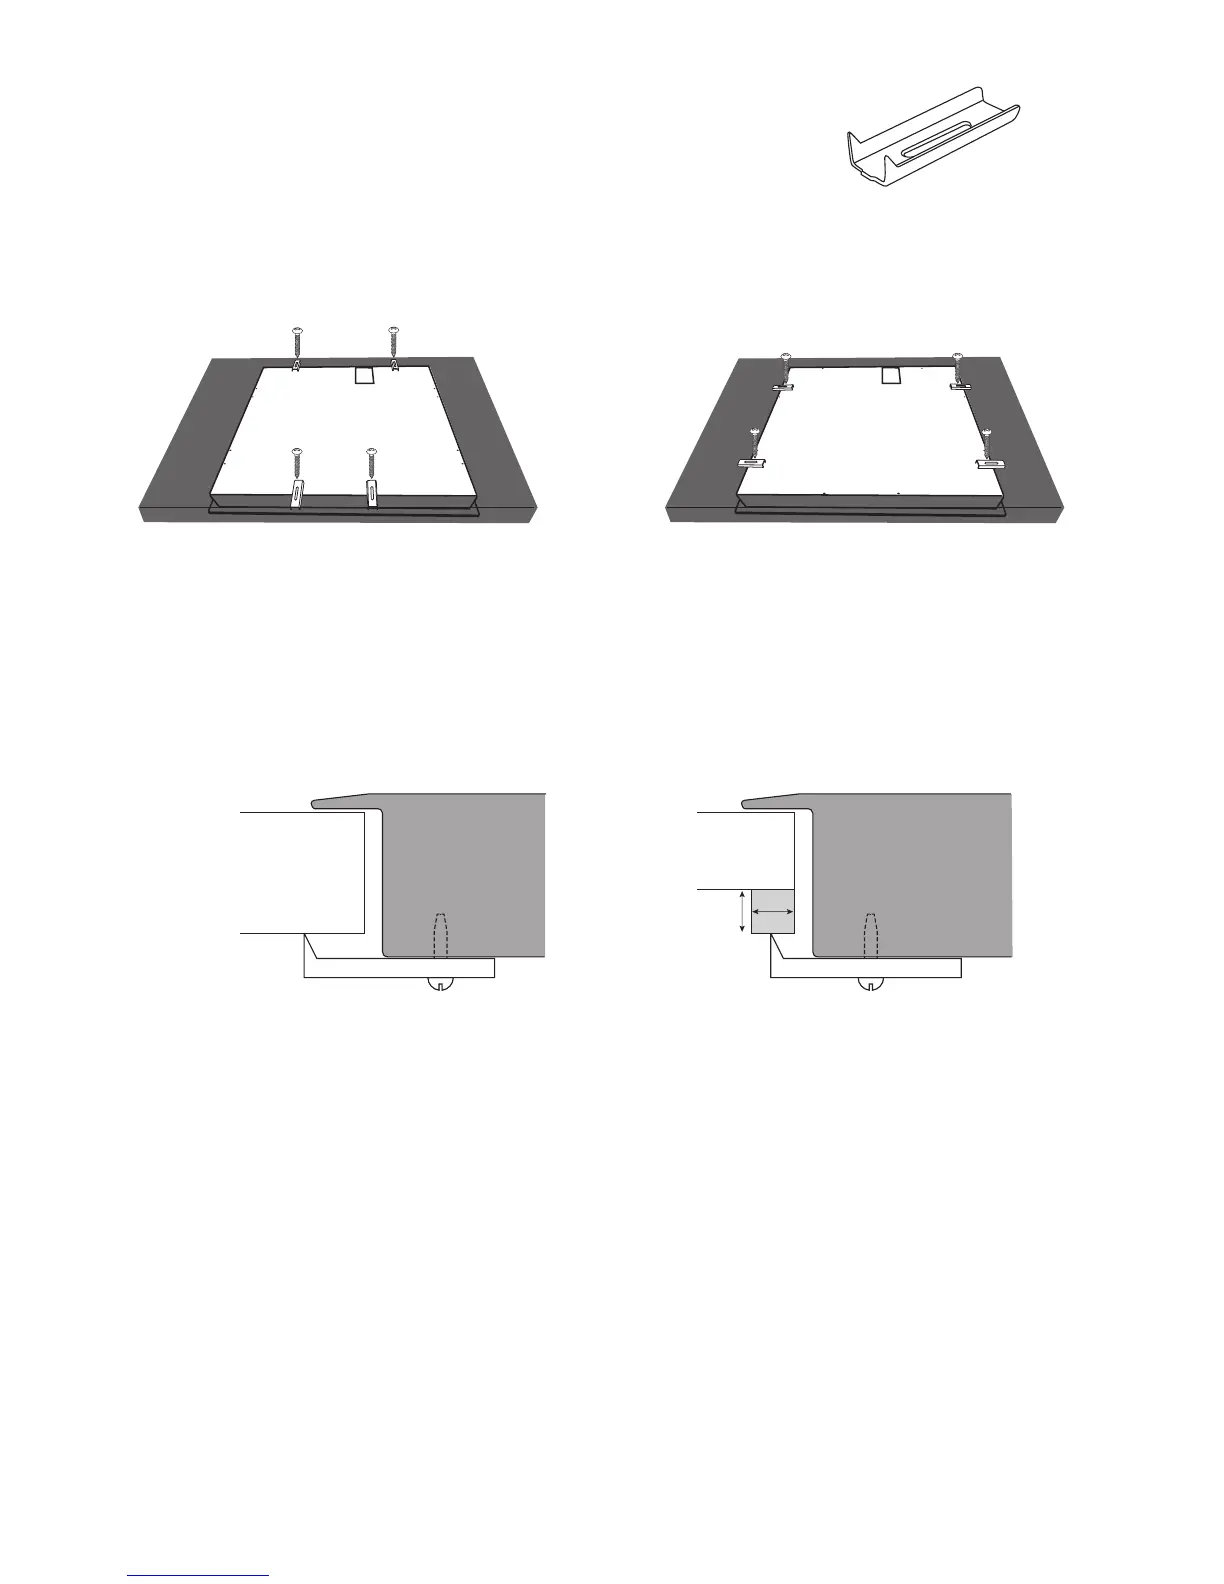
Attaching the xing brackets
1. Slide the hob into the hole in the work surface. Then from underneath loosely
attach the 4 fixing brackets to the underside of the hob using the 4 screws
provided. Do not tighten at this stage.
Option 1 : Attach the clips at the front
and back of the hob.
38mm work surfaces 28mm work surfaces
Front of hob Front of hob
Option 2 : Attach the clips at the side of
the hob.
15mm
15mm
2. You can use either of the two options above to secure your hob, it just depends on the space you have
available. Make sure you attach the clips the right way around, the spike end must grip the work surface.
3. Once you are happy with the position of the hob tighten all the fixing screws.
4. If your work surface is 28mm think you will need to add a 15mm batton to the work surface to be able to
attach the fixing brackets.