21
5 Preparing to Install the Pump
5.1 Warnings for Handling Helical Rotor Pumps
WARNING (helical rotor models)
DO NOT APPLY MACHINE GREASE
TO THE PUMP. Ordinary machine
grease will damage the stator
(NBR rubber) and void the warranty. Helical rotor
pumps are lubricated at the factory with a clear,
non-toxic grease. Its only purpose is temporary,
to allow the pump to be run dry for a short time
to test the direction of rotation. There is no
normal reason to reapply lubricant but if you do,
use silicon fluid or non-toxic silicone grease
approved for water valves and seals.
WARNING FOR SIPHON APPLICA-
TIONS If a pump system has a
vertical lift LESS THAN 33 ft (10 m)
up from the surface of the water
source, and then the water flows downhill to a
lower point, a siphon effect may cause suction
on the pump. This will cause an upward thrust on
the motor shaft, resulting in damage to the
motor. Prevent this by installing an air vent or a
vacuum breaker at the high point on the pipe.
CAUTION (helical rotor models)
BEFORE INSTALLATION, KEEP THE
PUMP OUT OF THE SUN. If the
pump gets hot, the rubber stator
will expand and may lock the rotor. No damage
will result from this, but you may be unable to
test the direction of rotation. If the pump gets
hot, allow it to cool in water for 20 minutes
before testing.
Pumps should not be stored in
water for a period longer then
three month. Too long storage
time might seize the pump up.
Pumps will not be damaged, but might have to
be pulled to free them again. Therefore it is
strongly advised that every two to three months
the pumps should run for a few minutes.
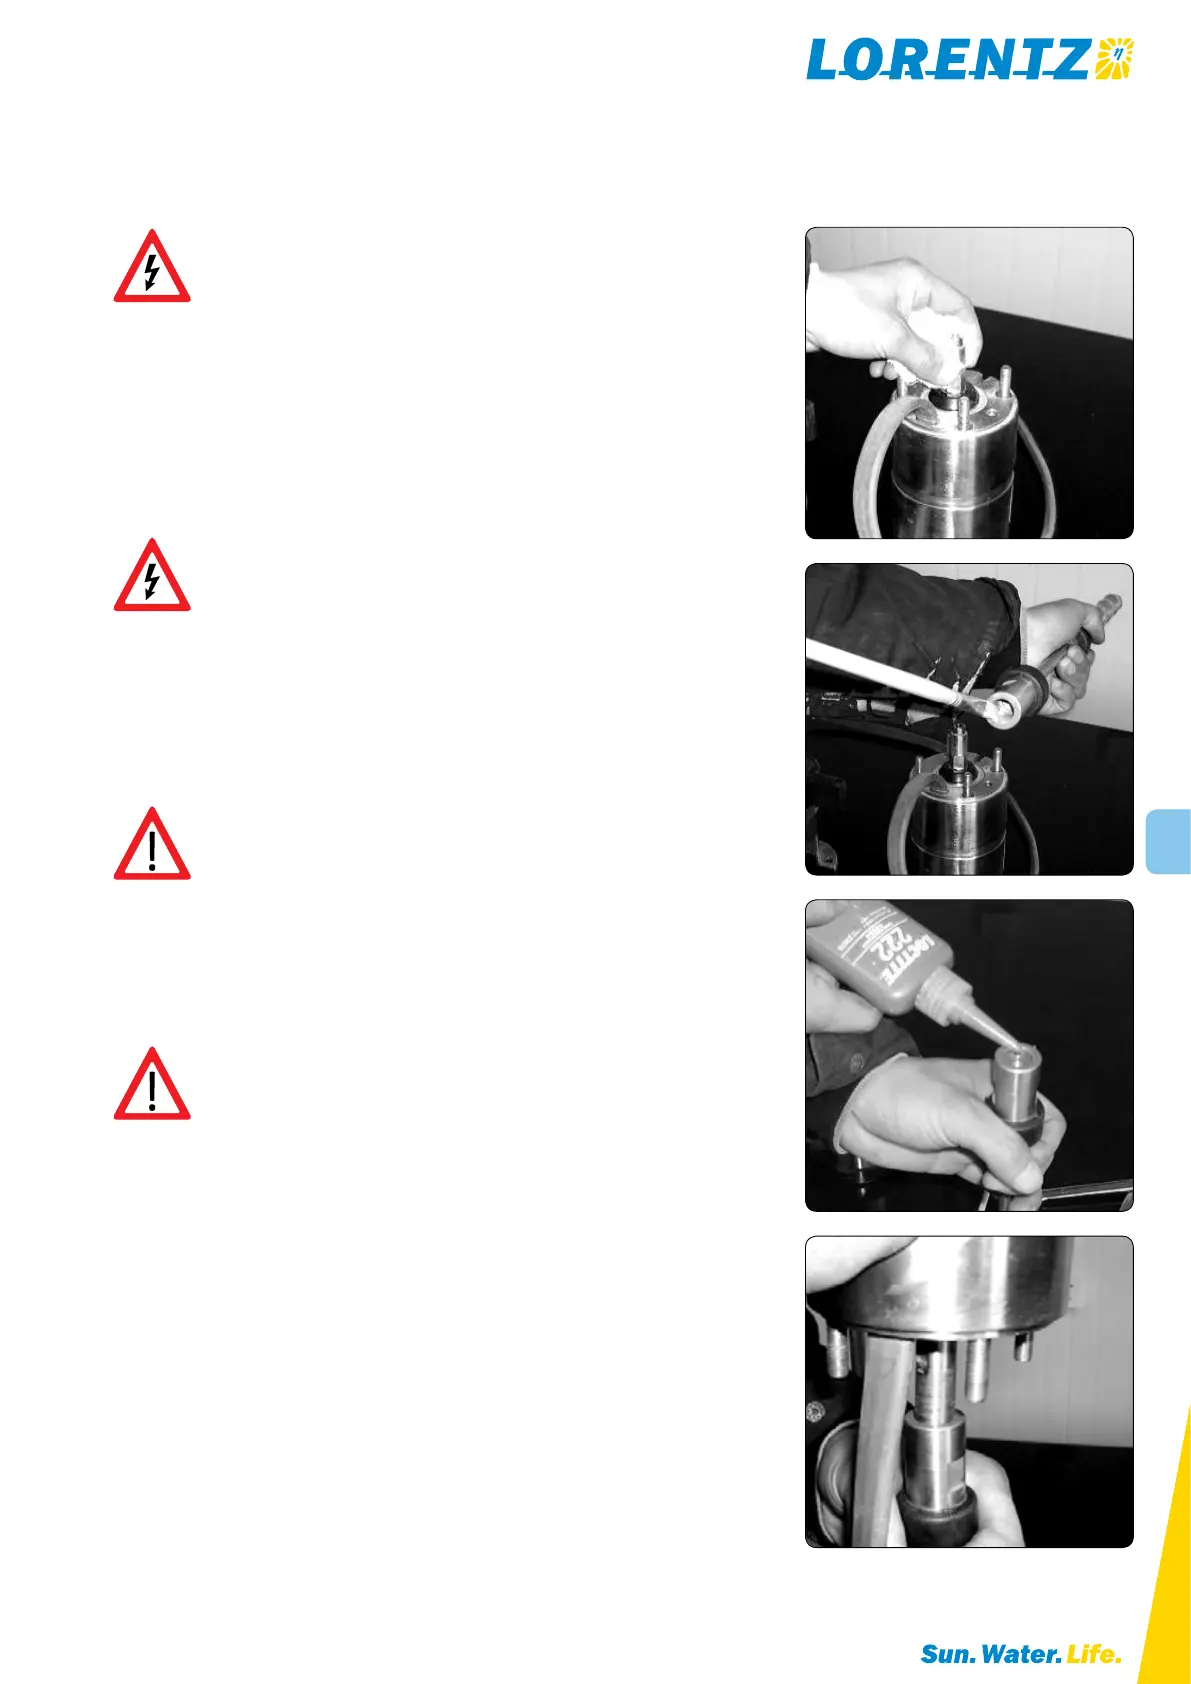
5.2 Assembling the Rotor on the Motor Shaft
What you need:
glue Loctite 222
acetone or alcohol, 50 ml
wrenches 13 mm, 22 mm,
1m steel pipe to extend 22mm wrench.
a piece of cloth or a towel
(1) Unthread 8 M8 nuts to take the pump housing out
(2) Settle motor horizontally, use wrench 13 mm to
fix motor shaft, 22 mm wrench with 1 m extension
pipe fixed on pump rotor shaft. Push down the ex-
tension pipe anticlockwise from motor flange view,
with ~50 Nm torque, rotor shaft will be unthreaded
from motor shaft. NO TORCH
(3) Clean motor screw shaft and inner thread of rotor
M16 with a cloth dipped in acetone or alcohol.
(4) Drop approx. 1 ml Loctite 222 glue into thread
chamber M16 of rotor, then thread rotor shaft on
to motor shaft.
(5) Take a 13 mm wrench to fix motor shaft, 22 mm
wrench to fix rotor shaft, fasten them by hands as
hard you can. 50 Nm are needed to fix pump rotor
with motor shaft. Clean the glue that got squeezed
out.
(6) Clean motor flange and four bolts, make pump
housing assembly and settle it on motor flange, drip
a drop of Loctite 222 glue on each bolt. One 8 mm
spring washer and two pieces of M8 nuts are used
to fix pump end on each bolt. 12 Nm are needed to
fix nuts. Clean the glue that got squeezed out.
(7) An hour later the glue will be have dried and be
sufficiently adhesive. Then the pump can be used or
put down to well.
Figure 19: Assembling the Rotor on the Motor
Shaft