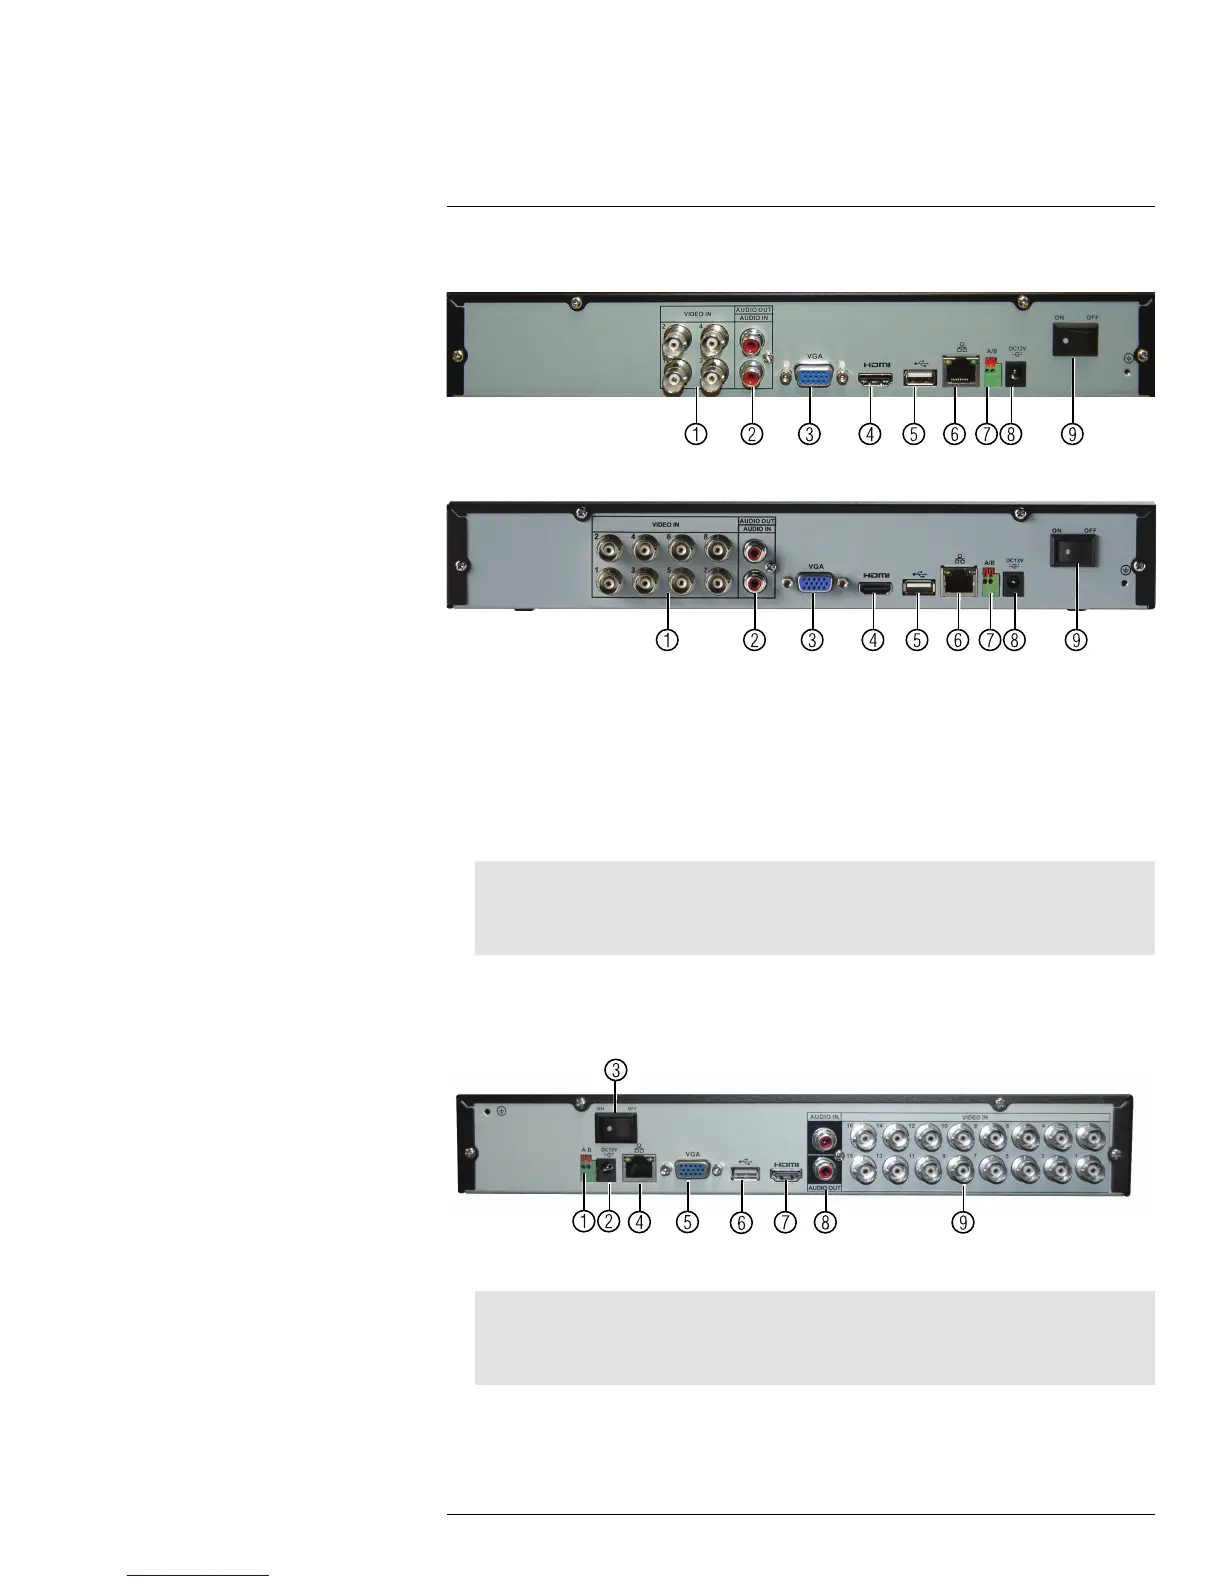
Rear Panel (LHV1000 Series)
5
4–Channel
8–Channel
1. Video input: Connect Lorex 720p wired HD cameras.
2. Audio IN/Audio OUT: Service only; not supported.
3. VGA: Connect a VGA monitor (not included) to view the system interface.
4. HDMI: Connect to an HDMI monitor or TV (not included) to view the system interface.
5. USB port(s): Connect a USB mouse (included) or USB flash drive (not included) for
data backup or firmware updates.
6. LAN: Connect a CAT 5 RJ45 Ethernet cable for local and remote connectivity.
7. A/B: Connect RS485 cables.
Note
PTZ cameras must be Lorex 720p wired HD cameras to work with the system. Lorex 720p wired
PTZ cameras can accept PTZ commands directly through the video cable. For more details, see
17.3 Controlling PTZ Cameras, page 78.
8. DC12V: Connect the included AC power adapter.
9. On / Off switch: Turns the DVR on or off.
16–Channel
1. A/B: Connect RS485 cables.
Note
PTZ cameras must be Lorex 720p wired HD cameras to work with the system. Lorex 720p wired
PTZ cameras can accept PTZ commands directly through the video cable. For more details, see
17.3 Controlling PTZ Cameras, page 78.
2. DC12V: Connect the included AC power adapter.
3. On / Off switch: Turns the DVR on or off.
#LX400014; r. 2.0/15899/15899; en-US
7

 Loading...


