11
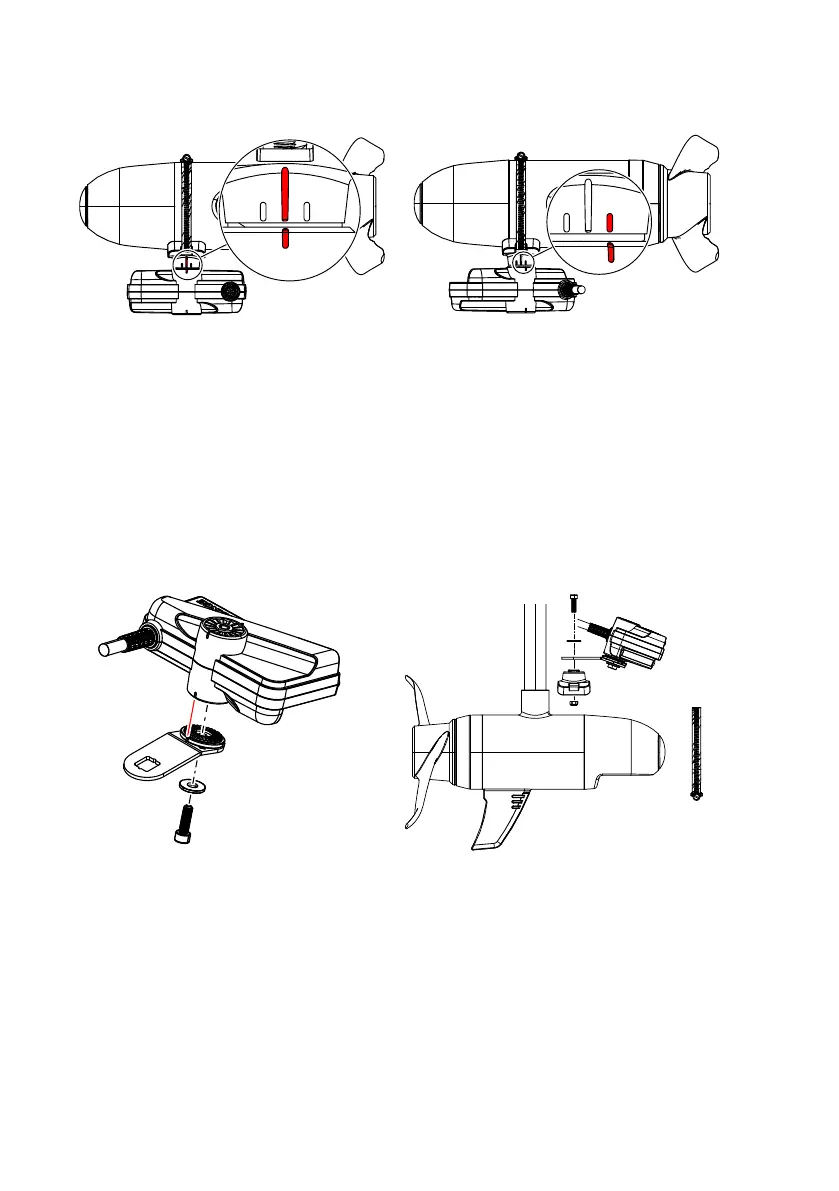
Once attached to the motor, orient the transducer to the down or forward view by rmly
gripping and rotating the transducer until the alignment marks match.
Down Forward
Scout view
Use a M6 cap screw and metal washer to attach a motor mount scout bracket arm (the
shallow water bracket is ideal for depths less than 3 m (10 ft)) to the transducer. Align the
lines on the arm with the lines on the transducer. Use the nut and remaining screw and
washer to attach the scout mounting bracket to the other end of the bracket arm.
¼ Note: If you have a pre-assembled scout motor mount clamp, you can easily swap out
the standard bracket arm for the shallow water bracket arm.
Unscrew the hose clamp, wrap it around the motor and through the scout mounting
bracket slots. Align the scout mounting bracket with the centerline of the trolling motor.
Re-screw the hose clamp to secure entire assembly to the motor. Tighten just enough to
prevent the transducer from moving during normal use.
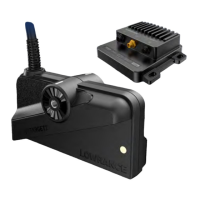
Transom mounting
If you don’t have a trolling motor on your vessel, you can install a single ActiveTarget 2 on
the transom. A transom bracket is sold as a separate accessory and allows a transducer
to be oriented in down or forward view. For mounting instructions, see the ActiveTarget
Transom Bracket Installation Guide that comes with the accessory.