10|Page
Step 6: Once the system has been plumbed in, gently remove the
quartz sleeve from its packaging being careful not to touch the length
with your hands. The use of coon gloves is recommended for this
procedure as oils from the hands can leave residue on the sleeve and
lamp which can ulmately block the UV light from geng to the wa-
ter.
Carefully slide the sleeve into the reactor unl you can feel it hit the
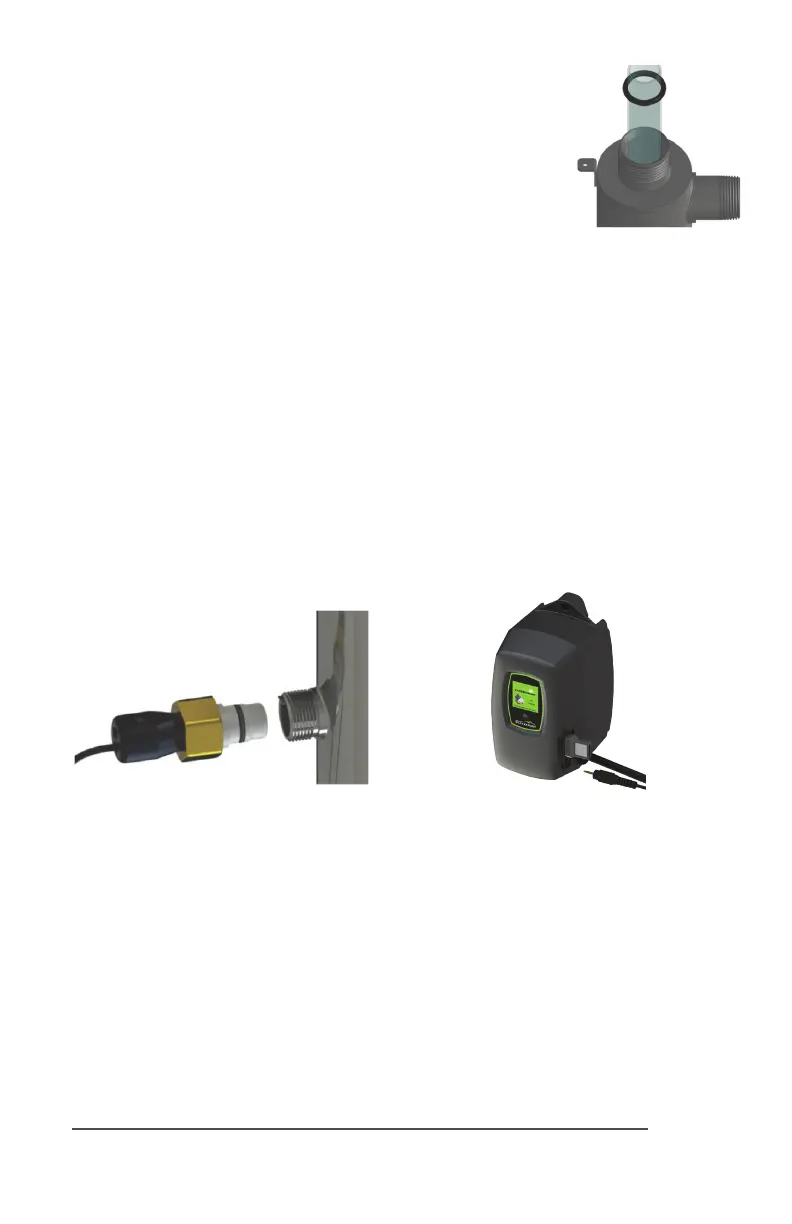
opposite end of the reactor. Align the sleeve so it centered along the
length of the reactor, then gently push it in to lock it into the inter-
nal centering springs in the far side of the reactor. CAUTION: Pushing
too hard when the sleeve is not aligned can damage the centering
springs. Slide the o-ring onto the sleeve unl it is bued up against
the reactor.
Figure 4. Quartz
Sleeve Installaon
Step 7: Hand ghten the provided gland nut over the quartz sleeve onto the threaded end
of the reactor. It has a posive stop to prevent over-ghtening. A rm force may be required to
fully ghten the gland nut, but DO NOT USE TOOLS for this step. Insert the provided stainless
steel compression spring into the quartz sleeve. The spring works with the lamp and LUMI-Loc™
connector to create the proper lamp alignment. PLEASE NOTE: DO NOT install a UV lamp inside
the quartz sleeve without the sleeve spring in place.
Step 8: Install the UV sensor (BLACKCOMB
6.1
systems only). Align the at poron so it faces
the gland nut end and matches up with the half metal lip on the sensor port (see Figure 5). Insert
the sensor so it is fully seated and hand ghten the sensor nut.
Figure 5. UV Sensor Installaon Figure 6. IEP Connecon
Step 9: The reactor is now ready for water ow. When all plumbing connecons have been
completed, slowly turn on the water supply and check for leaks. Make sure the by-pass valves are
funconing properly and that the water is owing through the reactor. The most common leak
is from the o-ring not making a proper seal on the reactor. For new installaons, review steps 6
and 7. For older systems drain the reactor, remove the o-ring, dry it and reapply silicon grease.
Reinstall the o-ring ensuring that it is properly sealed against the reactor and check again for
leaks.
Step 10: Mount the controller to the wall so it is above or beside the reactor to ensure that no
moisture can deposit on any of the connecons (see Figure 1). Always mount the controller ver-
cally. For monitored systems, insert the sensor connector into the IEP port located on the right
side of the controller (Figure 6). For the sensor to be recognized by the controller, the controller
power must be plugged in last. Do not plug the controller power cord in before the last step.
 Loading...