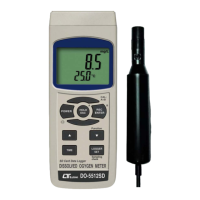
1)Prepare the Oxygen Probe ( optional, DOPB-11 ),
install the " Probe Plug " ( 6-1, Fig. 4 ) into the
" DO Socket " ( 3-13, Fig. 1 ).
2)Power on the meter by pressing " Power Button "
( 3-2, Fig. 1 ) once.
Select the measurement mode to " Dissolved Oxygen
measurement ". refer chapter 4, page 11.
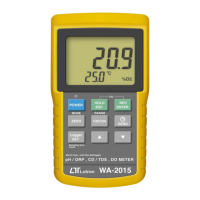
The Display will show " mg/L " and " Temp. " indicator.
Calibration at first !
Press the " Function Button " ( 3-6, Fig. 1 ) once,
the Display will show the " % O2 " indicator.
Wait approx. 2 minute until the reading value
reach stable, if the reading value not within
20.7 to 21.1 ( 20.9 ±0.2 ), then should be
processed the calibration procedures first.
The calibration procedures, please refer
chapter 7-2, page 28.
After execute the calibration procedures, the
display should show the value near 20.9
( 20.8 to 21.0 ).
3)Press the " Function Button " ( 3-6, Fig. 7 ) once,
the right low display will show the " mg/L " unit,
the meter is ready for the Dissolved Oxygen
measurement.
4)a.Immersed the probe to a depth at least 10 cm of
the measured liquid in order for the probe to be
influenced by the temperature & automatic
temperature compensation to take place.
26