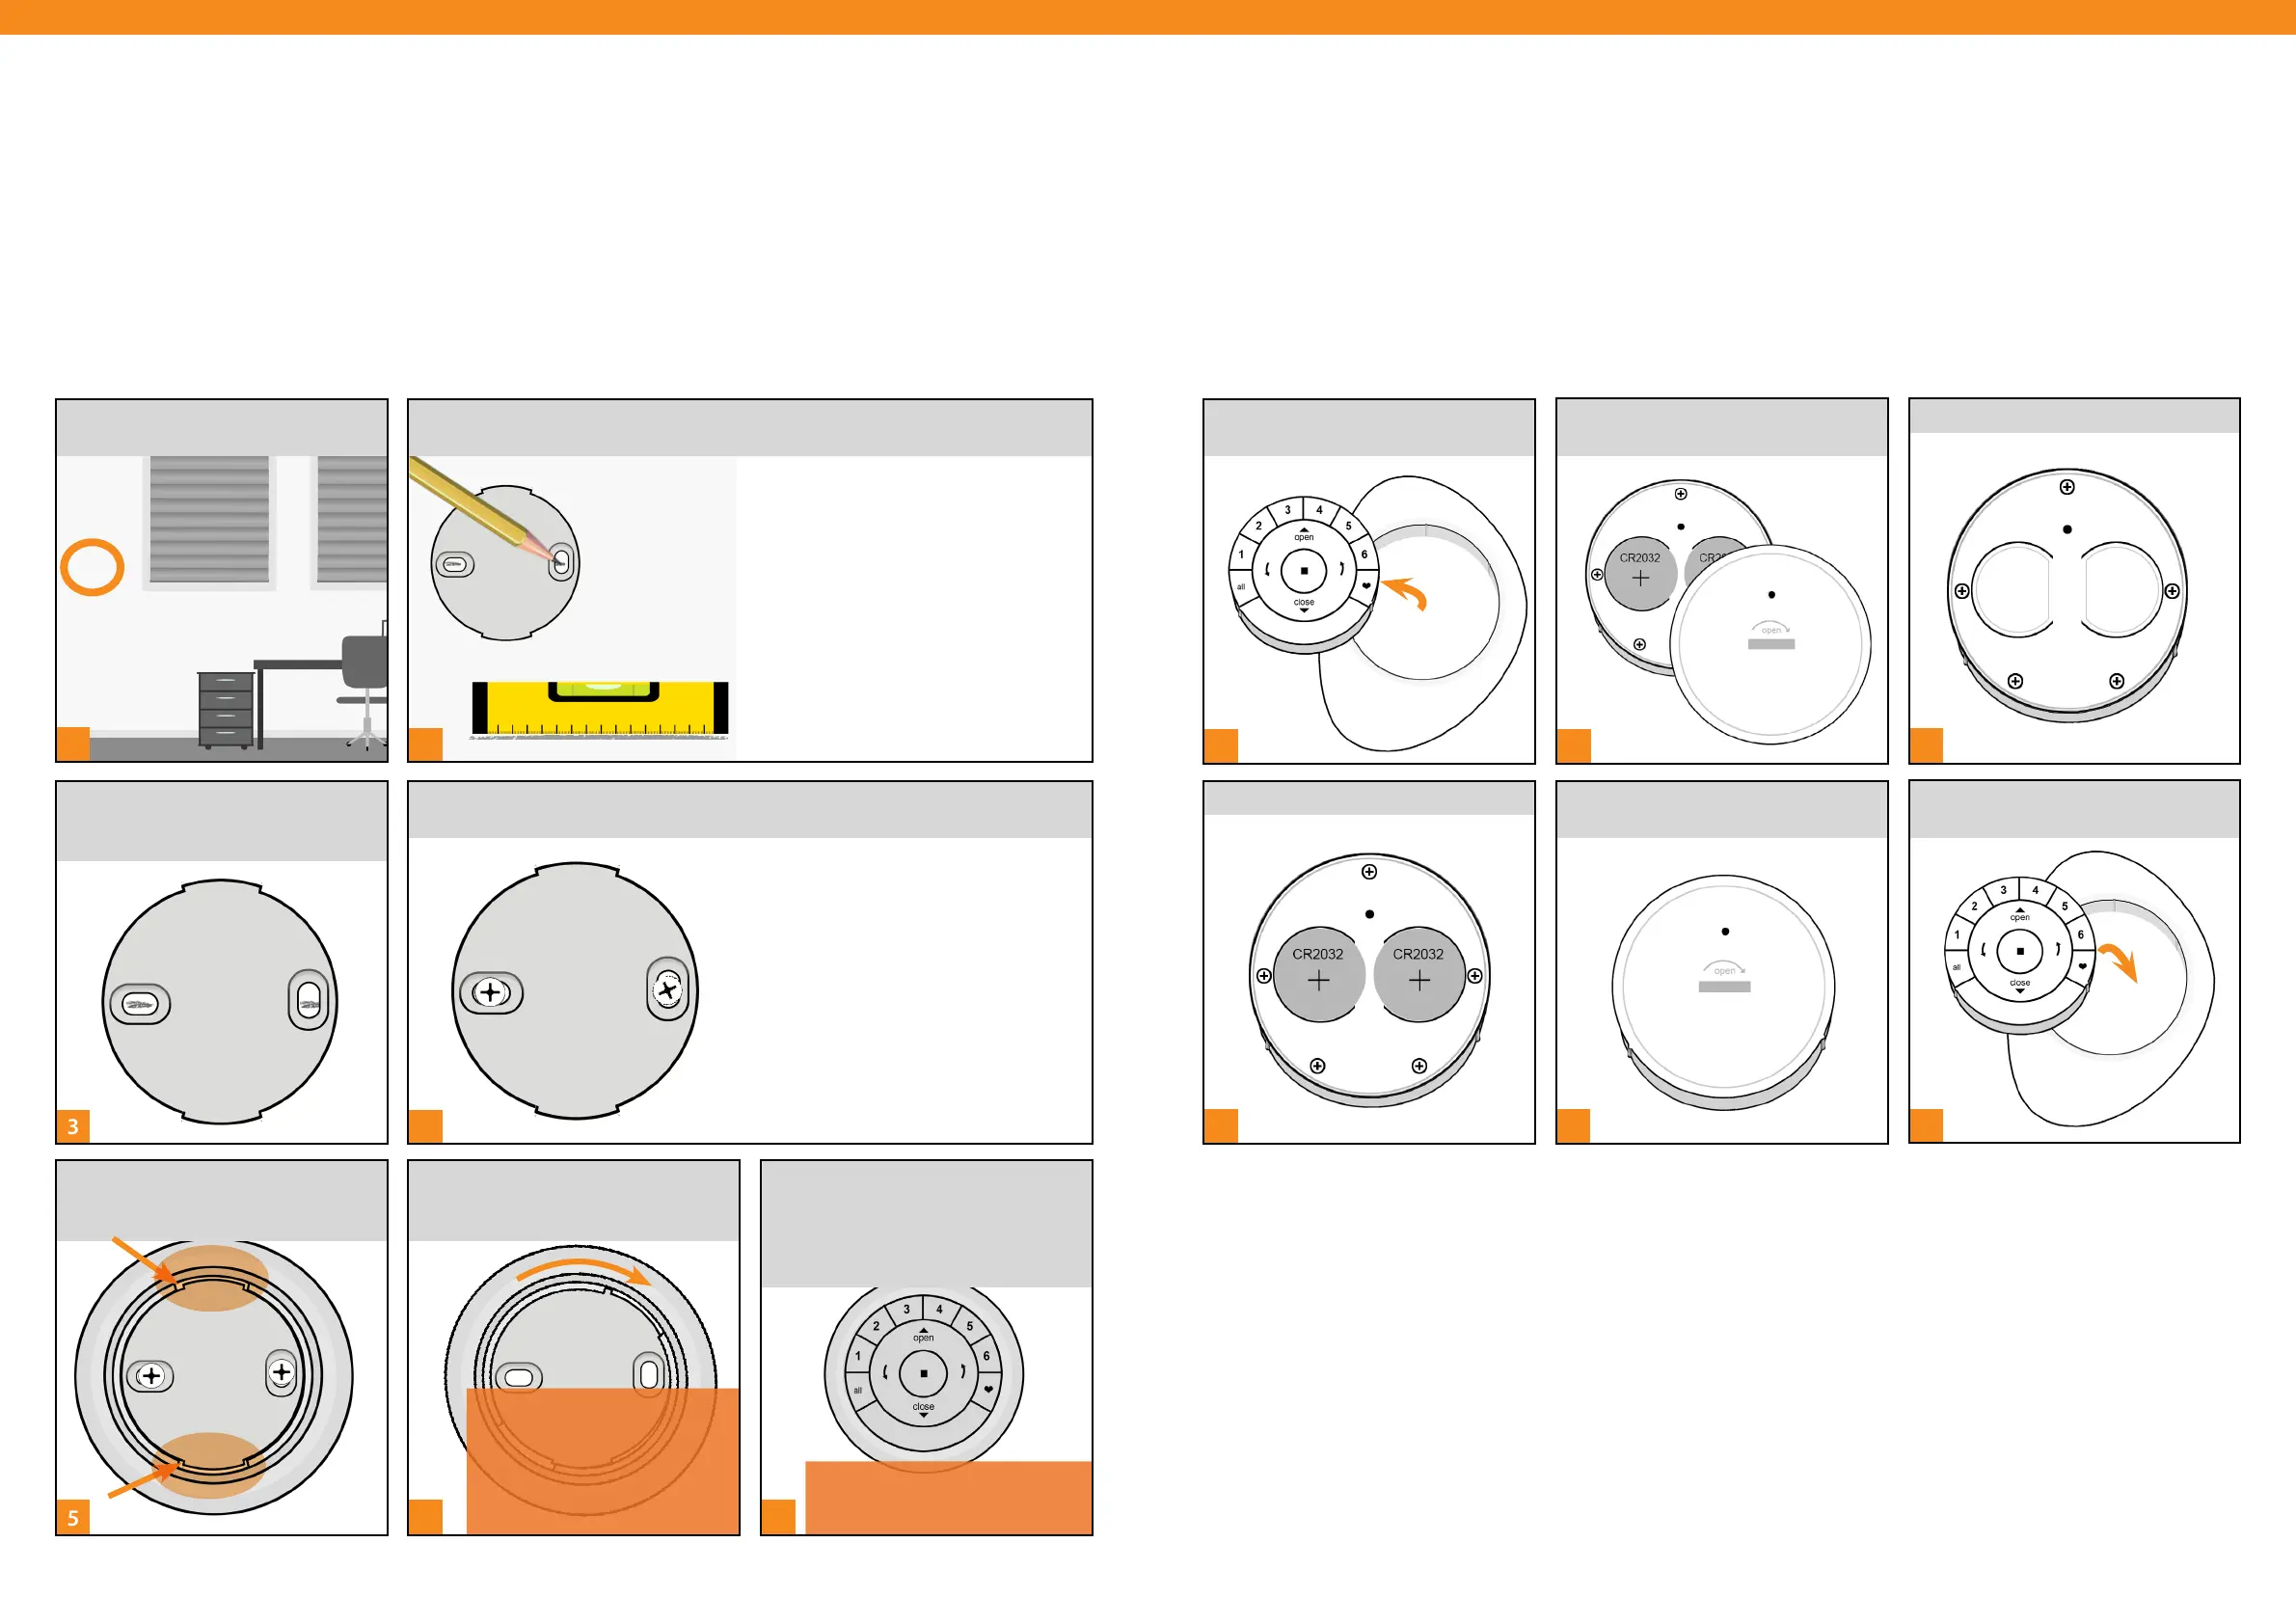
NOTE: If the texture of mounting
surface is uneven, insert the foam
spacers into the corresponding
grooves on the back side of the
Surface ring before inserting the
ring onto the mounting plate.
NOTE: The Luxaflex® logo on the
Surface remote should appear
right side up and be horizontal.
Option A.
Use the screw holes on the Surface
mounting plate to mark the location.
The Luxaflex® logo should appear right
side up and be horizontal.
Option B.
To ensure a straight and level
appearance, use a small, standard
bubble level with a ruled edge. Mark a
straight horizontal line approximately
45mm in length on the mounting
surface.
Option A.
If you are mounting the Surface onto
drywall, use a 5,5 mm bit to drill pilot
holes. Tap drywall anchors into the
pilot holes until the flange of the
anchor is flush with the drywall.
Option B.
If you are mounting the Surface onto
wood, use a 2,5 mm drill bit to drill the
screw holes.
REMOVE back cover from Remote
Module.
2
1
6
5
7
[ 24 ] [ 25 ]
INSERT the Surface ring around
mounting plate, ROTATING to the
right to securely lock into place.
Mounting the PowerView® Surface
3
1
PLACE the Surface mounting plate
on the mounting surface, lining up
the screw holes on the mark.
SELECT a location to mount the
PowerView® Surface.
2
With a pencil, LIGHTLY MARK the location for the PowerView® Surface on the
mounting surface
4
ATTACH the Surface mounting plate to the mounting surface using the screws
provided.
LINE UP the cut-outs on the
Surface ring with the notches on the
mounting plate.
Gently INSERT the Surface remote
into the Surface ring until it is snug,
LINING up the raised notches of the
Surface remote with the indentations
in the Surface ring.
x
Gently REMOVE Remote Module
from PowerView® Pebble®.
Battery Replacement
Replacing batteries in the PowerView® Pebble® Remote will not cause the loss of any shade programming,
including Groups and Favorites. The PowerView® Pebble Remote uses two CR 2032 batteries.
3
Remove old batteries.
5
REPLACE back cover of Remote
Module.
6
Gently REINSERT the Remote
Module into PowerView® Pebble.
4
INSERT new batteries.
 Loading...