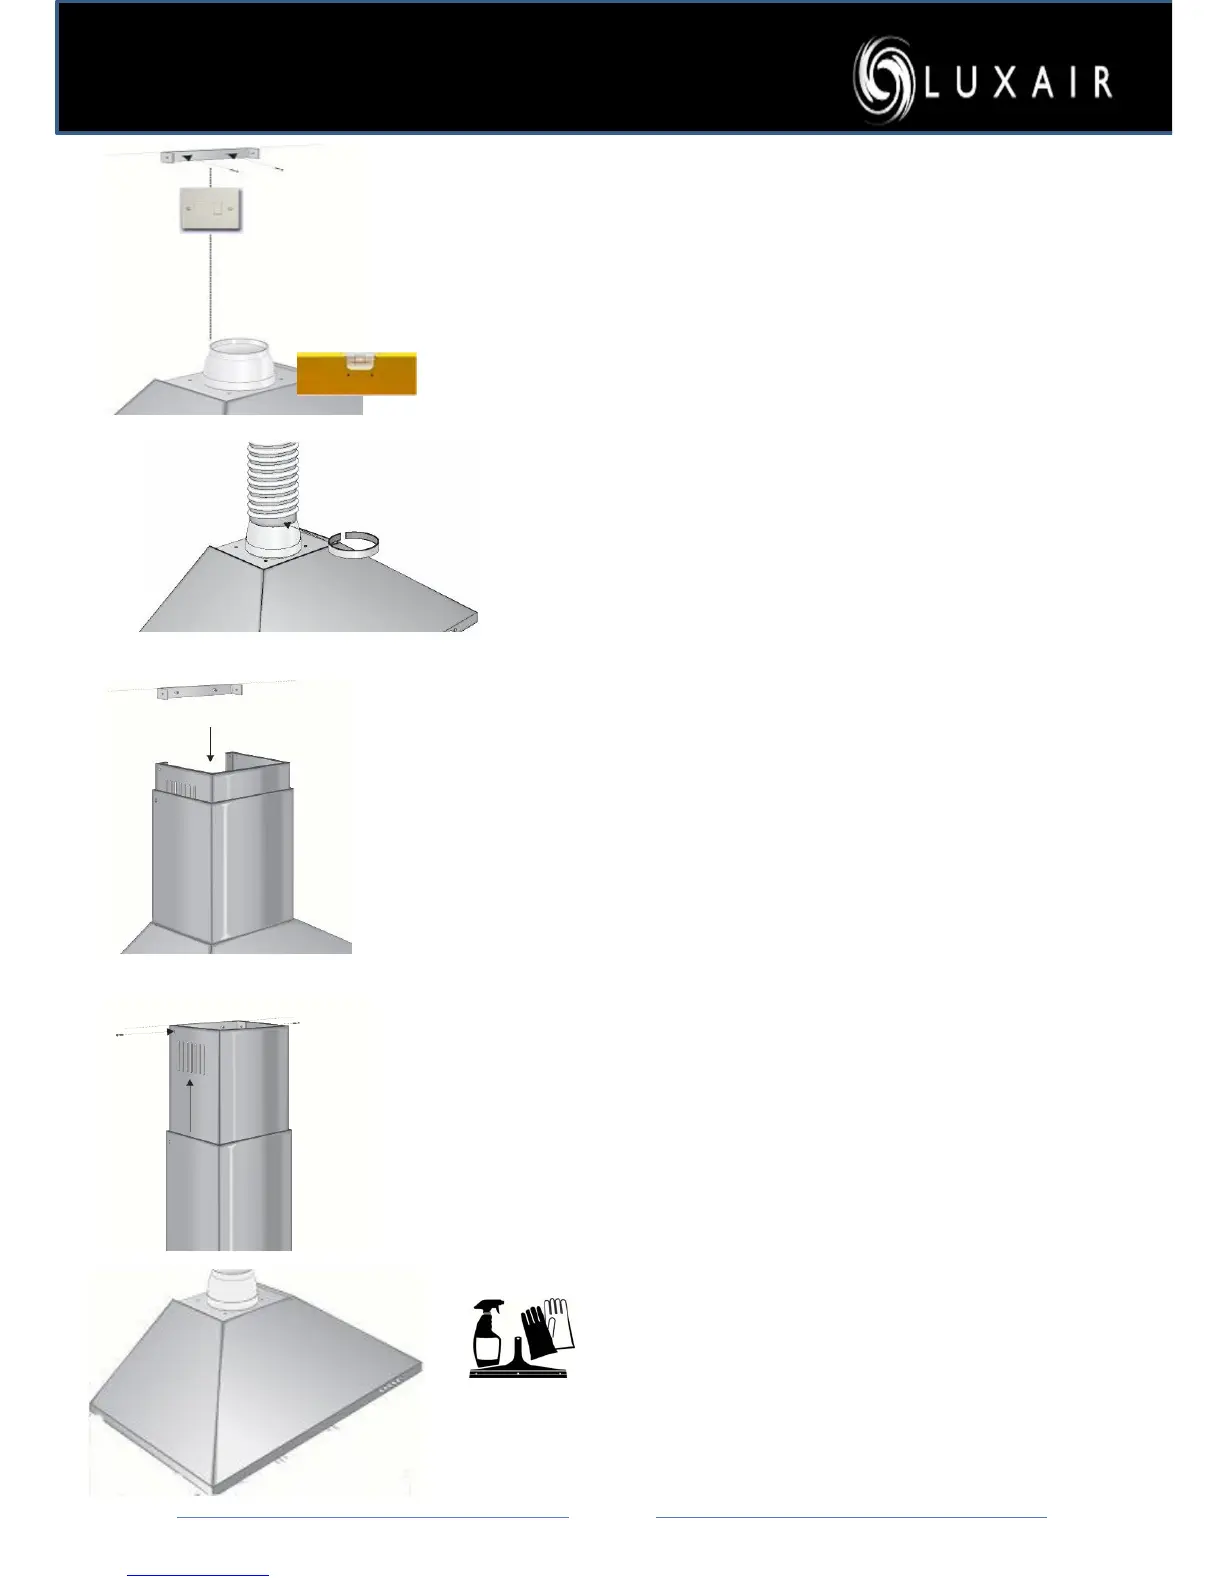
Mark the height and position of your fused spur
socket position this so it’s accessible, this should
also be fused with a 3amp fuse. Remove the
hood off the wall before drilling for the electrics
Move the bod y section to the wall
and proceed to make all electrical and
ducting co nnections, make sure you
have complied with all safety
instructions as outlned in the booklet.
Once all electrical and ducting has being
connected and tested proceed to assemble the
chimney sections, place the bottom part of the
chimney into the body of the hood , no fixings
are required as the
grooves secure this part, slide
the top section into the b ottom section
of the chimney, taking care not to scratch this as
you do so. The vented top section can be turned
upside down if the hood is ducted outside, this
will hide the vents that are unnecessary for
ducted out use. See page 12 for more details on
vented or recirculated options
Slide the top section into place over
the wall bracket, take care not to
scratch this as you do so, and secure
the top section to the bracket with
the two short screws provided.
Your new hood is no w read y for
Do not attempt to clean down your
new hood until you have read the
cleaning instructions
Careless cleaning could bur
and scratch your new hood