38
► Pull off the control knob.
► While holding the valve shaft
with pliers as shown insert a
small at screwdriver into the
center shaft and adjust the
ame’s low setting.
Clockwise will lower the ame
setting, counterclockwise will raise it.
The proper setting is where
the ame is stable at its lowest
setting. A slight utter will be
present in the crossover portion
of the front of the burner before
the burner itself becomes weak.
The factory setting for propane
gas is ½ to ¾ turn from the very
bottom of the adjustment. The
setting for natural gas is 1-½ to
1-¾ from the bottom. After the
low settings are proper, turn all
burners to high for visual in-
spection.
BRASS BURNER
FLAME/AIR SHUTTER
ADJUSTMENT
The amount of air that enters a
burner is controlled by the
air
shutter
.
Each grill burner is tested and
adjusted at the factory prior to
shipment. However, uctua-
tions in gas pressure, gas con-
version and even in the quality
of the gas itself may make it
necessary to adjust the burner.
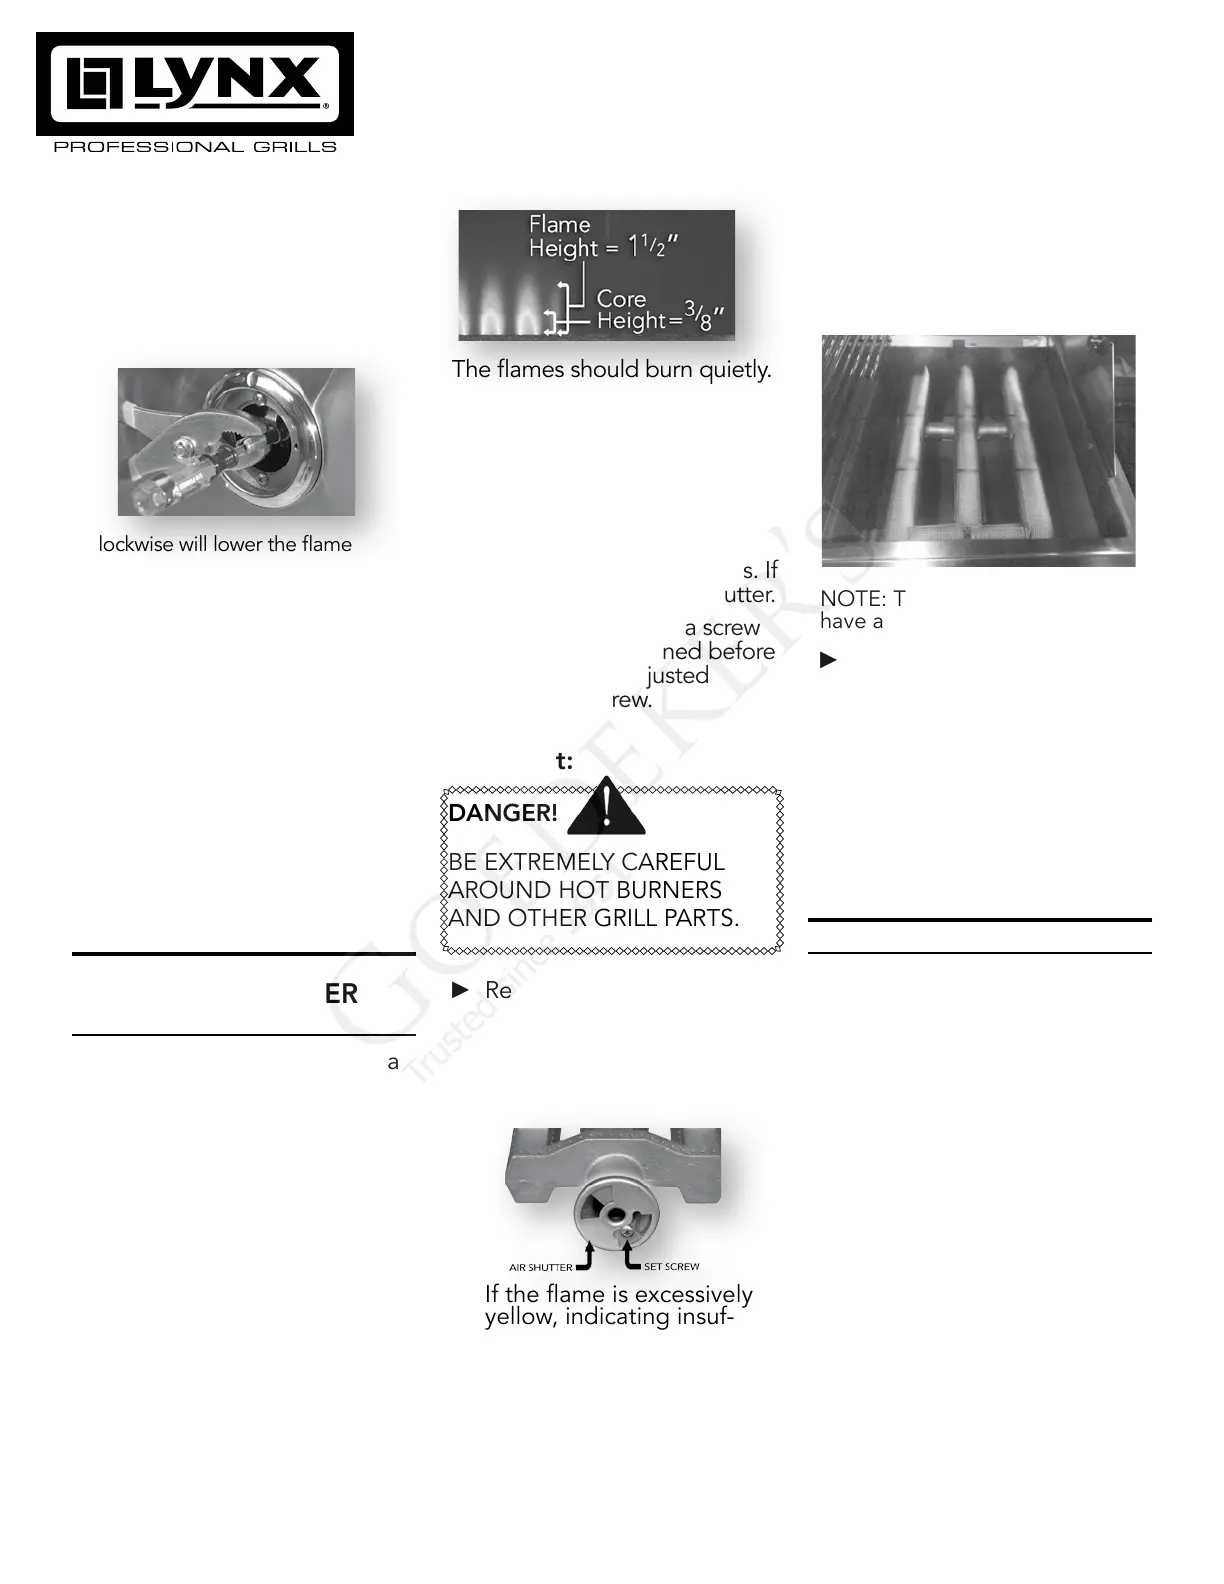
The ames of the main brass
burners should be visually
checked.
Flames should be blue and
stable with slight yellow tips. The
bright-blue core should be about
3/8 inch high with a total ame
height of about 1 1/2 inches.
The ames should burn quietly.
(no “torch” sounds) and they
should not “lift” up from the
burner.
If your ames do not match
those indicated in the photo,
ensure that the air shutter and
burner ports are free and clear
of dirt, debris, or spider webs. If
clear, then adjust the air shutter.
It is locked in place by a screw
which must be loosened before
adjusting. Once adjusted
retighten the screw.
To Adjust:
► Remove the racks and
briquette trays.
► Lift out the burner, loosen
the set screw and then put
the burner back in place and
light it.
► If the ame is excessively
yellow, indicating insuf-
cient air, CAREFULLY turn
the air shutter counter-
clockwise to allow more air
to the burner.
► If the ame is noisy (sounds
like a torch) and tends to lift
away from the burner, indi-
cating too much air, turn the
air shutter clockwise.
danger!
Be extremely careful
around hot Burners
and other grill parts.
► After the burner cools
down, remove it, tighten
the air shutter set screw and
reinstall the burner, briquette
trays and grill racks.
NOTE: The ProSear™ 2 does not
have an air shutter.
► The appearance of the
ProSear™ 2 burner should
be visually checked. The
ceramic tiles should be
uniformly red to orange in
appearance. There should
be no lifting, uttering or
lazy blue ames. Some food
particles will show as yellow
ames but should burn off.
ONE LAST THING:
Finally, before leaving, check all
the burners for proper operation.
Make sure the control knobs turn
freely and completely through
their full range.
IMPORTANT:
Make sure the owner knows
where the main gas supply shut
off valve is located.
Finally, for safety and for proper
use & care, you must leave this
manual with the owner. Make
sure you advise them to keep it
for future reference.
For technical assistance call:
Lynx Technical Support
888-289-5969
 Loading...