Technical Service: tech.support@malighting.com; +49.5251.688865-30 Emergency Line: +49.5251.688865-99 2-Port Node Version 1.1
1111
1111
11
Entering / Changing a setting:
You can only make changes from the console or the onPC (on a laptop or PC).
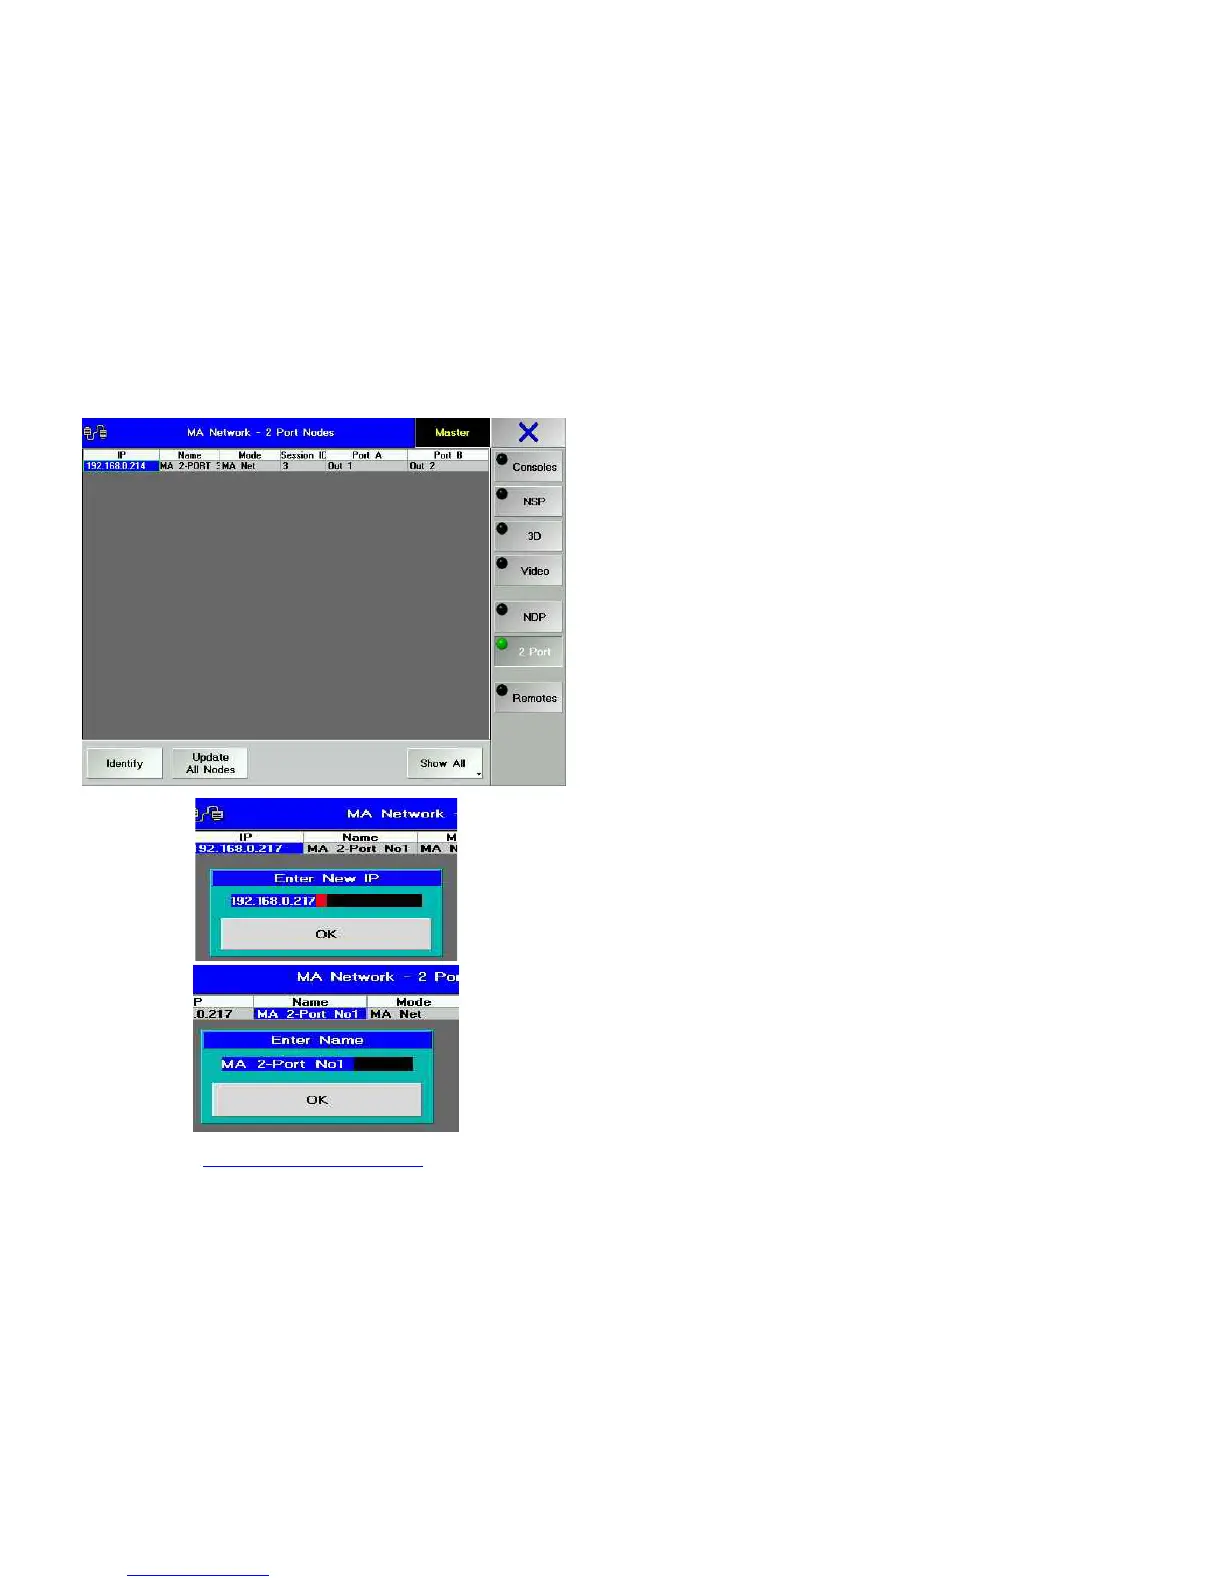
On the console or in onPC, open the TOOLS / MA NETWORK CONFIGURTAIONS
/ 2 PORT menu.
Select the 2-Port Node you want – the cell in the respective row will be
highlighted in blue then. Just to make sure, press the IDENTIFY button – the LED
and the display for the selected 2-Port Node will blink. Press the button again to
stop the blinking.
Select the desired cell. If you use the right mouse button or Encoder on the
console, the respective dialog window for entries will open immediately.
IP-address:
Here, you can set the IP-address for the 2-Port Node. The first 3 groups must
correspond to the other elements in the same network. The fourth group must be
set individually for this device and must be unique in this network.
In the TOOLS / MA NETWORK CONFIGURATIONS / 2-PORT menu, select
the IP cell making a mouse click or pressing the Encoder (cell will receive a blue
background) – this will automatically open the edit box.
In the edit box, enter the IP-address – us a dot to separate the number groups
consisting of 3 digits each.
Confirm using the OK button. This will automatically close the edit box.
Make sure that the desired IP-address appears in the IP cell.
Name: 18 digits max. (incl. special characters) - optional, entries are not
mandatory.
Here, you can enter the name of the 2-Port Node. This entry helps you to discern
the nodes when using several of them. You can, however, use the same name
more than once. If you make no entry, the default name will appear.
In the TOOLS / MA NETWORK CONFIGURATIONS / 2-PORT menu, select
the NAME cell making a mouse click or pressing the Encoder (cell will receive a
blue background) – this will automatically open the edit box.
Enter the name in the respective edit box.
Confirm using the OK button. This will automatically close the edit box.
Make sure that the desired name appears in the NAME cell.