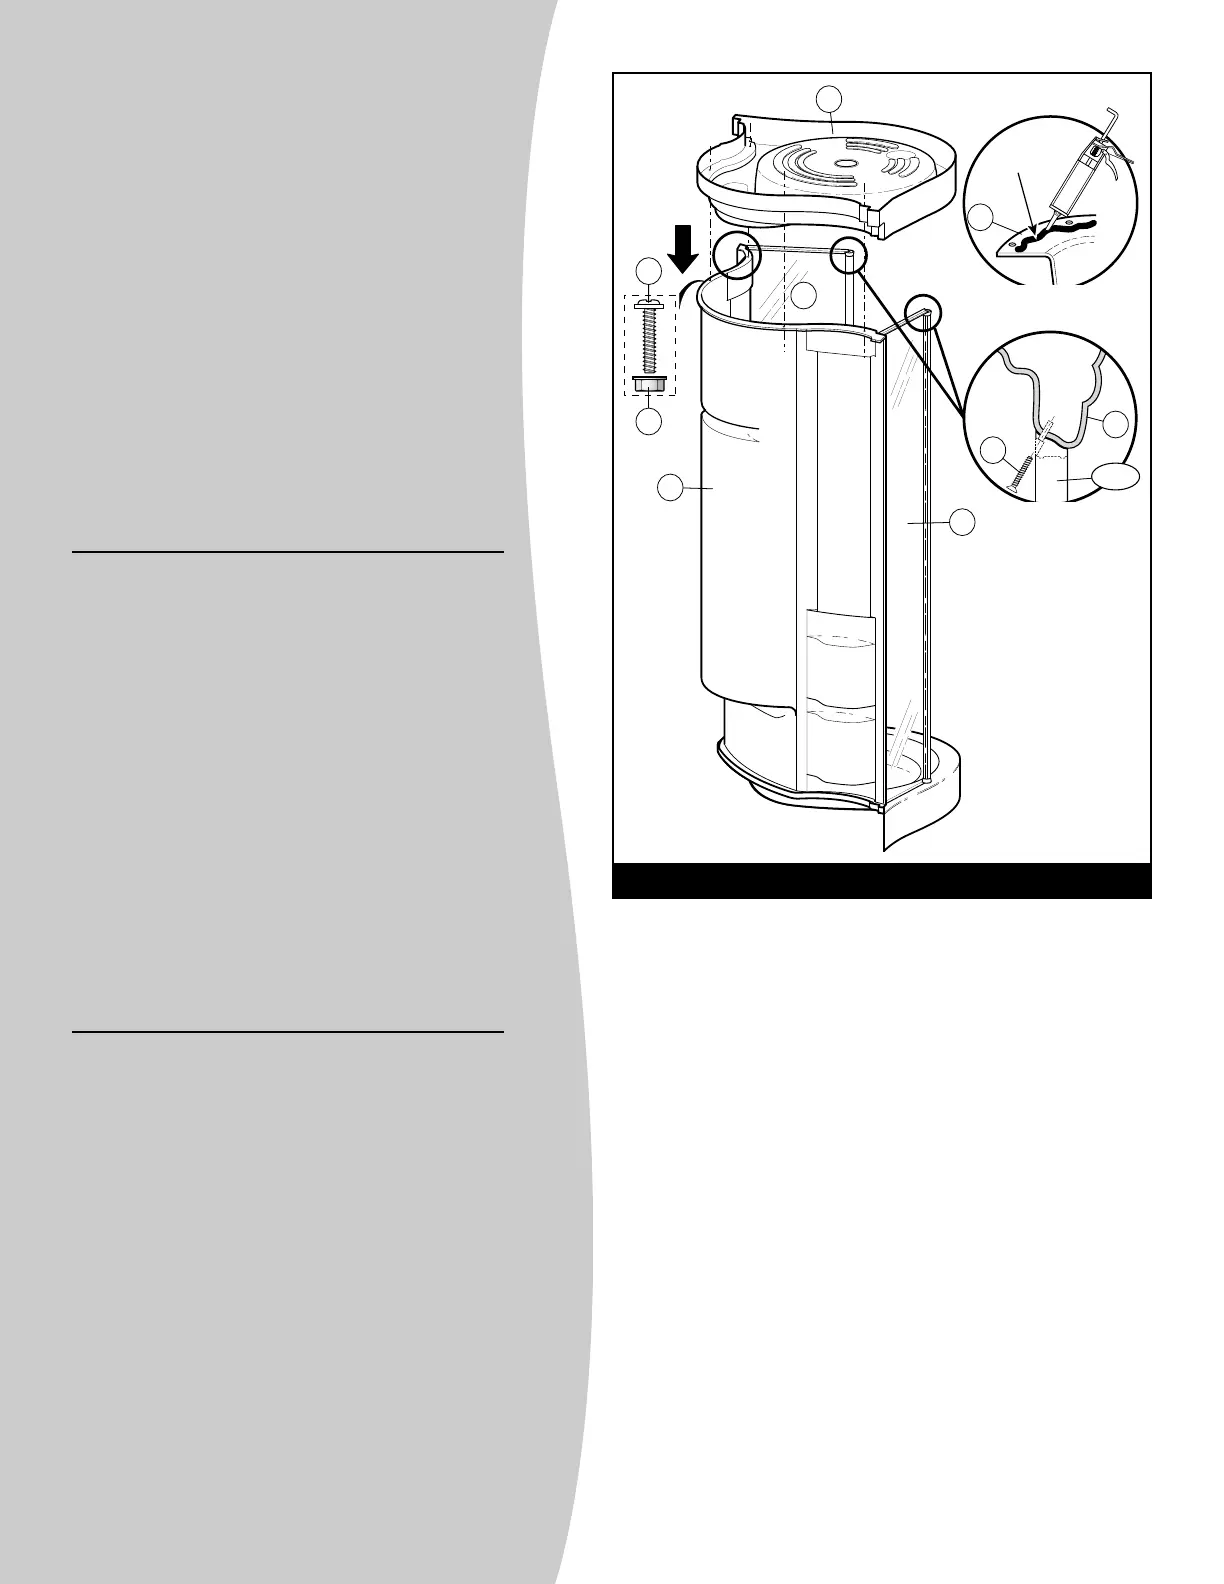
ROOFCAP ASSEMBLY
• Place roofcap (3) on fixed panels (10 and 11). Fig. 5.
• With a pencil, mark drill holes on roofcap (3).
Remove roofcap (3) and drill the four (4) holes on
roofcap (3) with a 3/16" bit. Apply a bead of silicone
along the edge of the wall (2), in front of the holes.
(
Fig. 5.1)
• Put roofcap (3) back on fixed panels, making sure
anchors are lined up with neoprene anchors on
roofcap, and fasten with #10-32 x 1" (2.5 cm) screws
(8) and nuts 10-32 (9). Fasten fixed panels (10 and
11) to roofcap anchors with #10-32 x 1 1/2" (3,5 cm)
screws (15).
Fig. 6.1.
ASSEMBLAGE DU TOIT
• Placez le toit (3) sur les panneaux fixes (10 et 11).
Fig. 5.
• Avec un crayon, marquez les trous à percer sur le
toit (3). Enlevez-le et percez les 4 trous dans le toit
(3) avec un foret 3/16". Pour assurer l'étanchéité de
l'ensemble, tirez un joint de silicone le long de la
lèvre du mur (2), devant les trous. (
Fig. 5.1)
• Replacez le toit (3) sur les panneaux fixes, en
vous assurant que les ancrages sont vis-à-vis les
ancrages en néoprène du toit, et fixez le tout avec
les vis 10-32 x 1" (2,5 cm) (8) et les écrous 10-32
(9). Vissez les panneaux fixes (10 et 11) aux
ancrages du toit avec les vis 10-32 x 1 1/2" (3,5
cm) (15). (
Fig. 5.2)
ENSAMBLAJE DEL TECHO
• Colocar el techo (3) sobre los paneles fijos (10 y 11).
Fig. 5.
• Con un lápiz marcar los orificios que deben
perforarse en el techo (3). Quitar el techo y perforar
los 4 orificios con una broca de 3/16''. Para asegurar
la impermeabilidad del equipo, coloque una capa de
silicona a lo largo de los bordes de la pared (2) y en
frente de los orificios (
Fig. 5.1).
• Colocar el techo (3) sobre los paneles fijos
asegurándose que los anclajes están bien alineados
con los anclajes de neopreno del techo y fijarlo con los
tornillos 10-32 x 1'' (2.5 cm) (8) y las tuercas 10-32
(9). Atornille los paneles fijos (10 y 11) con los anclajes
del techo con los tornillos 10-32 x 1 1/2'' (3.5 cm) (15)
(
Fig. 5.2).
 Loading...