PRELIMINARY STEPS
PLUMBING
Install all plumbing and drainage before securing the
unit. It is always recommended to have a
professional and competent plumber do the
plumbing installations.
LEVELLING
Make sure that the floor is level and that the walls
are at right angles.
UNIT INSTALLATION
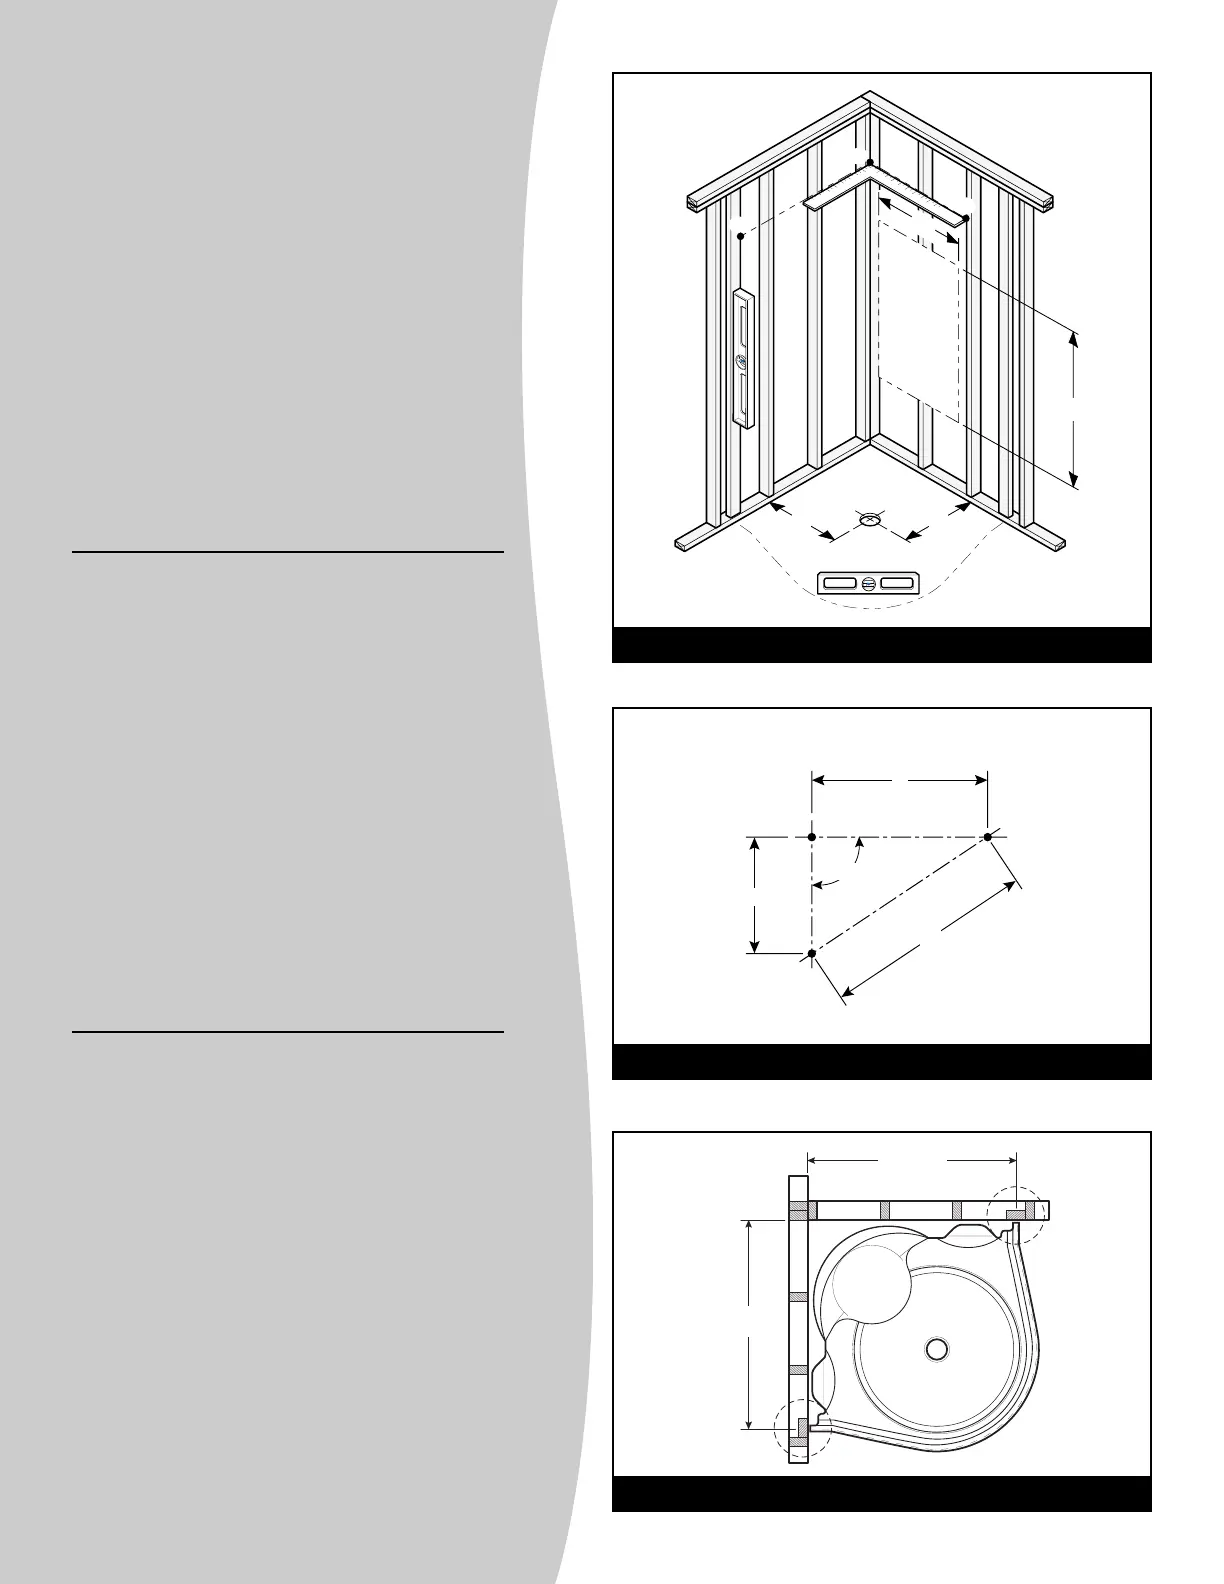
PREPARING THE ALCOVE
• Build the structure for the unit to the dimensions
indicated (
Fig. 1a). Make sure you have a screw
support 36 1/2" from each side when you screw the
unit into place (
Fig. 1c).
N.B.: To make installation and maintenance easier,
you must provide an access behind the faucet
installation.
Fig. 1a.
ÉTAPES PRÉLIMINAIRES
PLOMBERIE
Mettre en place toute la plomberie et le tuyau
d'évacuation avant de fixer l'unité. Il est
recommandé de faire exécuter la plomberie par un
plombier accrédité et compétent.
MISE À NIVEAU
S'assurer que le plancher est de niveau et que les
murs sont d'équerre.
INSTALLATION DE L'UNITÉ
PRÉPARATION DE L'ALCÔVE
• Bâtir la structure pour recevoir l'unité en suivant les
dimensions indiquées (
Fig. 1a); s'assurer d'avoir un
renfort pour vissage à 36 1/2” de chaque côté pour
y fixer l'unité (
Fig. 1c).
N.B.: il est obligatoire de prévoir une trappe
d'accès derrière la robinetterie afin d'en faciliter
l'installation et l'entretien.
Fig. 1a.
ETAPAS PRELIMINARES
PLOMERÍA
Instale toda la plomería y el tubo de desagüe antes
de fijar la unidad. Se recomienda confiar los trabajos
de plomería a un plomero calificado y competente.
NIVELACIÓN
Asegurarse que el suelo está nivelado y las paredes
forman un ángulo de 90°.
INSTALACIÓN DE LA UNIDAD
PREPARACIÓN DE LA ESTRUCTURA
• Armar la estructura para dar cabida a la unidad con
arreglo a las dimensiones indicadas (
Fig. 1a);
cerciorarse de que hay un refuerzo, a 36 1/2” de
cada lado, para clavar la unidad sobre él (
Fig. 1c).
Nota: Es importante prever una trampa de acceso
detrás de la tubería para facilitar la instalación y el
mantenimiento.
Fig. 1a.
6
 Loading...