39
MCSWP40 by MacAllister
Operation
GB
IE
In more detail...
> Before felling is started, consider the
natural lean of the tree, the location
of larger branches and the wind
direction to judge which way the tree
will fall.
> Remove dirt, stones, loose bark,
nails, staples and wire from the tree.
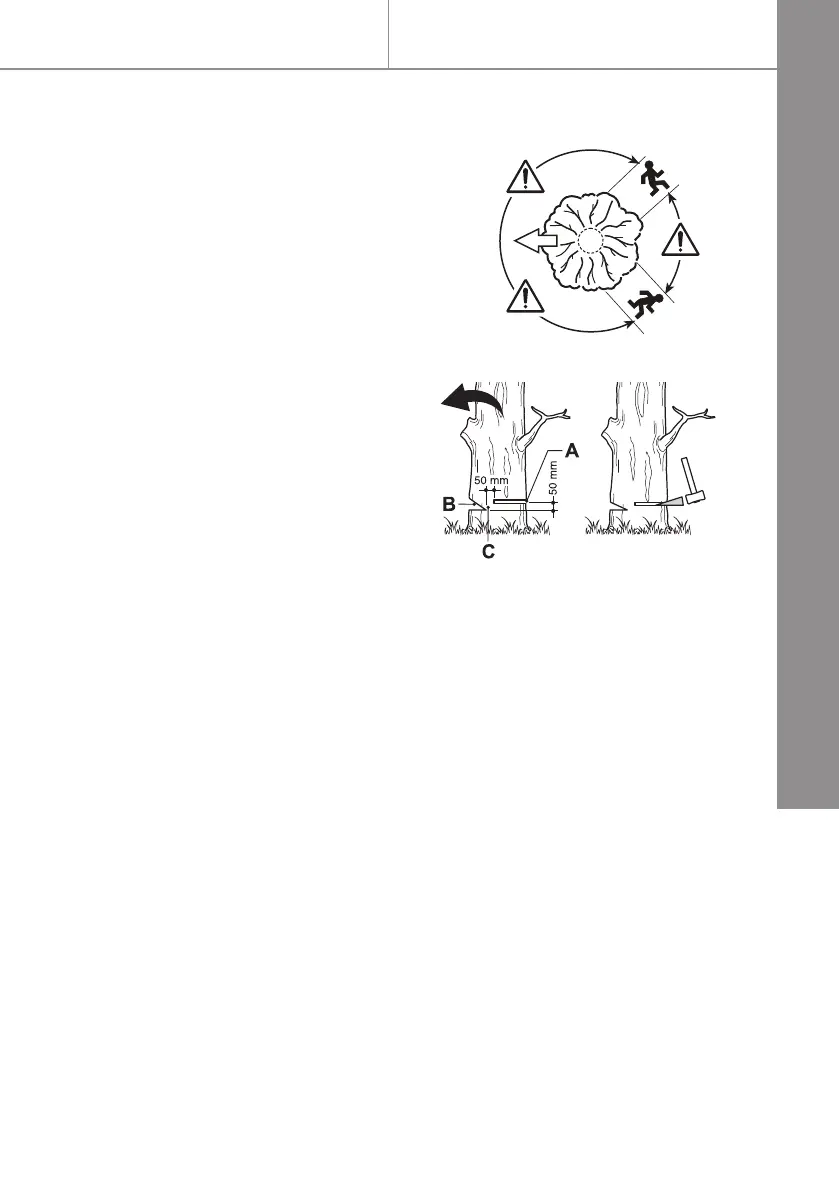
Notching undercut
Make the notch (Fig. 38, B)
1/3 the diameter of the tree,
perpendicular to the direction of
falls (Fig. 38). Make the lower
horizontal notching cut rst.This
will help to avoid pinching either
the saw chain or the guide bar
when the second notch is being
made.
Felling back cut
> Make the felling back cut (Fig. 38, A) at least 50 mm higher than
the horizontal notching cut (Fig. 38). Keep the felling back cut
parallel to the horizontal notching cut. Make the felling back cut so
enough wood is left to act as a hinge. The hinge (Fig. 38, C) wood
keeps the tree from twisting and falling in the wrong direction. Do
not cut through the hinge.
> As the felling gets close to the hinge, the tree should begin to fall.
If there is any chance that the tree may not fall in desired direction
or it may rock back and bind the saw chain, stop cutting before the
felling back cut is complete and use wedges of wood, plastic or
aluminium to open the cut and drop the tree along the desired line
of fall.
> When the tree begins to fall remove the product from the cut,
stop the motor, put the product down, then use the retreat path
planned. Be alert for overhead limbs falling and watch your
footing.
Fig. 38
Fig. 37


 To Next Page