Owner’s Manual
5
Owner’s Manual
How to Use This Manual:
Afer this introduction, a getting started guide will help
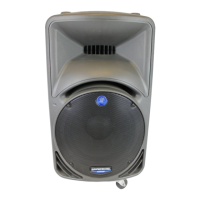
you get things set up fast. The hookup diagrams show
some typical DRM2A loudspeaker setups.
This icon marks information that is critically
important or unique! For your own good, read and
remember them...it is a good idea to pay special
attention to these areas in the Owner’s Manual
marked with the “VERY IMPORTANT” hand icon.
There’s an illustration of a microscope,
so, of course, you’re going to get more
detailed information when you see this little
guy. There are explanations of features
and practical tips listed here.
It’s a good idea to pay attention to text displayed
next to a note icon, as this icon draws attention
to certain features and functions relating to the
usage of the DRM2A.
Getting Started
The following steps will help you set up the DRM2A quickly.
. Make all initial connections with the power switches
OFF on all equipment. Make sure the master volume, level
and gain controls are all the way down.
2. If using a subwoofer, connect the outputs from
the mixing console (or other signal source) to the inputs
on the rear panel of the subwoofer, then connect the high
pass outputs from the subwoofer to the inputs of the DRM2A
loudspeakers. Make sure the subwoofer’s gain knob is
set to “U” (unity gain).
3. If not using a subwoofer, connect the outputs
from the mixing console (or other signal source)
to the inputs on the rear panel of the DRM2A loudspeakers.
4. Push the line cord securely into the subwoofer’s
IEC connectors and plug the other ends into grounded
AC outlets. The subwoofer may accept the appropriate
voltage as indicated near the IEC connector.
5. Turn the mixer (or other signal source) on.
6. Turn the subwoofer on.
7. Push the AC mains cord securely into the DRM2A
loudspeaker’s AC In Neutrik PowerCon® jack, then twist
/4 turn clockwise to lock. Plug the other end into the AC
mains supply receptacle.
8. Set the gain on the DRM2A (and all other DRM boxes)
to unity. Volume will be controlled via the mixer.
9. Start the signal source and raise the mixer’s main
L/R fader up to a comfortably loud listening level.
Things to Remember:
• Never listen to loud music for prolonged periods. Please see
the Safety Instructions on page 2 for information on hearing
protection.
• As a general guide, the mixer (or other signal source should
be turned on first, subwoofer next, and DRM2A loudspeakers
last. As such, the DRM2A loudspeakers should also be
turned o first, followed by the subwoofer, then the mixer.
This will reduce the possibility of any turn-on or turn-o
thumps and other noises generated by any upstream
equipment from coming out of the speakers.
• Save the shipping boxes and packing materials! You may
need them someday. Besides, the cats will love playing
in them and jumping out at you unexpectedly. Remember
to pretend like you are surprised!
• Save your sales receipt in a safe place.
Please write the serial numbers here for future reference
(i.e., insurance claims, tech support, return authorization,
make dad proud, etc.)
Purchased at:
Date of purchase: