21
Owner’s Manual
Owner’s Manual
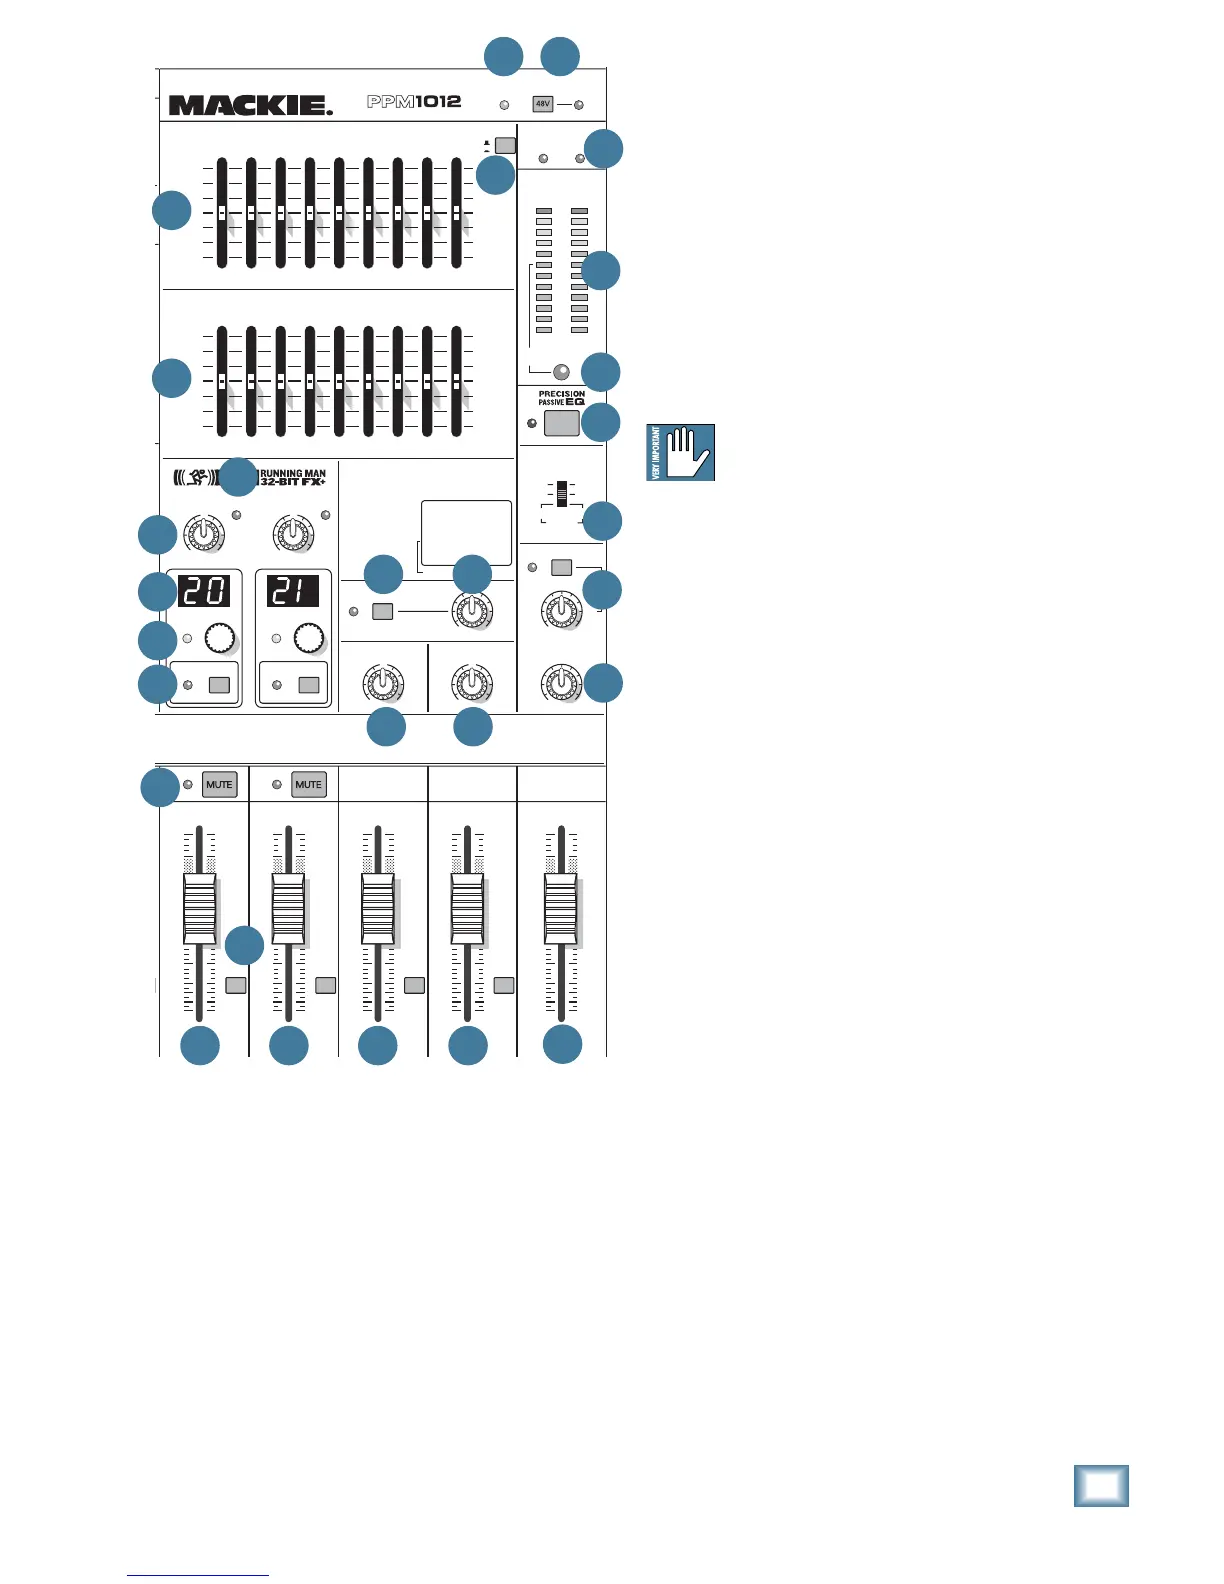
43. 48V PHANTOM SWITCH
Press in this switch to add +48 VDC phantom pow-
er to all the XLR microphone inputs of the mixer. The
LED next to the switch will turn on as a reminder.
Most modern professional condenser mics require
phantom power, which lets the mixer send low-cur-
rent DC voltage to the mic’s electronics through the
same wires that carry audio. (Semi-pro condenser
mics often have batteries to accomplish the same
thing.) “Phantom” owes its name to an ability to be
“unseen” by dynamic mics (Shure SM57/SM58, for in-
stance), which don’t need external power and aren’t
affected by it anyway.
Never plug single-ended (unbalanced)
micro phones, or ribbon mics into the mic
input jacks if phantom power is on. Do not
plug instrument outputs into the mic input jacks
with phantom power on, unless you know for certain
it is safe to do so.
44. MAIN EQUALIZER
The 9-band stereo graphic equalizer allows you
to tailor the sound of your main mix to suit your ex-
traordinarily-delicate sense of audio right and wrong.
Each slider allows up to 15 dB of boost and cut,
with 0 dB (no change in level) at the center. The
frequency bands are: 63, 125, 250, 500, 1 k, 2 k, 4 k,
8 k, and 16 kHz
The EQ affects the main mix line-level outputs
[16] and mono output [17], as well as the speaker-
level outputs [3] if the internal amplifi ers are playing
the main mix.
The EQ section comes before the main fader [59],
and the main meters [48]. As you adjust the EQ,
keep an eye on the meters in case you overdo it and
take the levels into overload.
The main EQ assign switch (46) allows you to use
this EQ to adjust the monitor 2 output instead of the
main mix.
As with the channel EQ, just take it easy. There is a
large amount of adjustment, and if you are not care-
ful, you can upset the delicate balance of nature. Re-
member that even the happiest audience of old ladies
can turn on you like a pack of wild dogs. Although it
may not seem cool to turn down controls, with EQ it
is often your best option. Turn down any offending
frequency range, rather than boost the wanted range.
Having many sliders will allow you to reduce the level
of some frequency bands where feedback occurs.
Master Controls
42. POWER LED
This LED comes on when the powered mixer is
plugged into the correct-voltage AC mains supply, and
the power switch [2] is on.
If the LED is not on, then make sure the AC power is
live, and that both ends of the power cord are correctly
inserted. If Zombies have taken over the power station
again, and all the lights in town are off, this LED may
not come on. (This would be the least of your worries.)