Operation Manual easyTymp
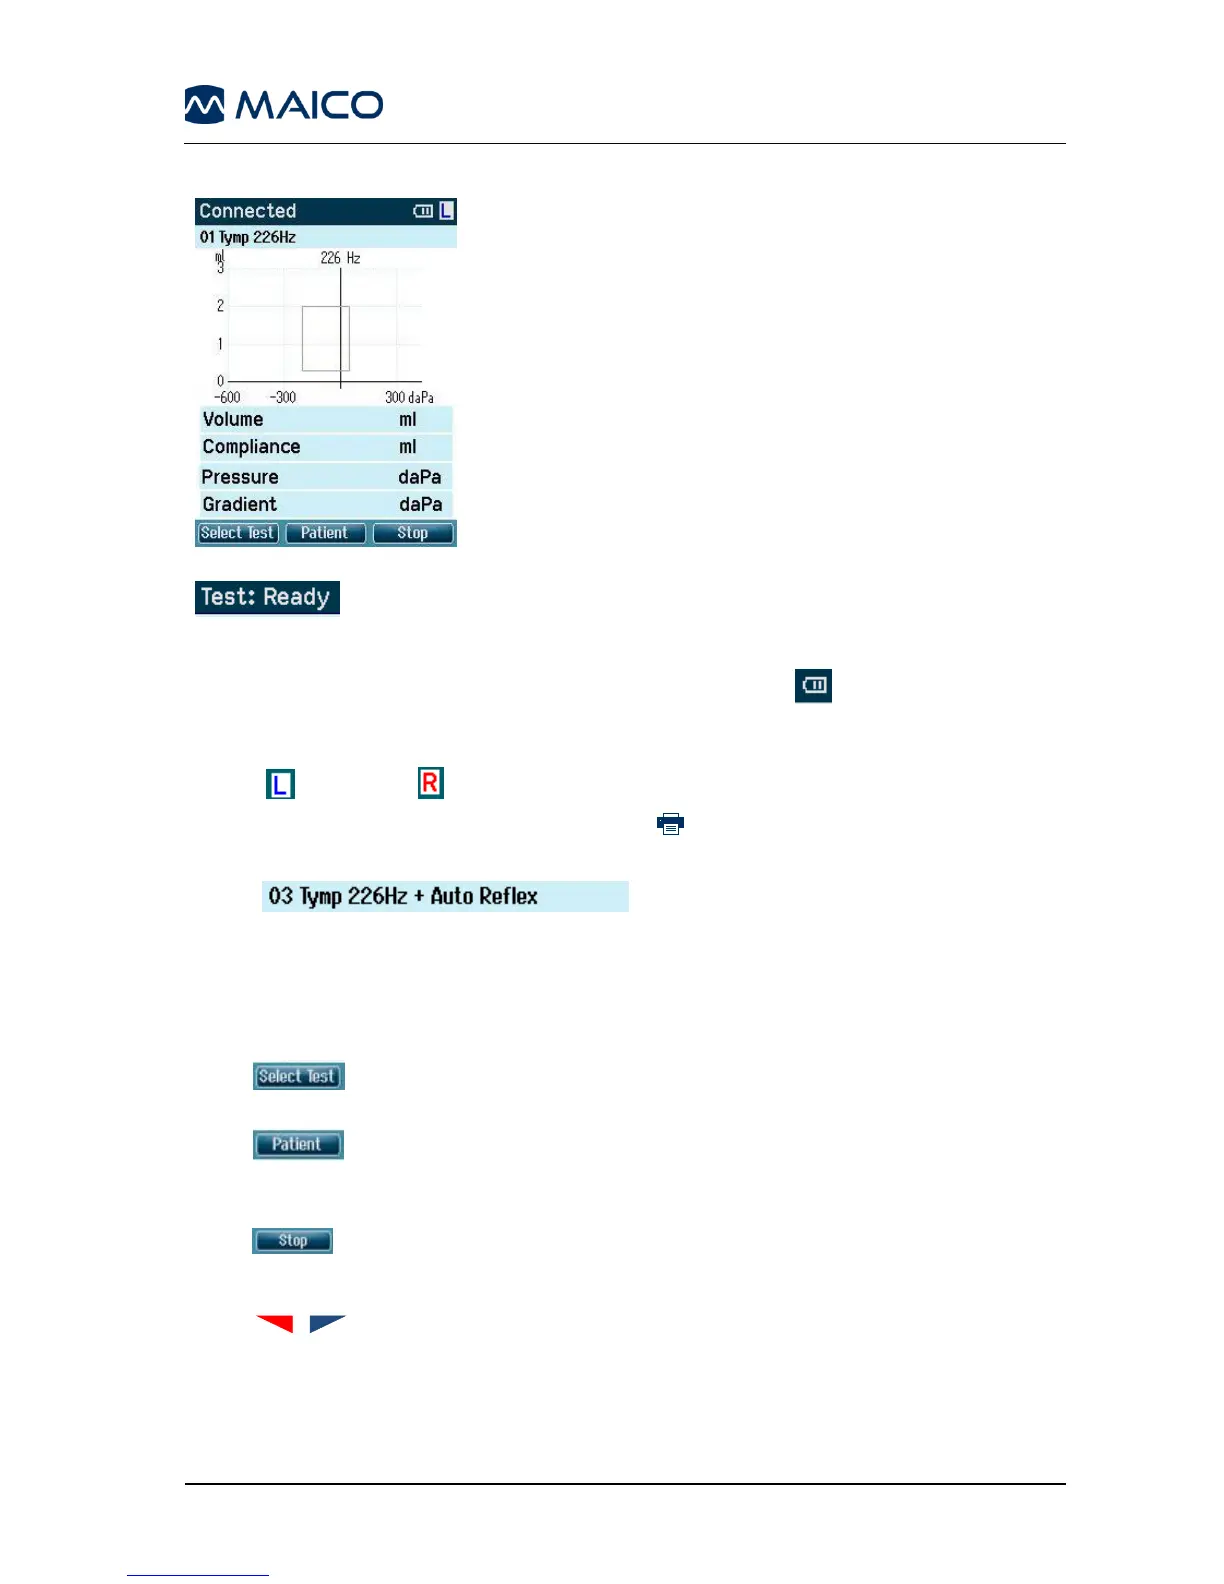
Usually the easyTymp starts with the Test screen. When
deleting or saving data after a measurement, you will also
return to this screen (Figure 48).
The graphics of the ongoing test will also be displayed. The
box indicates the normative area where the peak of the
tympanogram is expected to fall. The measured curve will
be directly shown in the graphic while the measurement is
being taken. Below the graphic the measured values
(Volume, Pressure, Compliance and Gradient) are
shown following the measurement.
The header shows the status of the probe. It might show Ready, In Ear,
Leaking or Blocked. When Connected is displayed, the device is connected to a cradle
or directly to the PC.
- In the upper right corner the battery status is indicated . When the easyTymp is
placed in the cradle, it will charge the battery and a flashing battery icon will be shown.
- In the upper right corner an icon indicates if the easyTymp is testing the left ear
or right ear .
- In the upper right corner a printer icon indicates the easyTymp is connect to
the wireless printer.
- When entering the Test screen, the second
line shows the name of the protocol which is in use. As soon as the easyTymp
detects that the probe is in the ear, the second line will show which test of the
protocol is running.
Operating from this screen:
Putting the probe in the ear and obtaining a seal will automatically start the test.
- : The top left button will bring you to the Select Test screen where you
can select a different test protocol.
- : The top middle button will bring you to the View Patients screen where
patient data can be viewed and earlier sessions can be reviewed and/or printed. This
function is only displayed if the patient management is activated.
- : The top right button, when the measurement is stopped the top buttons
will change to give the option to print, save or delete and Done! will appear in the
upper left hand corner of the screen.
- arrows will select respectively right or left ear for testing.
- If data on one or both ears is still available, the up and down buttons will bring you
back to the Done! screen and allow you scroll through the measurement results.
If a protocol includes an instruction message, pressing the Contra Probe button results in
continuing the protocol, no matter what the probe status indicates.