Operation Manual
touchTymp MI 26
and
MI 36
Version
5.4.5 Managing Test Results – Immittance
5.4.5.1 General
There are different possibilities to manage the results. It is possible to print the session
directly with the built-in printer or transfer the data to a PC for further processing.
5.4.5.2 Completed Results
When a test is completed within a module the button will display an asterisk , for
indication a test is stored in this module. These notations will change when printing or
transferring results are completed as described in sections 5.4.5.4 and 5.4.5.6.
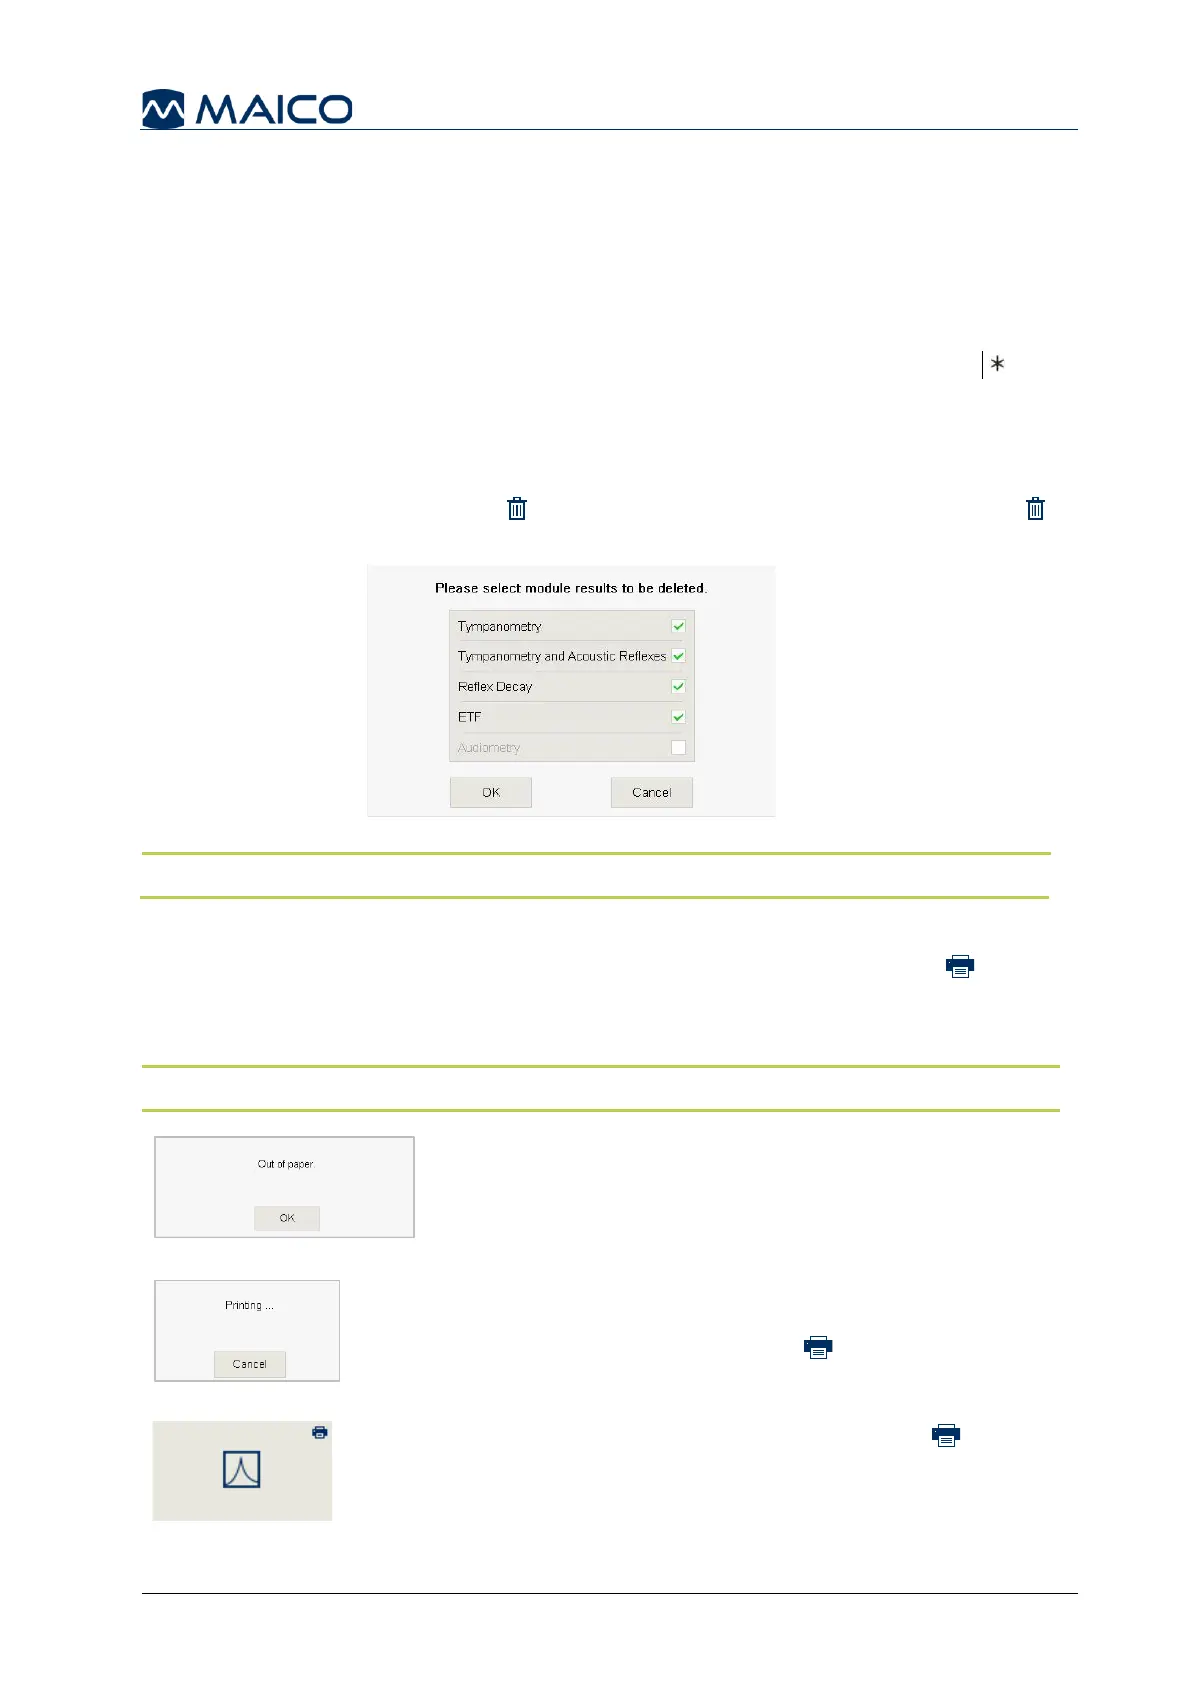
5.4.5.3 Deleting Test Results
Results are deleted by the Delete button or turning-off the device. When Delete
is selected, each module is listed to confirm deletion (Figure 76).
NOTE: It is best practice to delete results after testing is completed for each patient.
5.4.5.4 Printing Test Results with the Built-in Printer
Test results can be directly printed with the built-in printer. Press on the Print button
and a message box “Processing print job” will display. Printing from the device will
print all test results at once (i.e. 226 Hz and 1000 Hz).
NOTE: The printout will contain the same content as the diagrams on the screen.
If the printer is out of paper a message box will appear
(Figure 77). You can reorder paper from your local
distributor. For detailed information about how to change
the paper rolls see section 4.2.7.
A message box will appear once printing has started to
cancel printing (Figure 78). When cancelled, printing can
be restarted by pressing the Print button.
At the completion of the printing, a Print icon is
displayed on the button to note the printing of the tests
(Figure 79). This is only displayed when all tests have
been printed.
 Loading...