Power on and Run Router
MP1900X Series Router Installation Manual
4-2
copyright2019 Maipu, all rights reserved
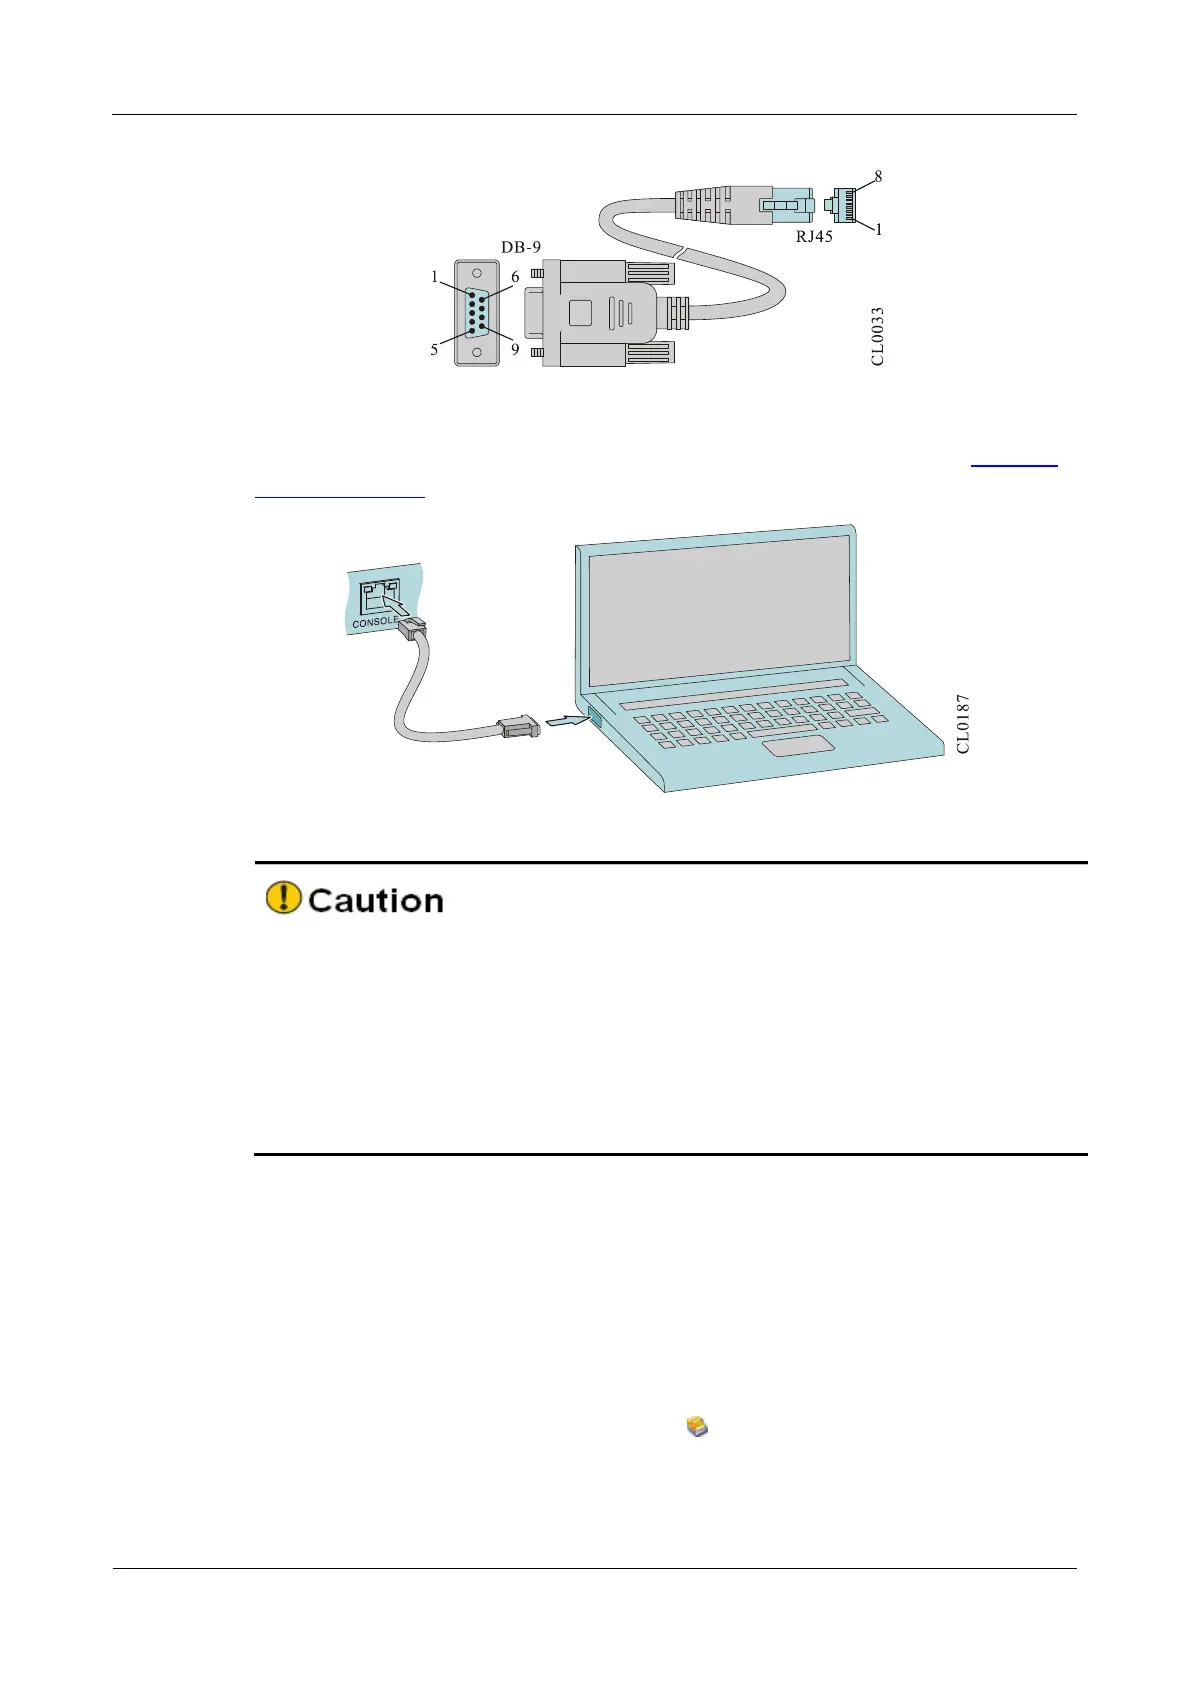
Figure 4-1 Console cable
For details about the inner signal connection of the Console cables, refer to Appendix
E1 Console Cable.
Figure 4-2 Connect the router and PC via the Console port
When the PC (or laptop) is connected with the router via the configuration cable,
first connect the DB-9 side of the configuration cable to the serial interface of the
PC and then connect the RJ-45 connector of the configuration cable to the Console
port of the router.
When removing the configuration cable that connects the PC (or laptop) with the
router, first remove the RJ-45 connector of the configuration cable, and then
remove the DB-9 side of the configuration cable.
4.1.2 Set PC HyperTerminal Parameters
The following takes running Windows XP HyperTerminal on the PC (or laptop) as an
example to describe the setting of the serial interface parameters of the PC (or laptop).
Step 1:
Enable the PC (or laptop), select Start > All Programs > Accessories >
Communication > HyperTerminal, and click to set up the new connection as shown
in Figure 4-5. If it is the first time to set the Hyperterminal, the system displays the
interface of Location Information, as shown in Figure 4-3. Fill in according to the red
indication in the fiugre and click OK.
 Loading...