6 REPAIR
6-1 Saw chain
6-1-1 Disassembling
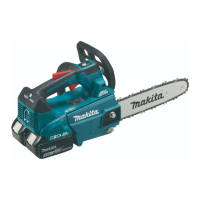
1 Remove Batteries [1] (2 pcs).
2 Loosen Flange nut complete [2], then remove
Sprocket cover ass’y [3].
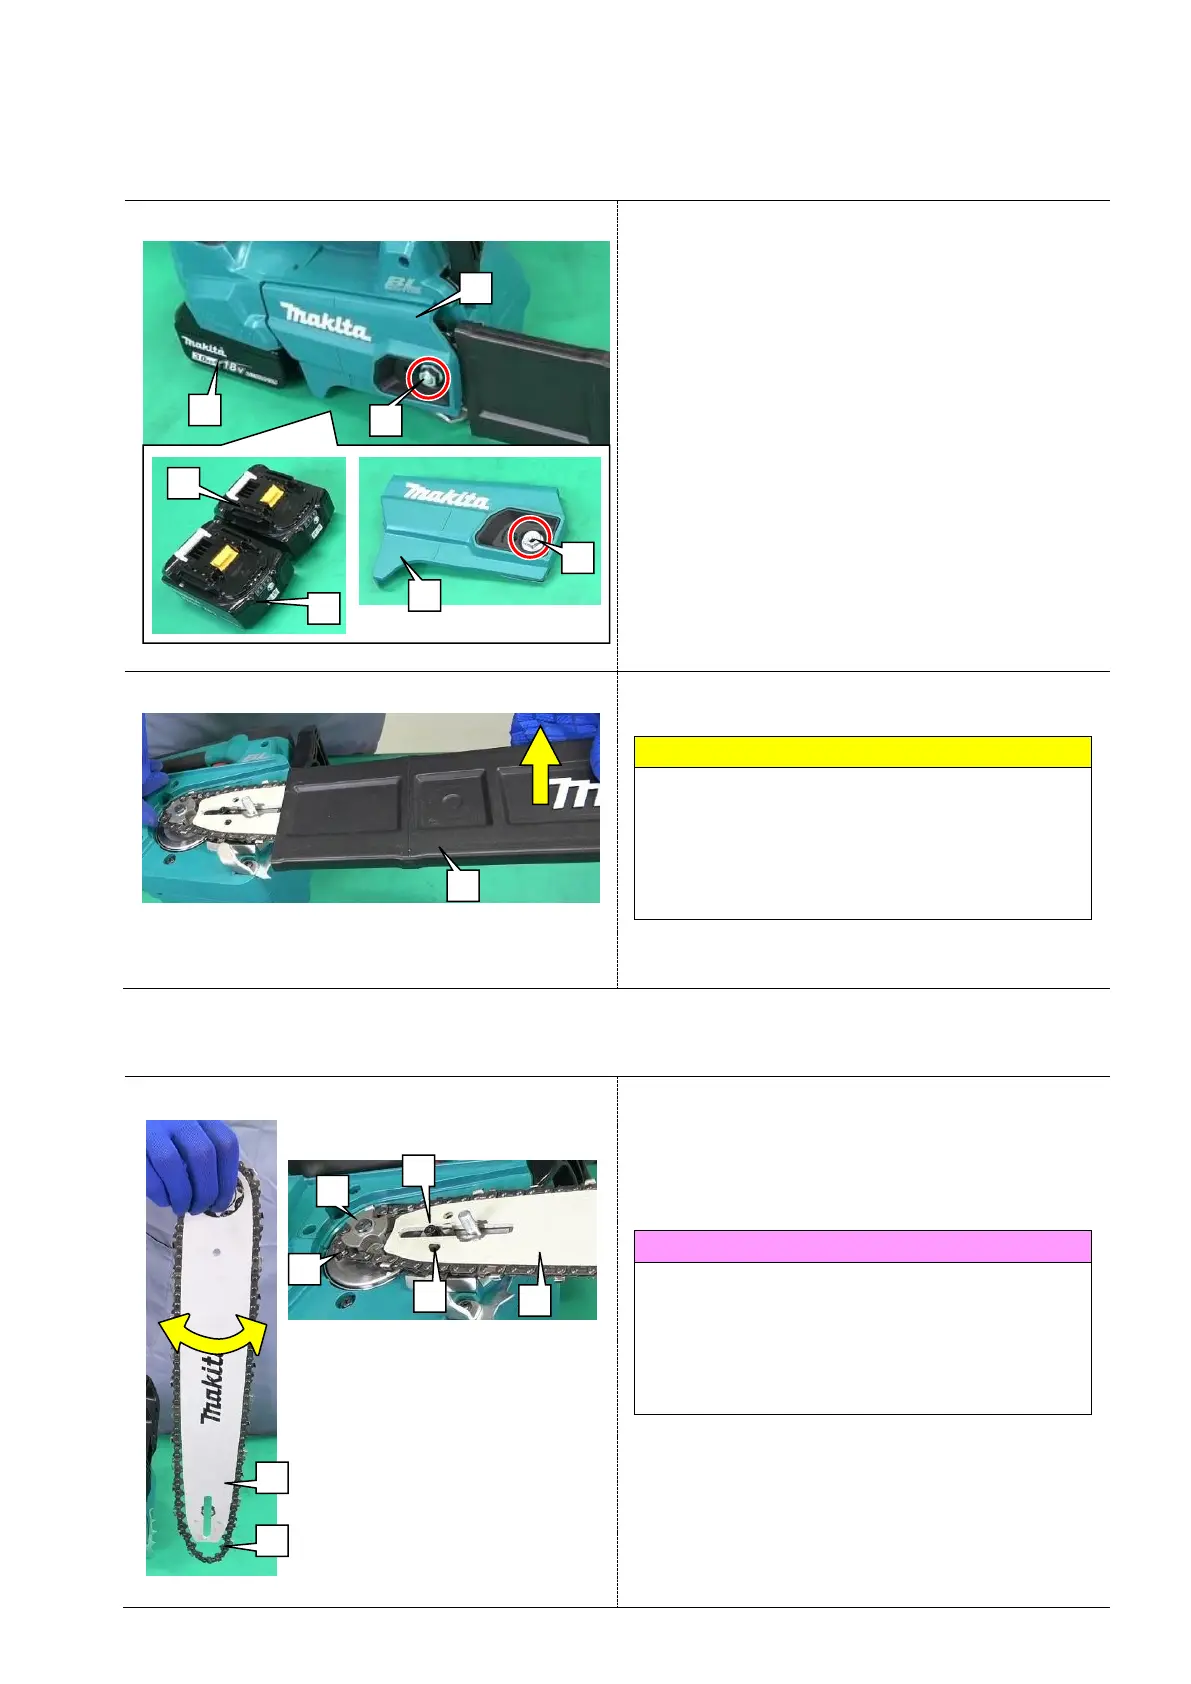
3 Lift up Saw chain section [1] and remove it.
Disassemble the machine after cleaning wood dust
etc. with a brush and an air duster.
Guide bar in all photos is not the actual one.
However, the removing/ assembling way is the
same.
1 Remove Guide bar case, then fit Saw chain [3] to
the grooves of Guide bar [1] and Sprocket 6 [2]
with care of the orientation in accordance with the
picture shown on Sprocket cover.
Pick up the top side of Guide bar [1] and swing the
rear side. Saw chain [3] can be fit into the groove of
Guide bar [1].
Adjust Drive gear [5] to put the hook of Tension
slide [4] into the lower hole of Guide bar [1].
 Loading...