32
5
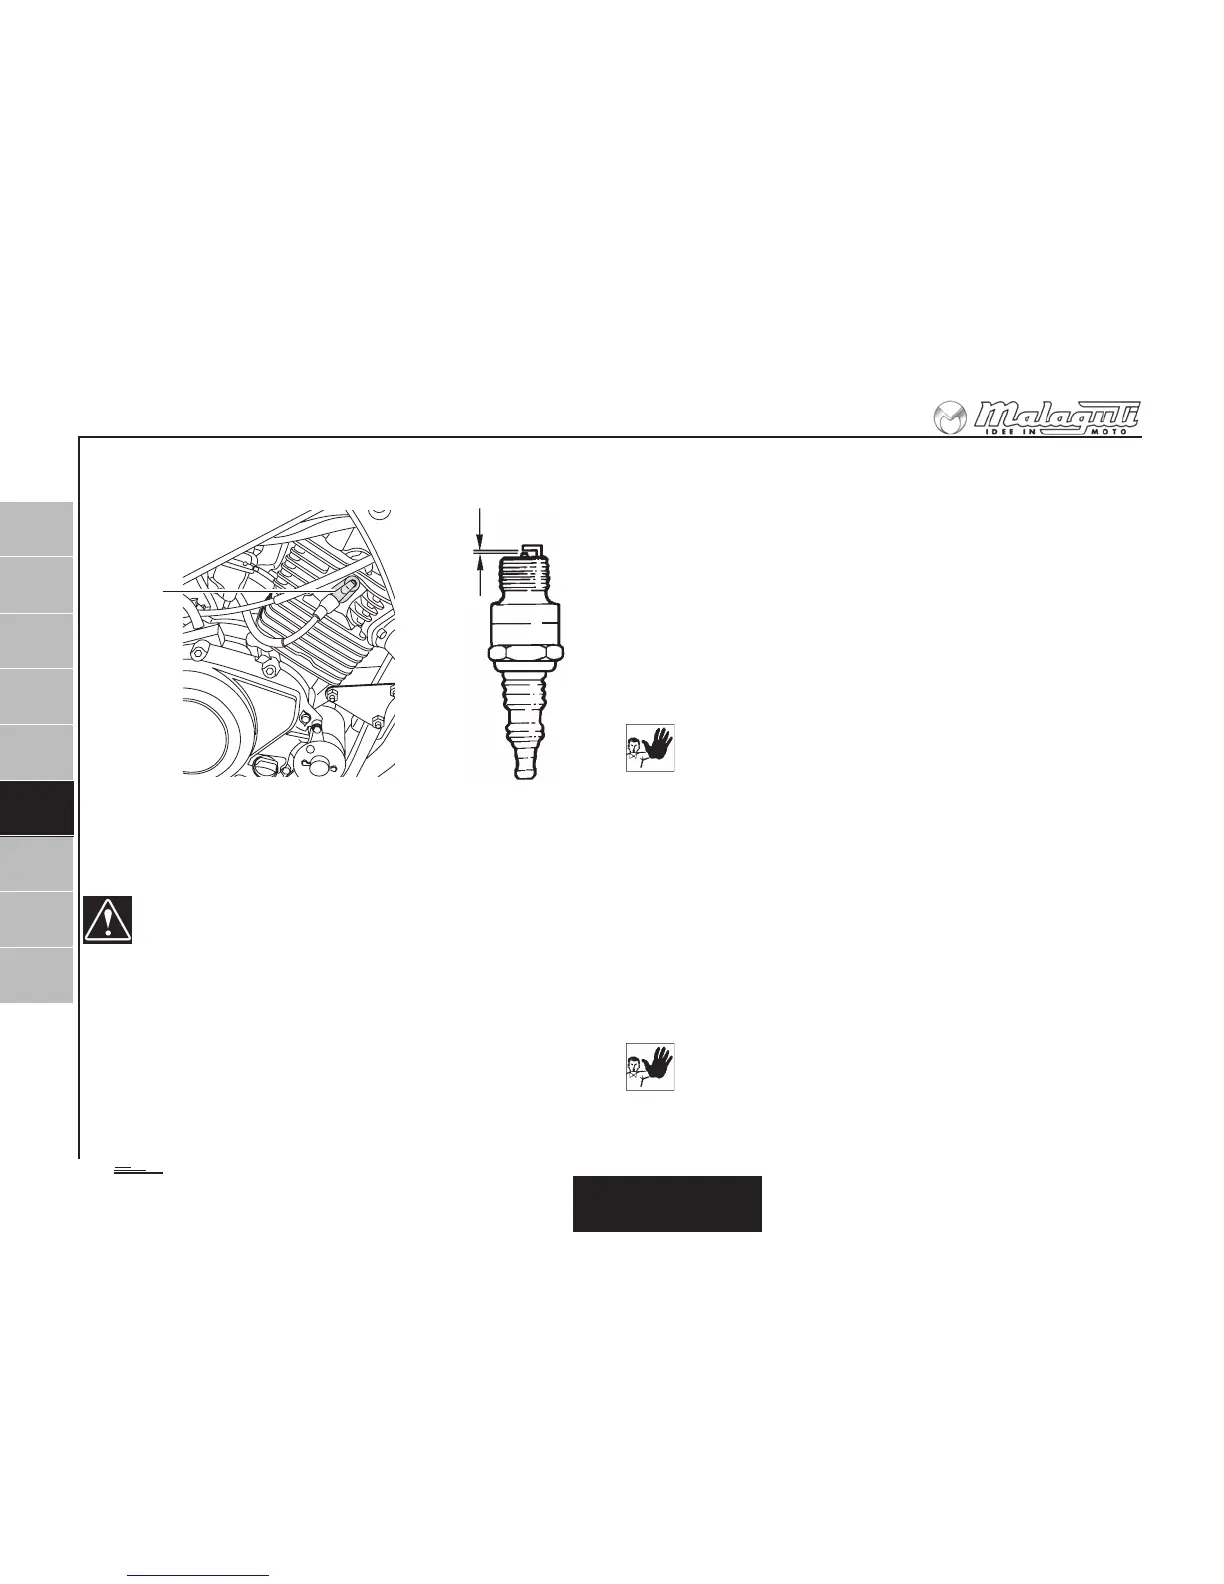
2
3
4
1
6
7
8
9
PERIODIC MAINTENANCE AND MINOR REPAIR
ENGLISH
C
0,6 mm
SPARK PLUG
Removing the spark plug
- Remove the spark plug cap.
- Uscrew the spark plug, C, with the wrench provided in the tool
kit, and remove it.
Spark plug servicing operations must be performed
when the engine is cold.
Inspection
Specified spark plug:
NGK CR7HSA or DENSO U22FSR-U
The spark plug is an important engine component.
• To service it, simply remove the plug cap and unscrew the plug
with the wrench supplied for this purposes.
• Examine the condition of the spark plug, since the deposits and
the colour of the insulator provide useful information about the
thermal rating of the plug, about carburation, lubrication and the
general condition of the engine.
•A light tan colour of the insulator around the centre electrode
indicates that engine is correctly functioning.
• If the spark plug shows a distinctly different colour, the engine
could be defective. Do not attempt to diagnose such problems
yourself. Instead have a MALAGUTI Dealer check the vehicle.
• Remove the spark plug and thoroughly clean its electrodes and
insulator, using a metal brush.
Adjust the gap between the electrodes with a thickness gauge:
the gap should be 0.6 mm.
Using spark plugs with thermal ratings differing from
those recommended can seriously damage the engine.
Spark plugs featuring cracked insulators or corroded
electrodes must be replaced.
Installing the spark plug
• Clean the surface of the gasket. Wipe off any grime from the
spark plug threads.
• Install the spark plug with the spark plug wrench, and then
tighten it to the specified torque.
Spark plug tightening torque:
12.5 Nm (1.25 kgm)
If a torque wrench is not available when installing a
spark plug, a good estimate of the correct torque is ¼
- ½ turn past finger tight. However, the spark plug
should be tightened to the specified torque as soon as
possible.
 Loading...