3-51
IT EN
648870 IT-EN-PL (04/05/2015)
D5/3 - Fuel prefilter and fuel filter:
replace filter elements
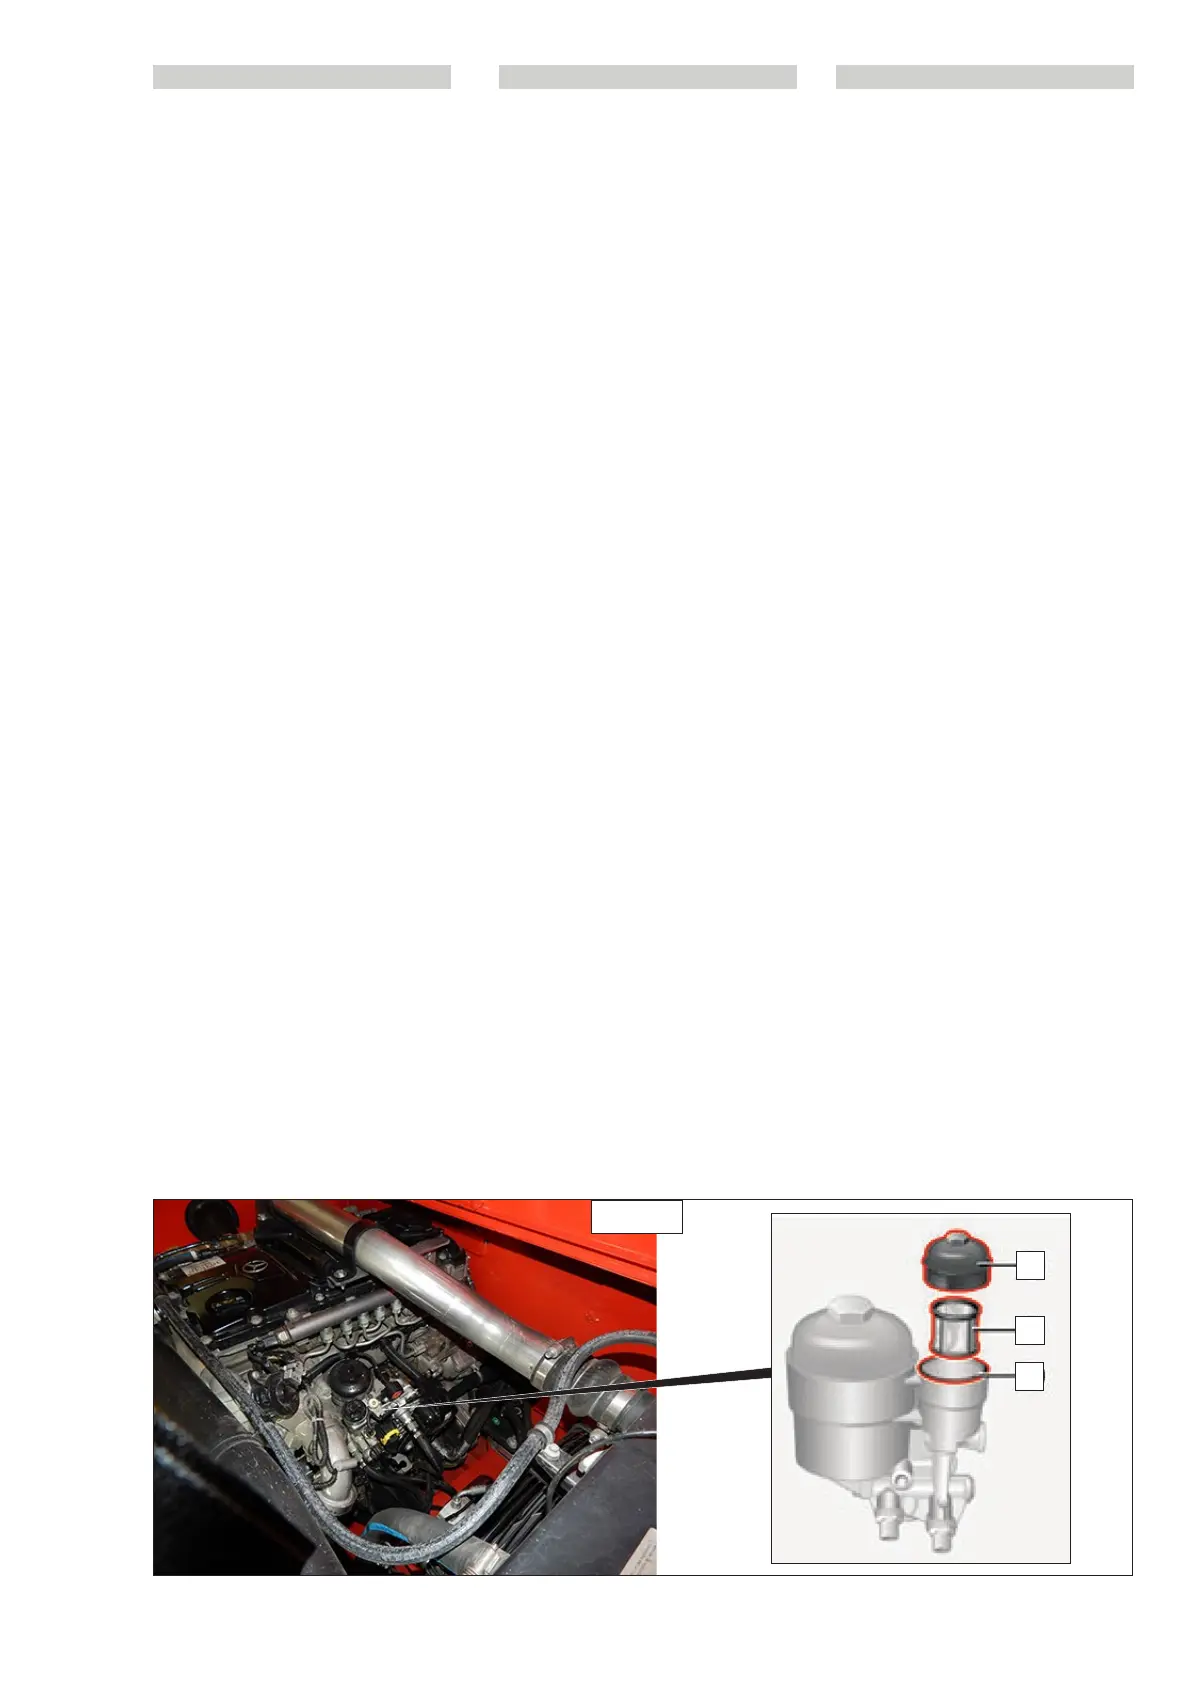
Clean the fuel pre-filter cartridge
Open the tank cap to discharge the over-
pressure inside.
Clean the outside of the fuel pre-filter,
keeping the ducts, hose pipes and cables
that
may be present under the pre-filter cove-
red.
Unscrew threaded cap “1” and remove it
from the filter casing together with filter
cartridge “2”(D5/3.1).
Clean threaded cap “1”(D5/3.1) and filter
cartridge “2”(D5/3.1).
If the filter cartridge is excessively dirty or
damaged, replace it.
Check the sealing ring “3”(D5/3.1) of the
threaded cap and replace it, if necessary.
Insert the filter cartridge in the threaded
cap and screw the latter back on the filter
casing.
Tightening torque: 25 Nm.
D5/3.1
2
3
1
D5/3 - Prefiltro del carburante e filtro
del carburante: sostituzione della
cartuccia dei filtri
Pulire la cartuccia prefiltro carburante
Aprire il tappo del serbatoio per far scarica-
re la sovrappressione presente all’interno.
Pulire esternamente il prefiltro del car-
burante, provvedendo alla copertura dei
condotti, dei tubi flessibili e dei cavi che
dovessero eventualmente trovarsi sotto il
prefiltro.
Svitare il tappo filettato “1” ed estrarlo dalla
scatola del filtro insieme alla cartuccia fil-
trante “2” (D5/3.1).
Pulire il tappo filettato “1”(D5/3.1) e la car-
tuccia filtrante “2” (D5/3.1).
Se la cartuccia filtrante è eccessivamente
sporca o danneggiata, sostituirla.
Controllare l’anello di tenuta “3”(D5/3.1)
per il tappo filettato ed eventualmente
sostituirlo.
Introdurre la cartuccia filtrante nel tappo
filettato e avvitare quest’ultimo nella scato-
la del filtro.
Coppia di serraggio: 25 Nm.
PL
D5/3 - Wstępny filtr paliwa i filtr paliwa:
wymiana wkładów filtrów
Wyczyścić wkład wstępnego filtra paliwa
-- Otworzyć korek zbiornika w celu obniże-
nia ciśnienia w panującego wewnątrz.
Oczyścić z zewnątrz wstępny filtr paliwa,
zakrywając kanały, giętkie przewody ruro-
we i kable, które ewentualnie znajdują się
pod filtrem wstępnym.
Odkręcić korek gwintowany “1” i wyjąć go
z obudowy filtra razem z wkładem filtrują-
cym “2” (D5/3.1).
Wyczyścić korek gwintowany “1” (rys.
D5/3.1) i wkład filtra “2” (rys. D5/3.1).
Jeżeli wkład filtra jest bardzo brudny lub
uszkodzony, wymienić go.
Sprawdzić pierścień uszczelniający “3” (rys.
D5/3.1) korka gwintowanego i ewentualnie
wymienić go.
Włożyć wkład filtra do korka gwintowane-
go i przykręcić korek do obudowy filtra.
Moment dokręcania: 25 Nm.
648870 IT-EN-PL (04/05/2015)