S
ection
8
Note: For the fi rst time start up of the generator, the
should be turned on. This is
important for higher voltage generators to insure connections are correct before damage is done. For
Note: Regulators without the ‘C’ option will skip
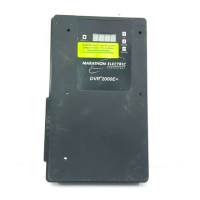
2000EC. If this regulator was obtained to allow paralleling with the Utility, then
This document will not provide the necessary instructions for paralleling with the Utility. If it is intended
that this regulator will be used on a stand-alone generator, then with
buttons to select the desired underfrequency setting. Table 2-11 in the
2000E manual will provide the complete range of settings. The selected setting is the frequency
at which the regulator will begin to reduce the operating voltage, as speed is reduced, to protect the
setting is 59 Hz. This is
and is correct for 60 Hz operation.
ange of 58.8 to 60.8 Hz. When the setting is increased from
, the setting will be 58.8.
Two additional pushes of the
button will increase the setting to
For 50 Hz operation, decrease the setting to 49 Hz. Push the
Push the down button 14 times.
will remain lit, but the se
buttons to adjust the setting according to the desire
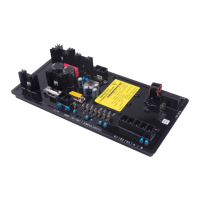
Note: 280 Frame stability must be set-up using a PC and DRV
(See Section 8, Set-Up From the Computer.)
w be blinking. This will save the
7.) The power source can now be removed from t
he regulator. The regulator can be connected
generator. The generator set can be started and brought up to rated speed. With
and 0 output, the generator ou
tput should be residual voltage. All line to line and line to n
or balance and equal voltages
to insure that everything is connected properly.