S
ection
8
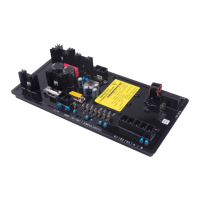
The regulator must be powered from an external source into terminals 3 and 4. This power can
generator PMG with the engine running or a 120 Vac wall outlet.
Before terminals 3 and 4 on the voltage regulator are connected to the PMG, the engine must be set for
1800 RPM for 60 Hz operation or 1500 RPM for 50 Hz operation. If the engine speed goes high the PMG
voltage will also go high, which can damage the voltage regulator.
1. Connect the computer to the voltage regulator with a straight serial cable (no null modem).
2. Ground the regulator with the ground terminal. No other wires should be connected to the regulator at
this time. When power is applied to the regulator, LED 2, Loss of Sensing, should be blinking.
2000E computer program on the computer. Click on
from the drop down menu, then move over and click on
. The default settings on the
normally acceptable. Press
to proceed with the default settings. If everything is working
properly, a series of small windows will open to show that information is being uploaded from the voltage
regulator. Every time a screen is changed on the computer, new data will be read from the voltage
regulator to insure that the screen is up to date.
in the top tool bar and then click on
in the drop down menu. Click
the data. In the window that opens, type the name of the fi le that is appropriate for the installation. Click
. By saving the data before any changes are made allows the user to refer back to the default
settings if necessary. To print the settings for future reference, click on
in the top tool bar and then
button and fi ll in the requested data to add to the print out to identify the
specifi c unit. Then click
Note: For the following steps below for any window on the computer screen that requires data entry (fi elds with
white or green colored background), double clicking on the window will provide a list of the acceptable values.
After a number is changed in a window, press ‘Enter’ to send data to the regulator.
5. The fi rst screen to appear is the
screen. In the upper left area of the screen
section, identify whether the
‘Sensing Voltage’ section, identify whether the ‘Sensing Voltage’
generator will be three phase or single phase
by clicking on the circle next to
. In the top center under
enter the nominal value that the regulator will see on its sensing terminals.
Sensing Voltage (V)’ enter the nominal value that the regulator will see on its sensing terminals. Sensing Voltage (V)’
to the output leads of the generator it will sense the rated generator voltage. If it is
connected to the midpoint of the generator leads it will sense one-half of the rated generator voltage. If it is
connected to the secondary of a sensing transformer it will sense the secondary voltage of the
transformer. If a sensing transformer is used, enter the ratio of the sensing transformer (480:120 has
indow. If a CT is used it must have a secondary rating of 5
amps. Enter the CT ratio (500:5 has a ratio of 100) in the
‘Generator CT Ratio’ window.‘Generator CT Ratio’