7
Nº326S Preamplifier Phono Modules Installation Instructions & Release Notes
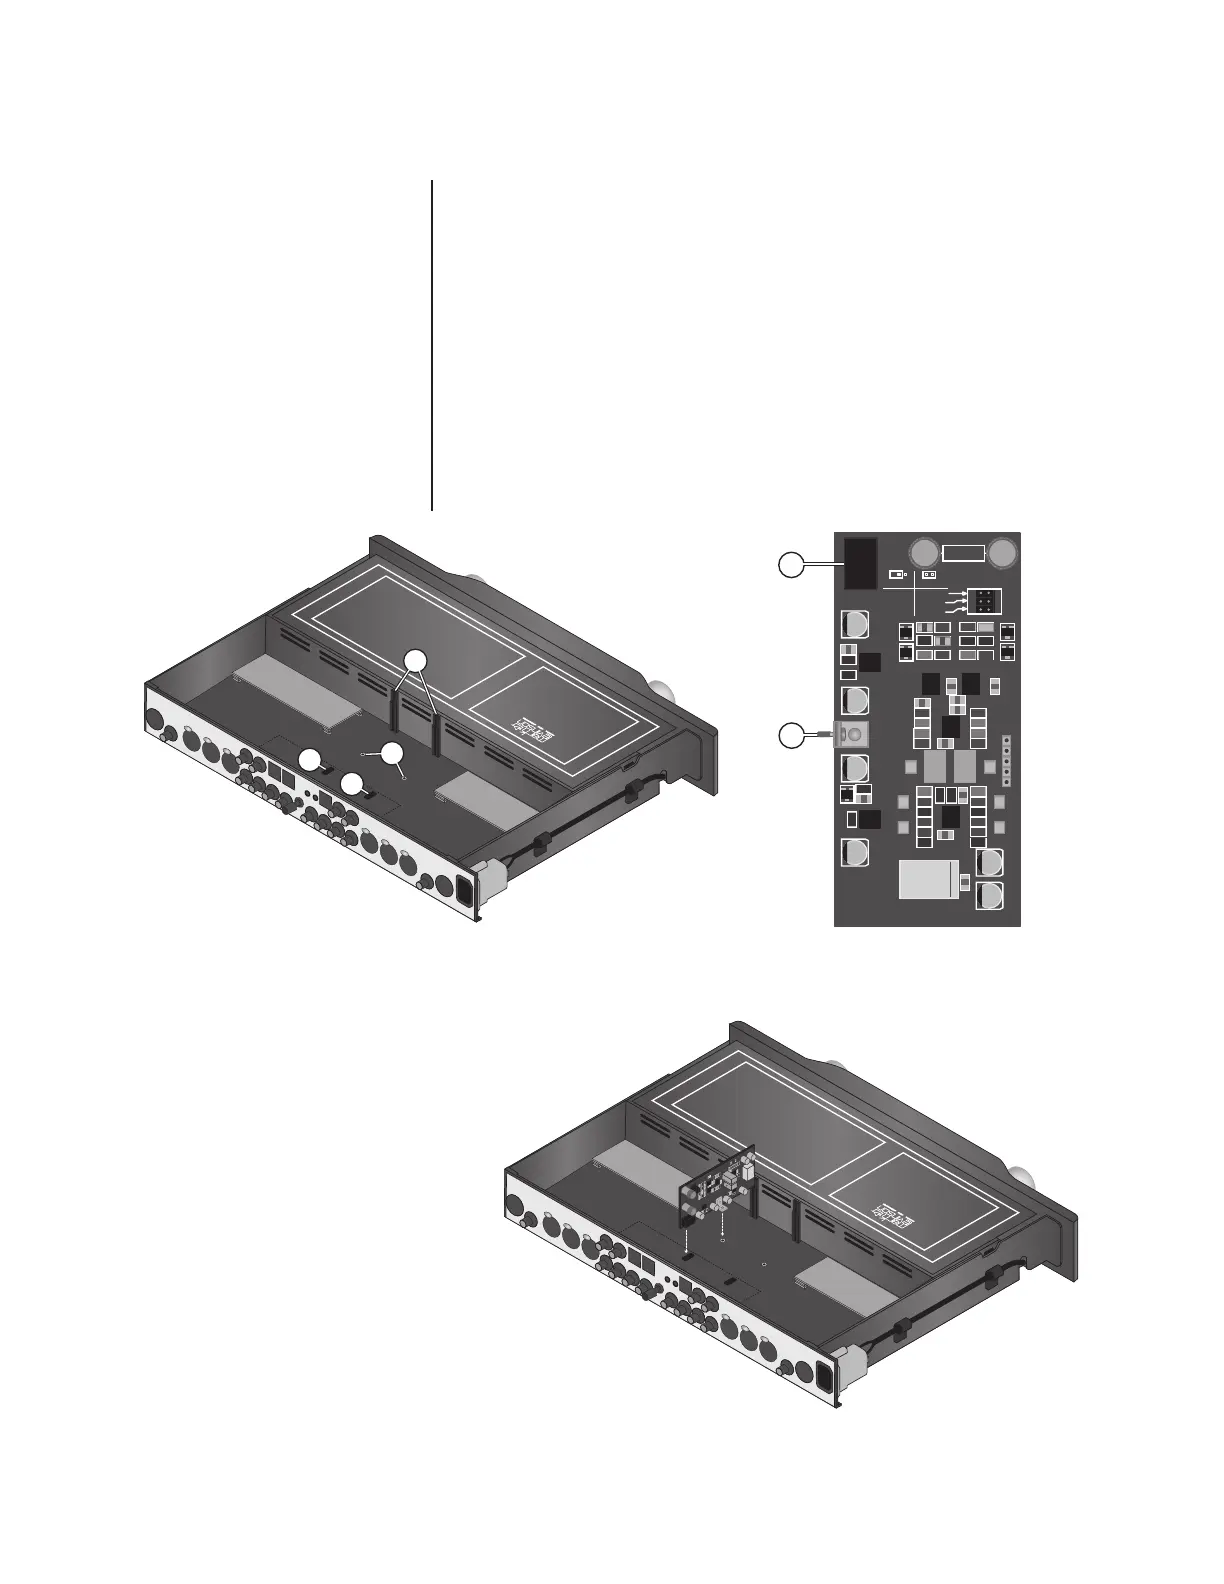
8. Gently slide one of the phono
modules into the left-most
insertion slot (A) as shown in
the illustration to the right.
The socket at location P10 (E)
on the phono module will
connect with the plug at
location P500 (D) on the
main circuit board, and the
phono module mounting
bracket (F) will align with the
mounting terminal (B) on the
main circuit board.
7. Refer to illustrations shown below to locate the following:
A. Phono module insertion slots
B. Phono module mounting terminals
C. Location P300 (plug)
D. Location P500 (plug)
E. Location P10 (socket)
F. Phono module mounting bracket and screw