17
Adding a Light
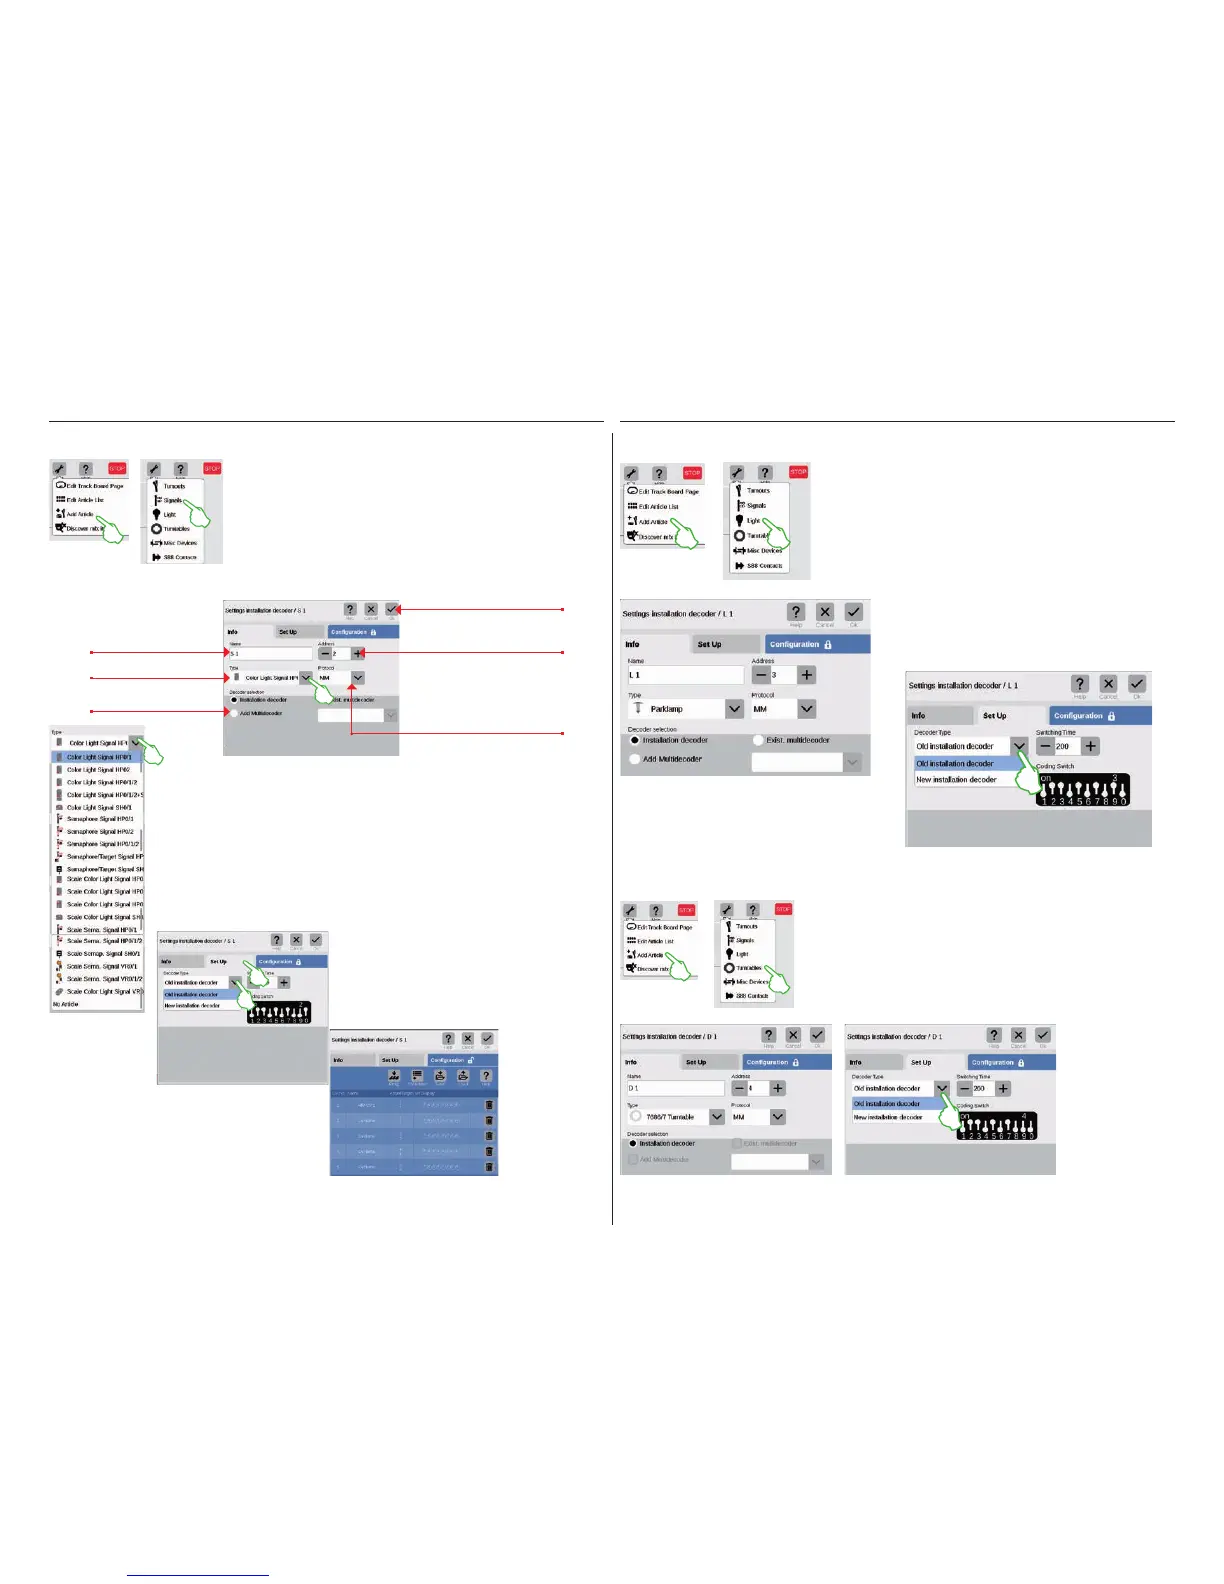
A new light item is quickly set up: A drop-down menu opens
with a tap of your finger on the tool symbol for the item list
(„Edit“). Here you select „Add Article“. Tap on „Light“ (images
to the left) in the menu that opens.
Now, all of the settings (name, address, type,
protocol, decoder, or type of decoder, and switch-
ing duration) can be edited: in the tabs „Info“ (left
image) and „Set Up“ (lower image).
The tab „Con-
figuration“ is
intended for
experts and is
not relevant for
normal operation.
Tap in the item list on the tool symbol and select „Add Article“ (left
image) in the drop-down menu that opens in order to set up a signal.
Then tap on „Signals“ (right image) and open the settings (lower
image).
You can do other settings in the
tab „Set Up“. Here you select
the type of decoder and you
can also change the switching
duration.
Adding a Signal
Here you can set the details for the new signal item:
You determine the type of signal by means of a
drop-down menu that you open up with a tap of
your finger. Different signal variations are there
ready to be selected.
Adding a Turntable
Now you have
access to all of
the settings in the
tabs „Info“ (name,
address, type,
protocol, and de-
coder) (left image)
and „Set Up“ (type
of decoder and
switching duration)
(right image).
A turntable is also easily put into the item list: A drop-down menu opens
with a tap of your finger on the tool symbol for the item list („Edit“). Here
you select „Add Article“ (left image). Tap on „Turntables“ in the menu
that follows.
Name the signal.
Select decoder.
Select the type of signal.
Tap on „Ok“ adds the
signal.
Select the protocol.
Set the address – if it is shown
in red, the address is already
assigned.