24 MAC Viper Performance Safety and Installation Guide
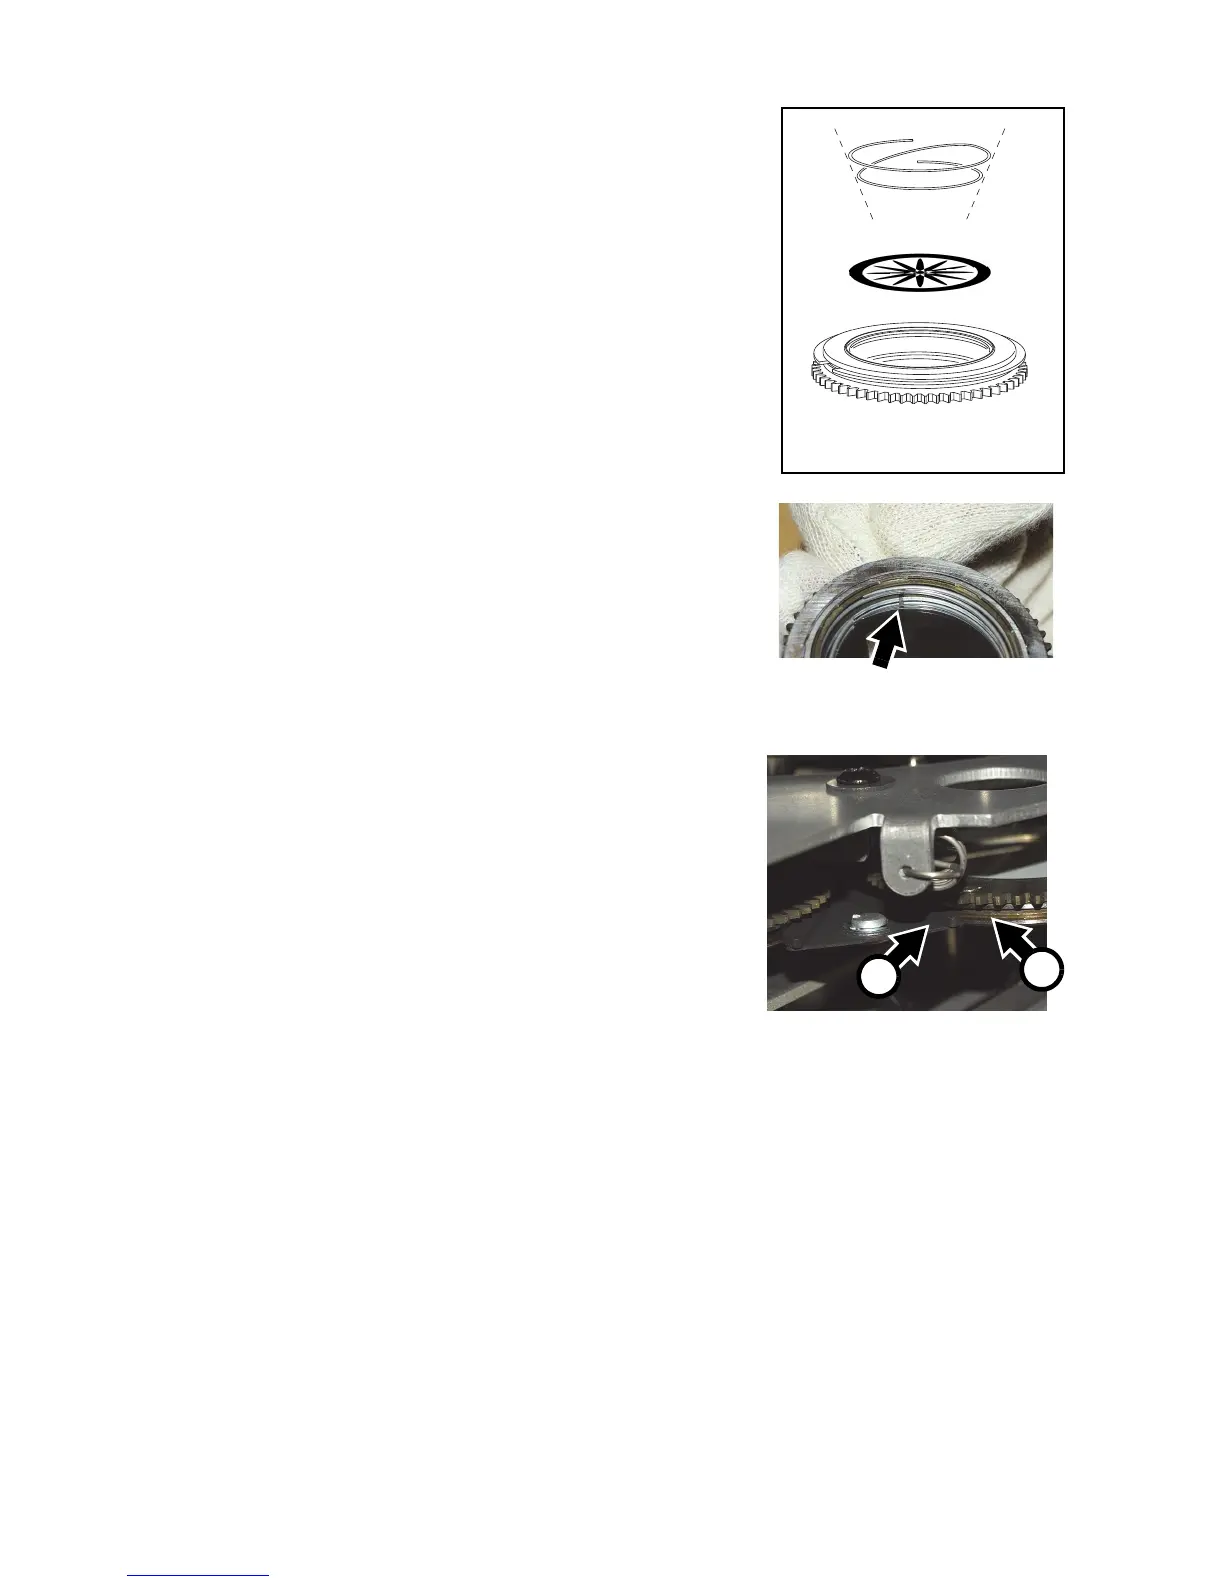
8. See Figure 22, With a small screwdriver or similar, unhook the
end of the gobo spring furthest from the gobo and pull out the
spring. Drop the gobo out of the holder onto a clean, soft
surface.
9. Insert the new gobo in the holder with that must face towards
the lamp – the more reflective side – facing upwards towards the
spring (see Figure 22 and Figure 19).
10. See Figure 23. Rotate the gobo in its holder if necessary to
line up the alignment marks (arrowed) in the gobo and
goboholder.
11. Insert the spring with the narrow end against the gobo, as
shown in Figure 22. To identify the narrow end, press the
spring flat: the narrow end is on the inside. Push the wide end
of the spring in under the lip of the holder.
12. Check that the gobo is seated flush against the holder. Press
the spring as flat as possible against the back of the gobo.
13. See Figure 24. Push the goboholder back into its clip so that
the jaws A of the clip engage in the groove B around the
goboholder and the magnet lines up with your reference
point. Rotate the goboholder with a finger to check that it is
correctly held in the clip and that the goboholder teeth mesh
correctly in the teeth of the actuation cog in the center of the
gobo wheel.
14. If necessary, continue replacing gobos one by one as
described above.
15. If no further service work is to be carried out, reinstall the
module and head covers as described in “Access to the
framing module” on page 18 and “Access to the head” on
page 17. Release the tilt lock before reapplying power.
Replacing color filters
The MAC Viper Performance has seven dichroic color filters. See the MAC Viper Performance User Guide
available for download from www.martin.com for names and part numbers.
Use only genuine Martin™ color filters. Handle and store filters with care. Wear cotton gloves while handling
them and keep them perfectly clean.
To replace a color filter:
1. Disconnect the fixture from power and allow it to cool for 30 minutes.
2. Remove the head covers, position the head with the front glass angled downwards and the top side
facing upwards, and apply the tilt lock (see “Access to the head” on page 17).
3. Remove the framing module from the head (see “Access to the framing module” on page 18).
4. See Figure 25. Turn the color wheel A until the filter that you want to replace B is accessible. Put on
clean cotton gloves and hold the filter near its outer edge between finger and thumb. Push the outer
 Loading...