Figure 9
Figure 8
Mounting Ring
Screws
• Align the screw holes of the mounting ring with the holes
(7.5mm) on mounting template and insert the screws through
the false ceiling as illustrated in Figure 8.
• It is recommended to use M4 Pan-PH screws of length 35mm.
• Tighten the screws.
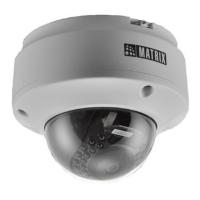
• Finally fix the Camera to the mounting ring as illustrated in
Figure 9.
Step 3: IP66 Protection Accessory Installation
1. By default your camera contains the LAN connector fitted by IP66
protection accessory.
3. Rotate the middle part of IP66 assembly in anticlockwise direction
to detach the IP66 accessory from the LAN connector.
2. The IP66 protection assembly consist of tail end, middle part,
“IO” ring and LAN connector as shown below.
Tail end
Middle
Part
“O”ring
LAN
Connector
Power cable
IP66 protection accessory
14
13
 Loading...