25
CHAPTER 8: PART REPLACEMENT GUIDE
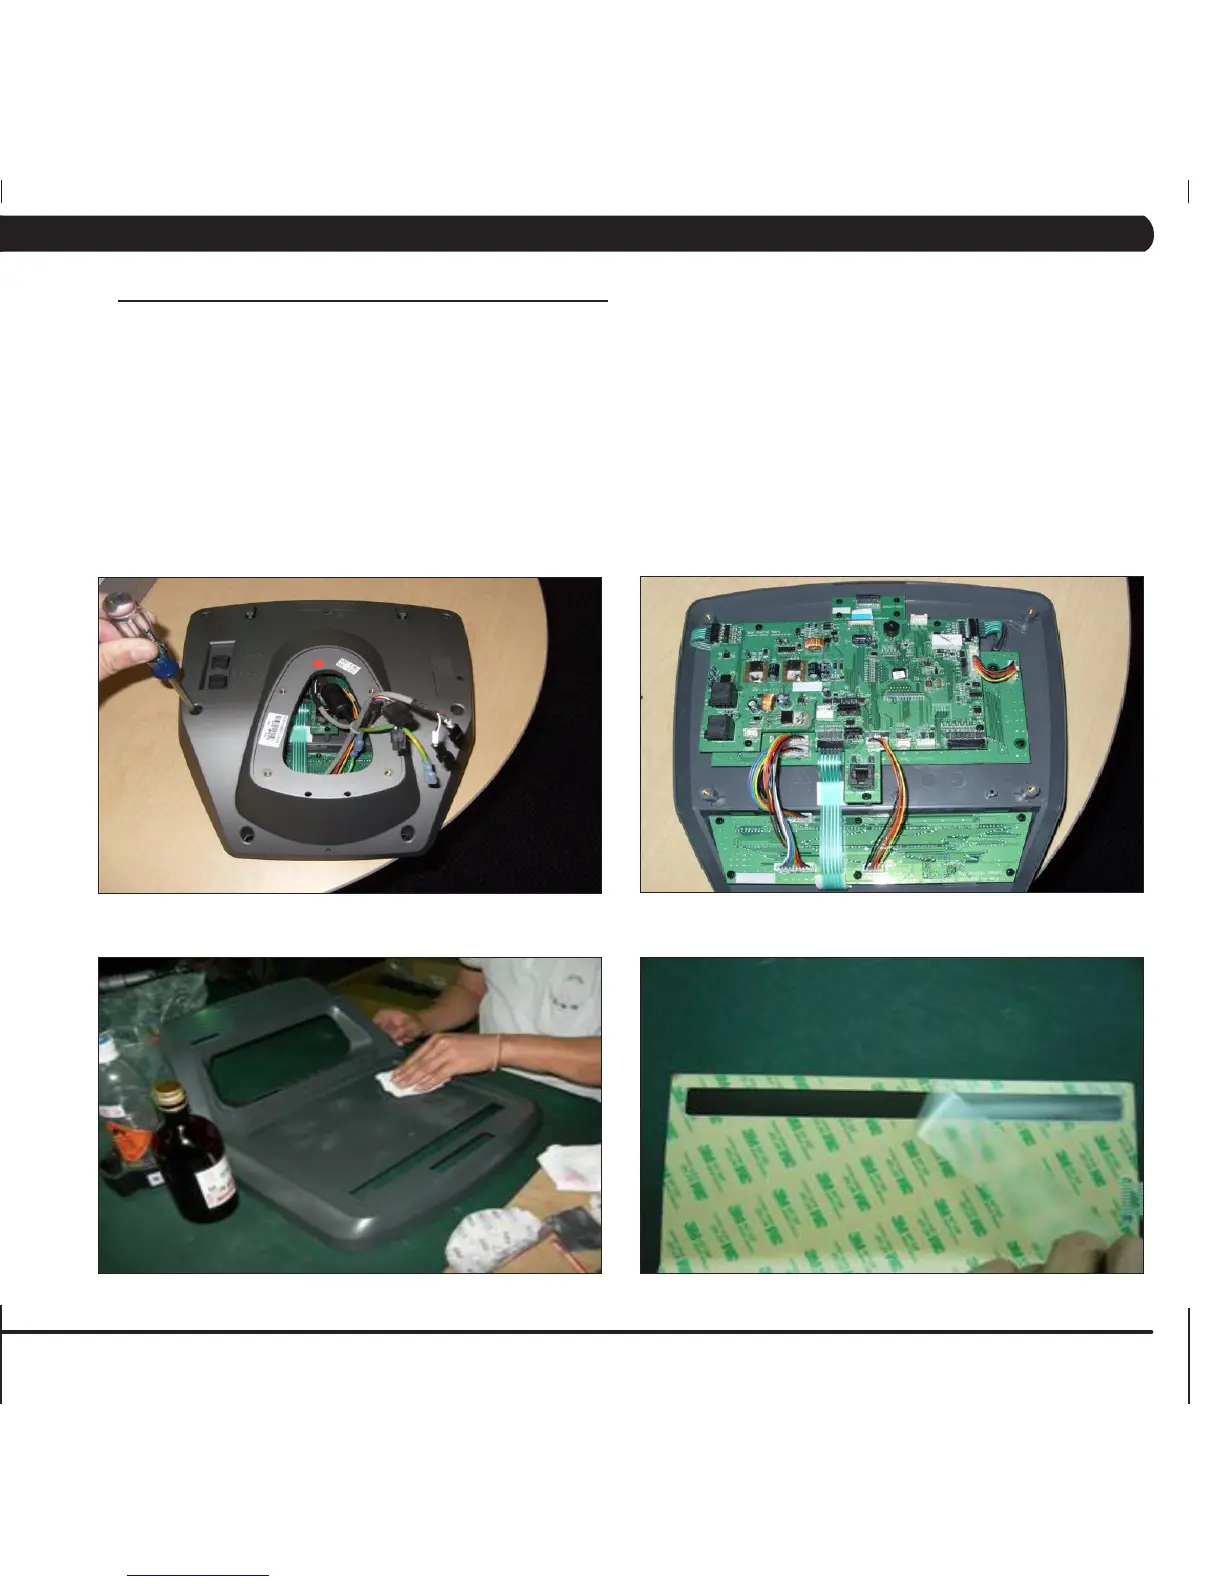
8.5 CONSOLE KEYPAD / OVERLAY REPLACEMENT
1) Remove the console as outlined in Section 8.1.
2) Remove the back cover of the console (Figure A).
3) Unplug and remove the faulty overlay (Figure B).
4) Clean the console area with alcohol to remove any left over adhesive (Figure C).
5) Remove the protective film over the display window of the overlay (Figure D).
6) Peel part of the protective film from the back of the overlay (Figure E).
7) Push the overlay ribbon cable through the hole in the console and plug it in (Figure F).
8) Match the overlay to the cutout on the console (Figure G).
9) Press down on the corners of the overlay to keep it in place, then remove the protective film (Figure H & I).
10) Once the overlay is in the correct position, press down on the overlay with a cloth to adhere it to the console plastic (Figure J).
11) Use the same procedure to replace any additional faulty overlays. NOTE: Overlays can not be reused.
12) Test the bike for function as outlined in Section 8.20.
FIGURE A
FIGURE B
FIGURE C
FIGURE D