44
Introduction &
Contents
Installing your
VCR
Setting up your
VCR
Playing a
Video Tape
Recording
Programmes
Advanced
Features
Help and
Specification
••
•• If your VCR is connected to a TV using a SCART lead, a video played
will automatically be displayed on the TV irrespective of the channel
you are watching (unlike "normal" RF aerial connection where you
must use a nominated channel).
••
•• The AV button your VCR provides a convenient method of switching
between an appliance connected to the SCART socket (e.g. a Satellite
Receiver) or TV stations received by your 'normal' aerial connected to
the AERIAL SOCKET of your VCR.
••
•• If you do not have anything plugged into the SCART SOCKET of your
VCR and you press AV the screen will go blank. Press AV again and
your TV will display the last station viewed on your VCR.
••
•• It is an infringement of the Copyright, Designs and Patents Act 1956,
1988 chapter 48 and the Performers Protection Act 1958-72 to copy
Records, Pre-recorded cassettes, Pre-recorded video tapes and
compact discs or to re-record them in any form without permission of
the Copyright owners.
21 Pin SCART socket
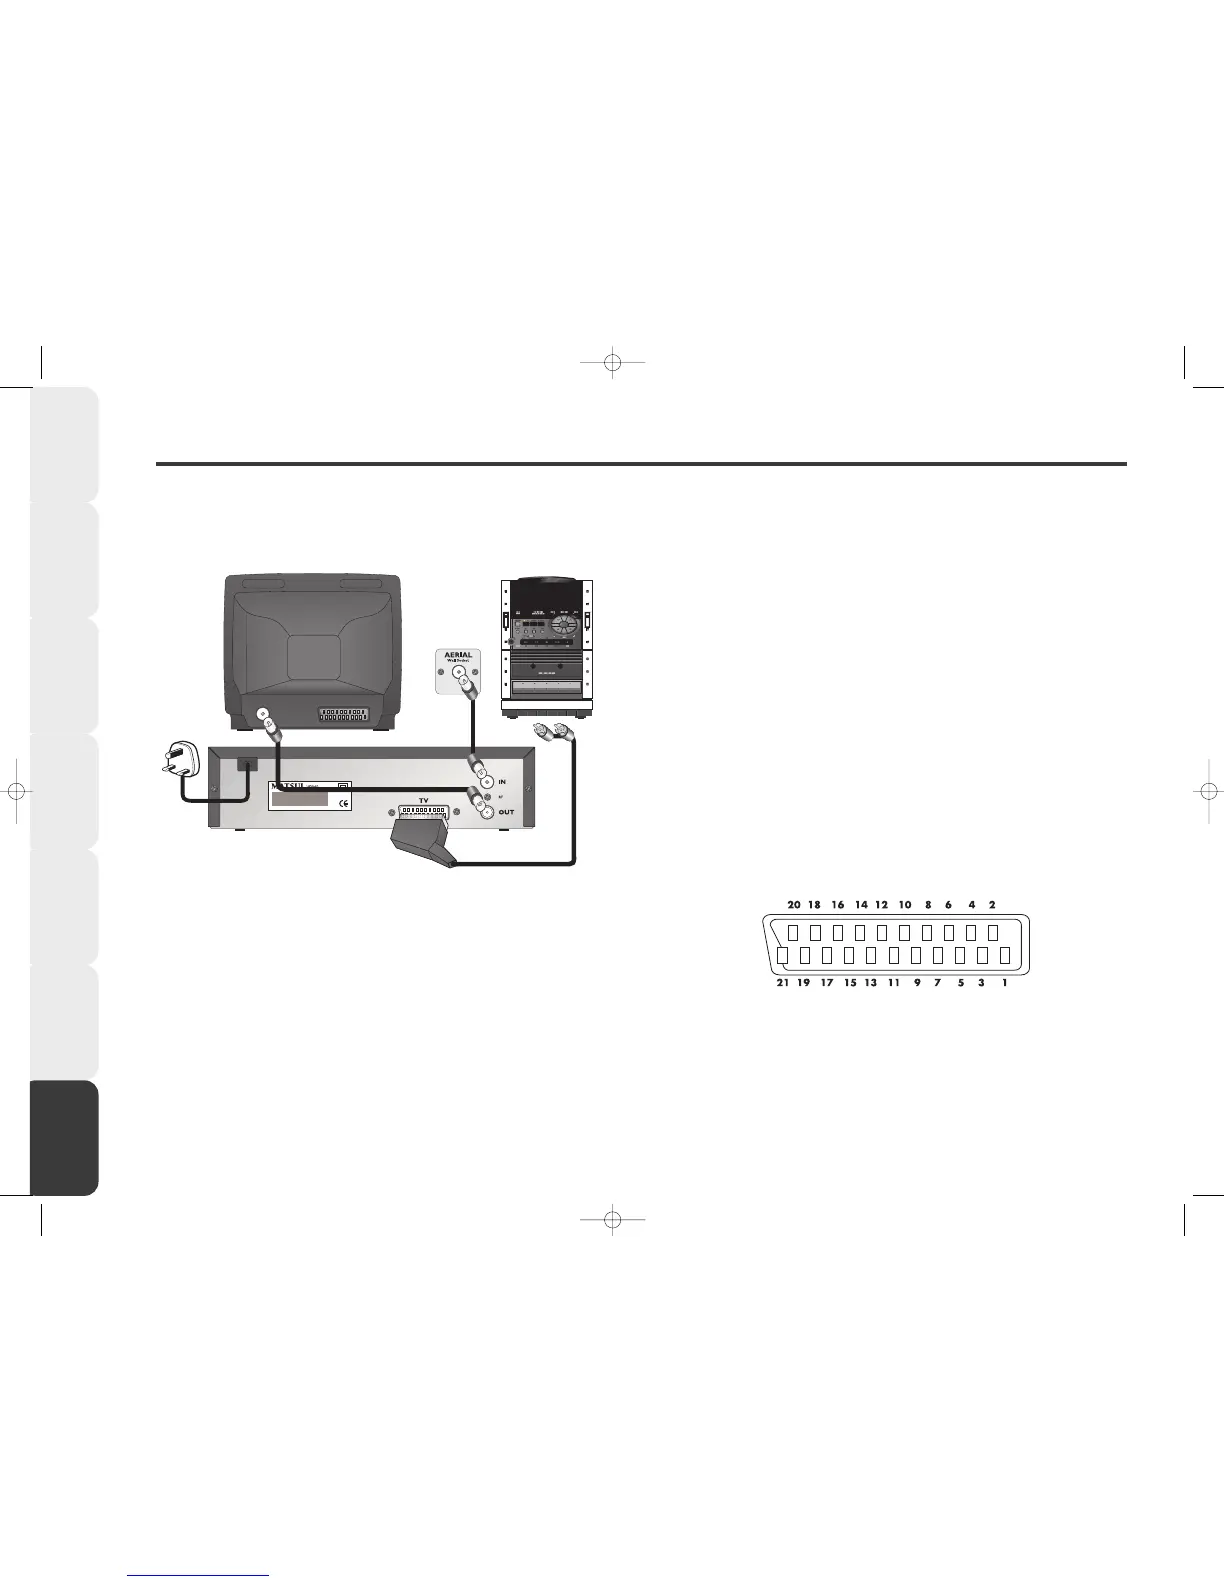
How to connect your VCR to a Hi-Fi
You can connect your VCR directly to your Hi-Fi with an audio (phono) lead.
11
11 All connections must be made with both your VCR and Hi-Fi unplugged
from the mains supply.
22
22 Connect one end to the SCART socket on the back of your VCR.
33
33 Connect the other end to the AUDIO IN sockets on the back of your Hi-Fi.
44
44 Press the PLAY button on your VCR to play the video sound track
through the speakers of a Hi-Fi system. The sound from your VCR
through your Hi-Fi will be mono not stereo.
55
55 Due to the wide variety of Hi-Fi equipment, the information on this
page should be used only as guidance. Refer to your Hi-Fi's
Instruction Book for more details.
Connecting to a Hi-Fi and SCART Socket Information
1. Audio output (right)
2. Audio input (right)
3. Audio output (left)
4. Audio earth
5. Blue earth
6. Audio input (left)
7. Blue In
8. Switching voltage (put)
9. Green earth
10. Date line 2
11. Green In
12. Date Line 1
13. Red earth
14. Reserved
15. Red In
16. Blanking signal
17. Video earth
18. Blanking signal earth
19. Video output
20. Video input
21. Shield/earth