44
© 11.2023
If the outlet pressure remains stable during operation and the regulator reacts as desired, continue with item 4.
If the outlet pressure still varies, the installation process of the baffle plate (item 11) can be repeated.
If this still doesn't give the desired result, the installation process can be repeated with the baffle plate (item 12).
If the outlet pressure remains stable during operation and the regulator reacts as desired, continue with item 4.
If this procedure is not successful, contact MEDENUS to find out other solution options.
The restriction must not make the regulator so sluggish that the SSV drops when starting or switching off the gas
regulation section.
4. Put the baffle and restrictor plates that are not required back into sealing cap (item 7) and screw down the locking
screw (item 8). Seal the spring cap (item 4) of the regulator as prescribed using the sealing cap (item 7). After
completion of all of the work, a leakage test must be performed on the gas regulation section.
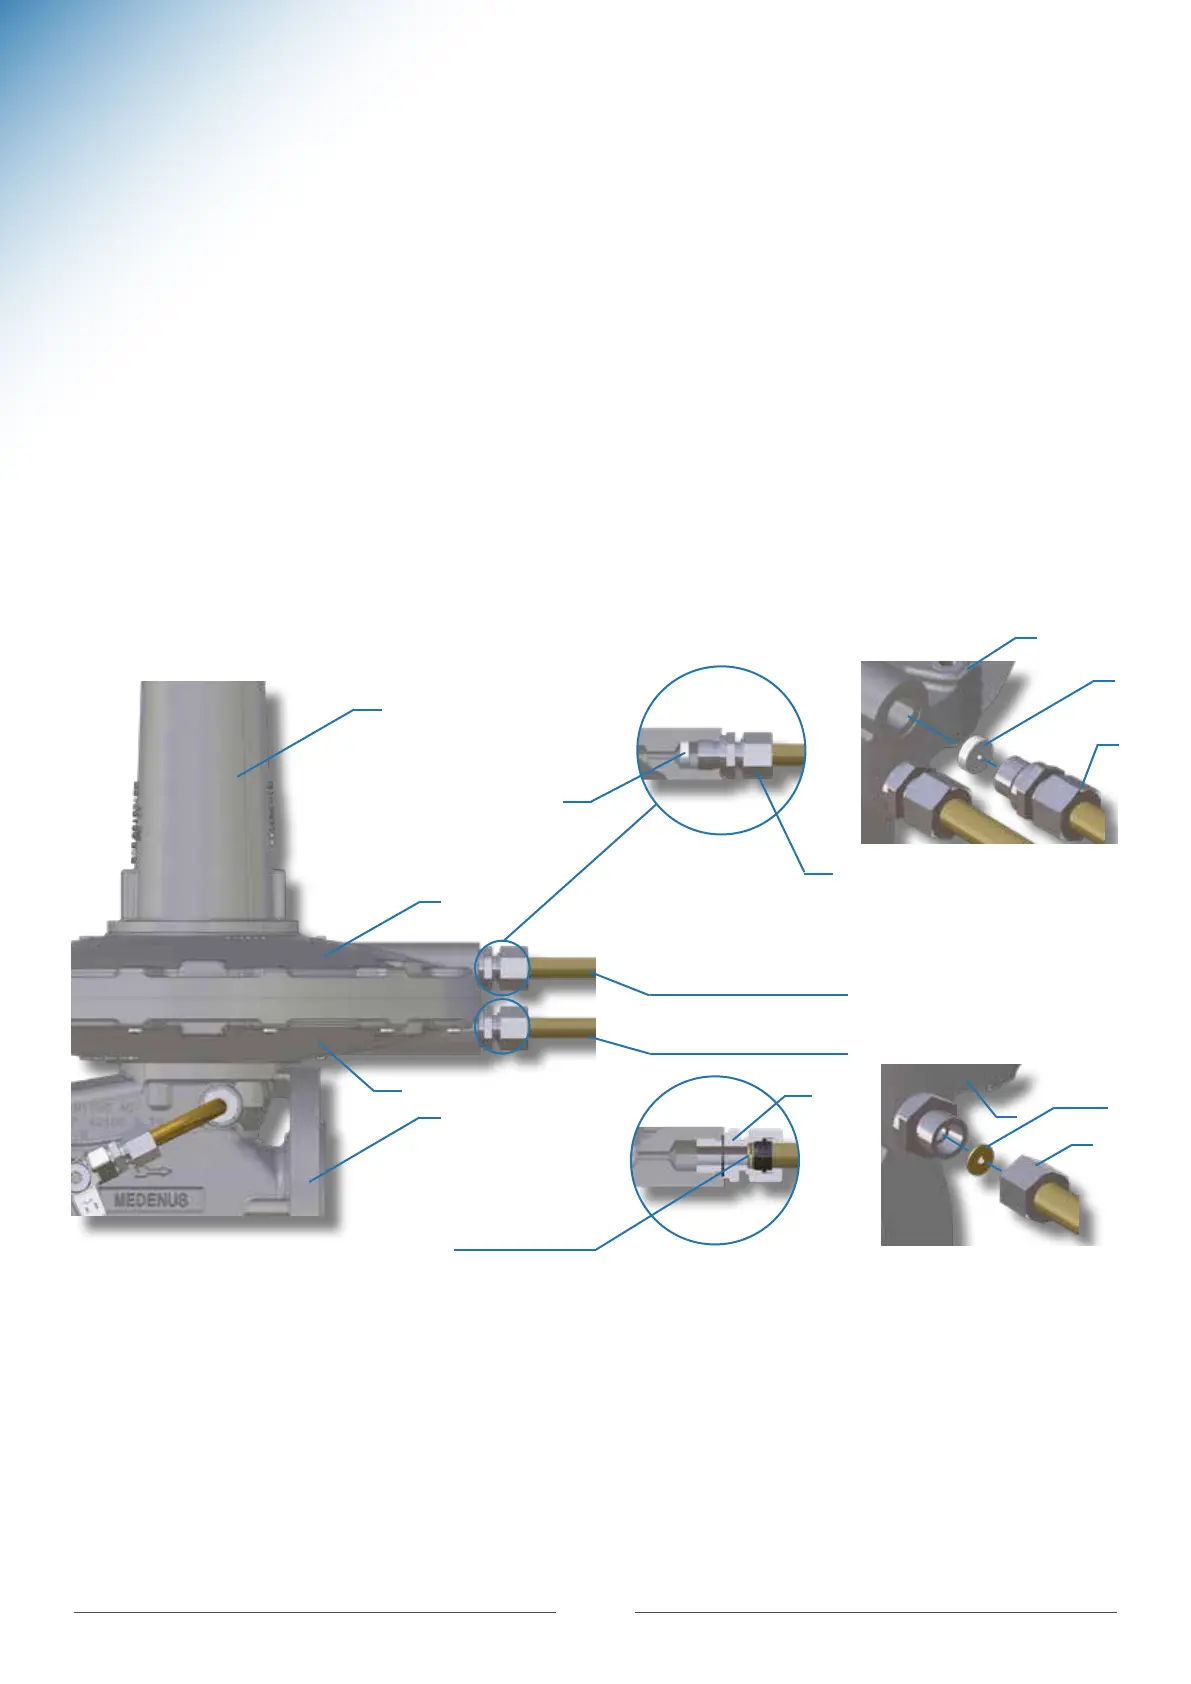
Breather connection
Impulse connection
4
3
9
5
3
9
5
1
2
10-12
6
2
6
10-12
Baffle plate
Ø 3mm item 10
Ø 2mm item 11
Ø 1mm item 12
Legend
1. Housing
2. Diaphragm cover bottom
3. Diaphragm cover top
4. Spring cap
5. Ermeto screw fitting breather connection
6. Ermeto screw fitting pulse connection
7. Sealing cap
8. Lock screw
9. Restrictor plate
10. Baffle plate Ø 3mm
11. Baffle plate Ø 2mm
12. Baffle plate Ø 1mm
 Loading...