MVR/MVRPRO-UG01-EN-200727
<17>
MVR / MVR Pro User Guide - English
Changing Input Signals in Live View = Multi Input
If two cameras are being connected, MVR / MVR Pro detects both input resolutions and displays an additional
icon on the monitor. You have the option to change between Input 1 and Input 2 at any time during one imaging
session (patient study). Any active video recording must be stopped rst.
• By using a touchscreen monitor simply tap on the Input button to toggle between both signals.
• Alternatively, you can use the remote control button for toggling the Input.
• [USB keyboard: Pressing “c” has the same function.]
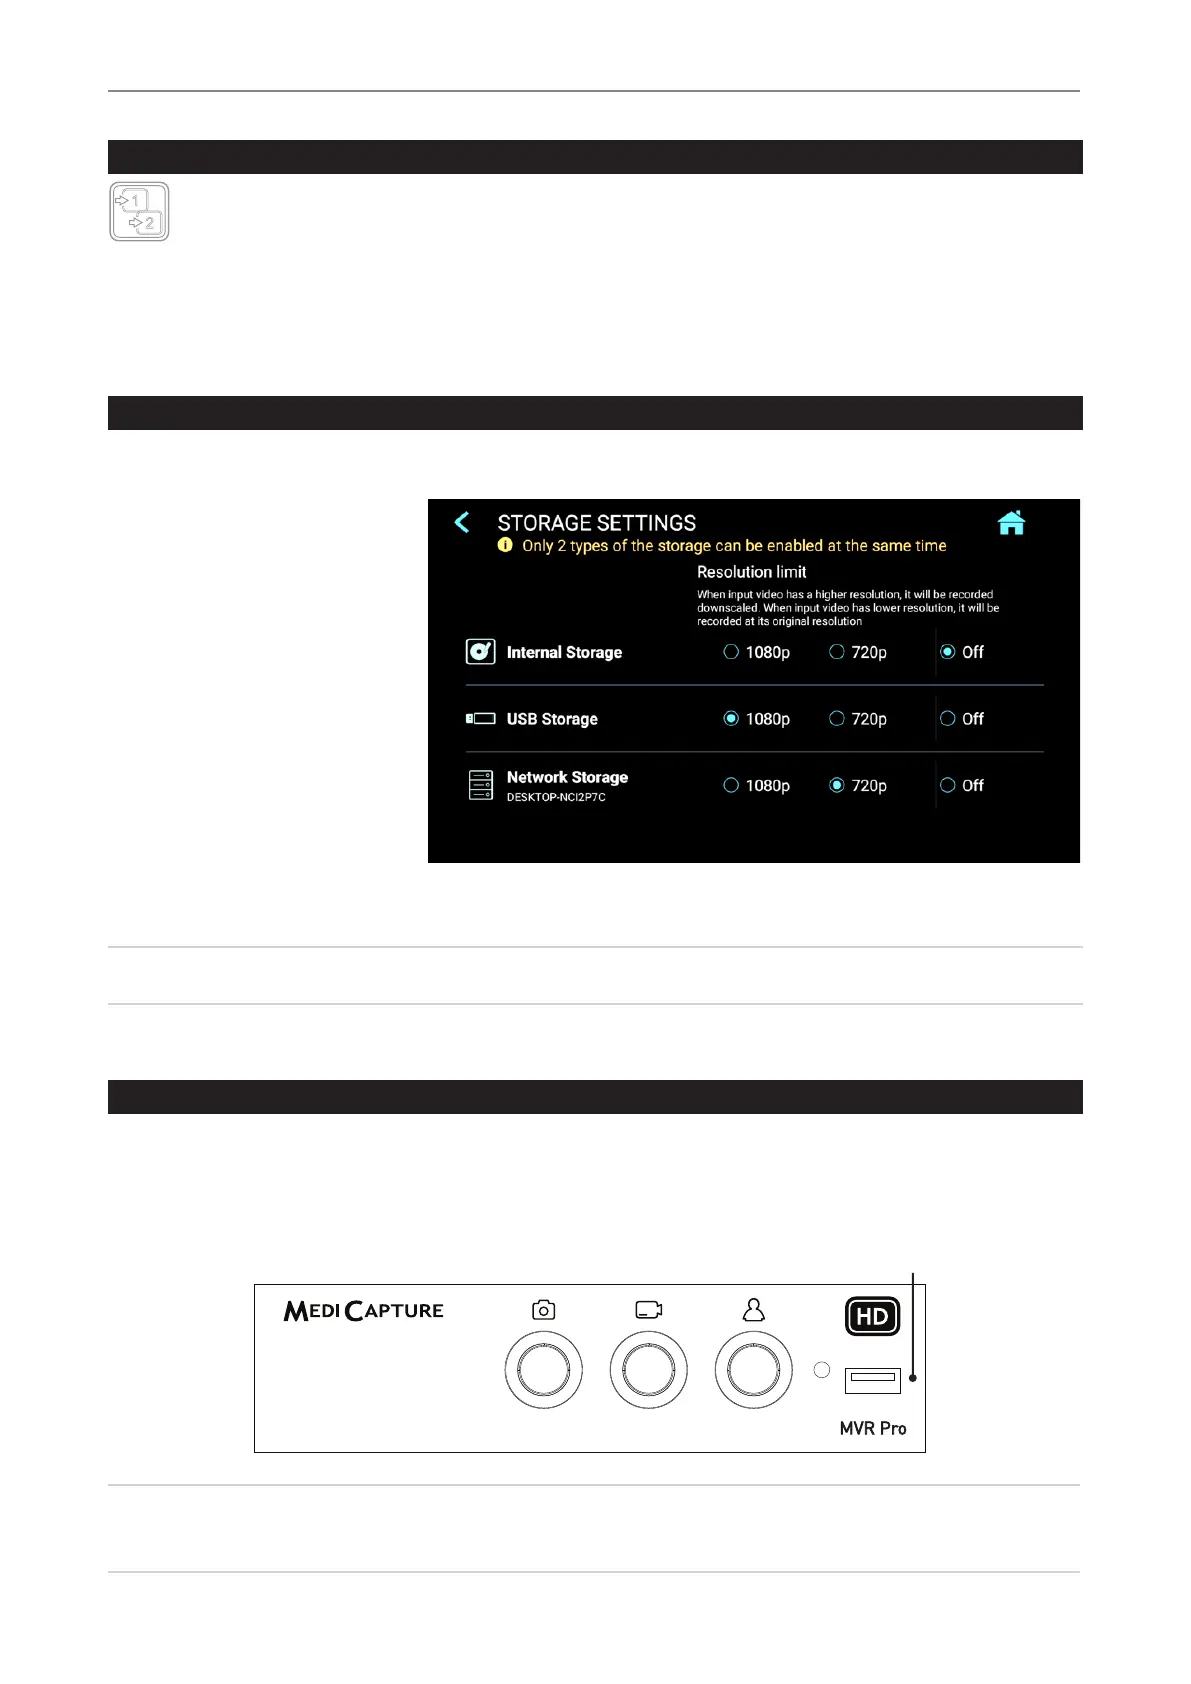
Storage Options = Multi-Storage
➤Settings ➤Archive ➤Storage
MVR / MVR Pro offers the possibility to store your recording studies to multiple storage targets.
Note: Two types/options of storage
can be chosen at the same time.
Options are:
• Internal Storage
• USB Storage
• Network Storage
You can also select different
video resolutions for different
storage targets.
Example: Recording to USB in the
highest possible resolution and recording
to a network server in reduced resolution.
Resolutions 1920x1200 and 1280x1024 will be supported at setting 1080p –
recorded and captured in original resolution and format.
Note: Images are always captured in the original input resolution.
Recording to a USB Flash Drive
Recording to the supplied MediCapture USB ash drive is the easiest way to start using your MVR / MVR Pro. When you nish
recording, you can remove the ash drive and easily carry it with you.
Please make sure that USB storage is activated.
➤ Settings ➤ Archive ➤Storage
USB Drive Connector
Connect a USB drive here. Images and
videos are captured to the drive.
Note: In case the policy in your IT-environment does not allow the use of USB storage media at all,
IT-Administrators can disable the USB-option for storage.
➤ Settings ➤ Advanced Settings ➤ Storage Rules