MVR/MVRPRO-UG01-EN-200727
<23>
MVR / MVR Pro User Guide - English
MediCapture Automatic Video Repair Function
USB drives must not be removed during recording! Removing the USB drive during recording results in corrupted les.
Turning MVR /MVR Pro off or a mains power failure during active video recording will also cause corrupted video les.
MVR / MVR Pro features an Automatic Video Repair Function. As soon as you plug-in a USB drive with a damaged video le, MVR /
MVR Pro detects the le and xes it for playback. A message will pop-up on the screen to inform you about the
successful progress.
MVR / MVR Pro also scans the internal storage for corrupted video les and repairs them automatically.
Please note: Automatic Video Repair only works for USB drives when formatted to FAT32 or NTFS.
USB drives in format exFAT are not supported by the Automatic Video Repair Function.
Footswitches and Camera Triggers
One Standard footswitch / camera-trigger connector is located on the back panel. It serves the same function as the corresponding
Record Photo button on the front panel. Note that the footswitch / trigger connectors respond to a simple “closed contact”; they are
not “programmable.”
Please note: To operate two remote cables from your image source
(Capture Photo + Record Video) an adapter is necessary for the MVR / MVR Pro remote connector.
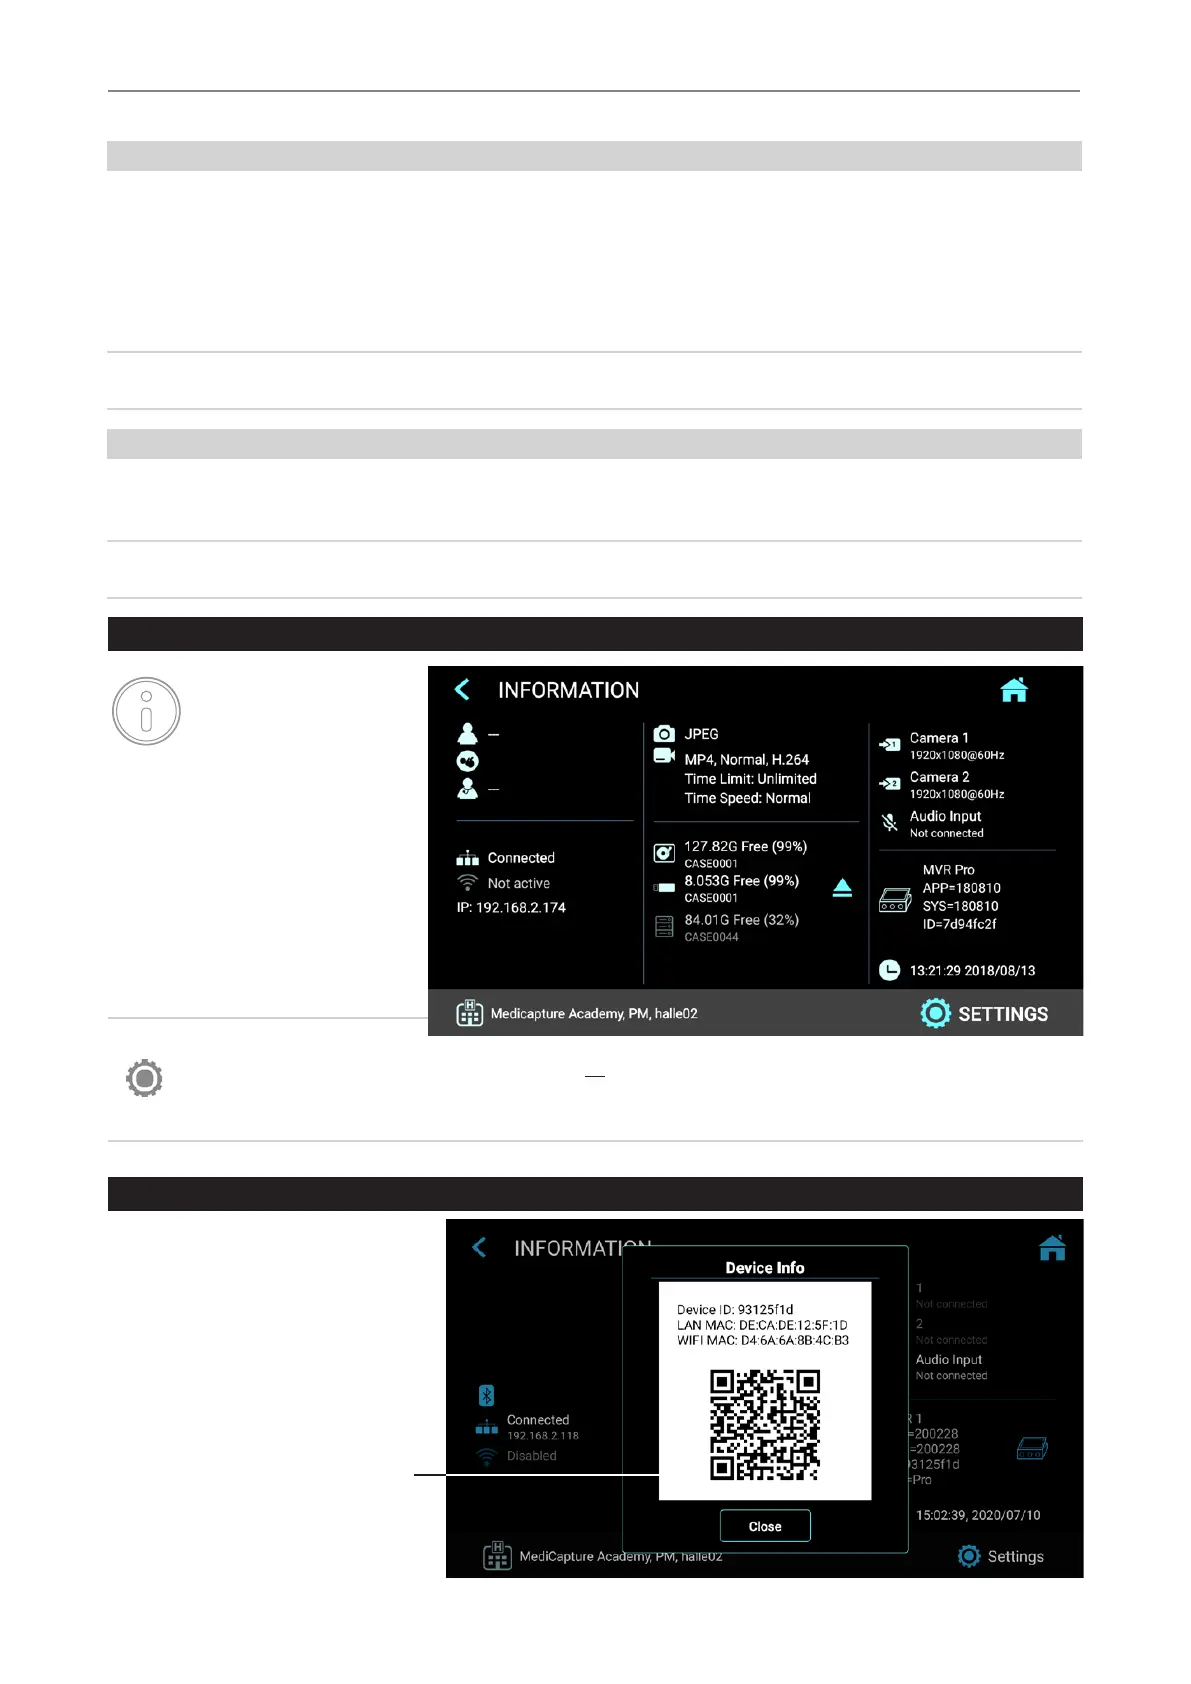
Information Page / System Settings
An Info Icon is displayed
in the live screen.
By using a touchscreen
monitor or a USB mouse,
you can tap on the Info Icon to access
the INFORMATION page.
[USB keyboard: “i” has the
same function.]
The INFORMATION page gives
you an overview about relevant
parameters and access to
System SETTINGS.
Please note:
The SETTINGS icon function is only available when no recording study has started. After starting a recording study,
the Settings cannot be changed. If you wish to enter the system Settings, you need to close the study rst. Then open the
System Info page and tap on SETTINGS.
The Device Info also
contains a QR code
for scanning.
Device Info: Device ID / LAN MAC address / QR code
You can nd the Device ID and the
LAN MAC address by tapping on
the icon for Device Info.