22
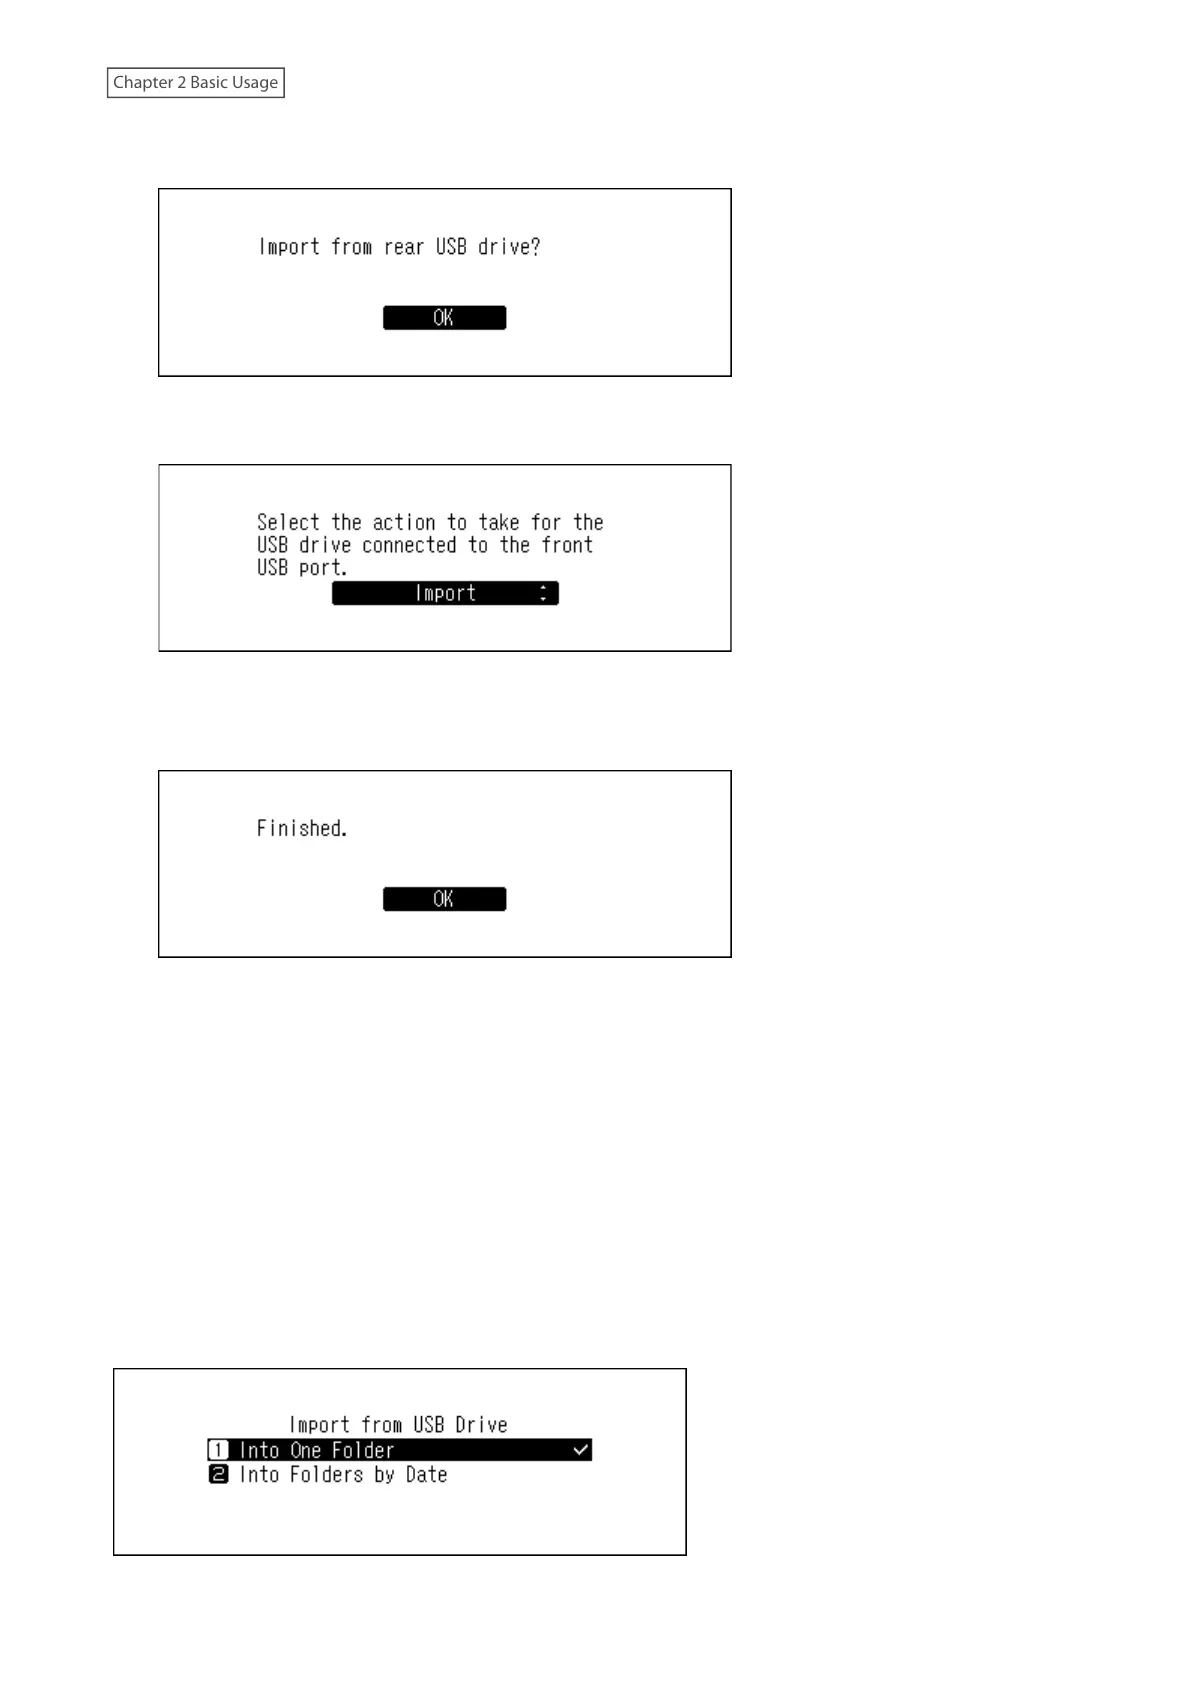
2 When the USB drive is connected to the rear USB 3.0 port on the N1 EX, the following screen will be displayed.
Press the Menu/Enter button.
When the USB drive is connected to the front USB port on the N1A EX model, or the USB 2.0 port on the N10/
N100, the following screen will be displayed. Press the Up/Down buttons and select “Import”, then press the
Menu/Enter button.
3 Wait until music importing is finished.
4 Press the Menu/Enter button.
5 Disconnect the USB drive.
Notes:
• If a filename or folder name starts with a period (.), the file or folder cannot be imported.
• If the Back button is pressed while importing, the import process will be cancelled after the Digital Music Library
finishes importing the current file. If the imported file size is large, the cancellation process may take a few
minutes to finish.
Import Destination Details
Imported music files will be stored in the “import” folder. There are two options to store the imported data in the
Digital Music Library. To change these options, go to Settings > Import from USB Drive and select “Into One Folder” or
“Into Folders by Date”.
 Loading...