ENGLISH
129
1. Zip foot
2. Buttonhole foot
3. Guide ruler
4. Seam ripper
5. Screwdriver
6. Bobbins (x 3)
7. Needles
8. Oil
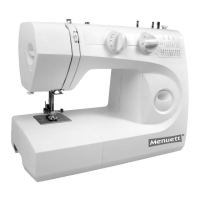
9. Accessory tray
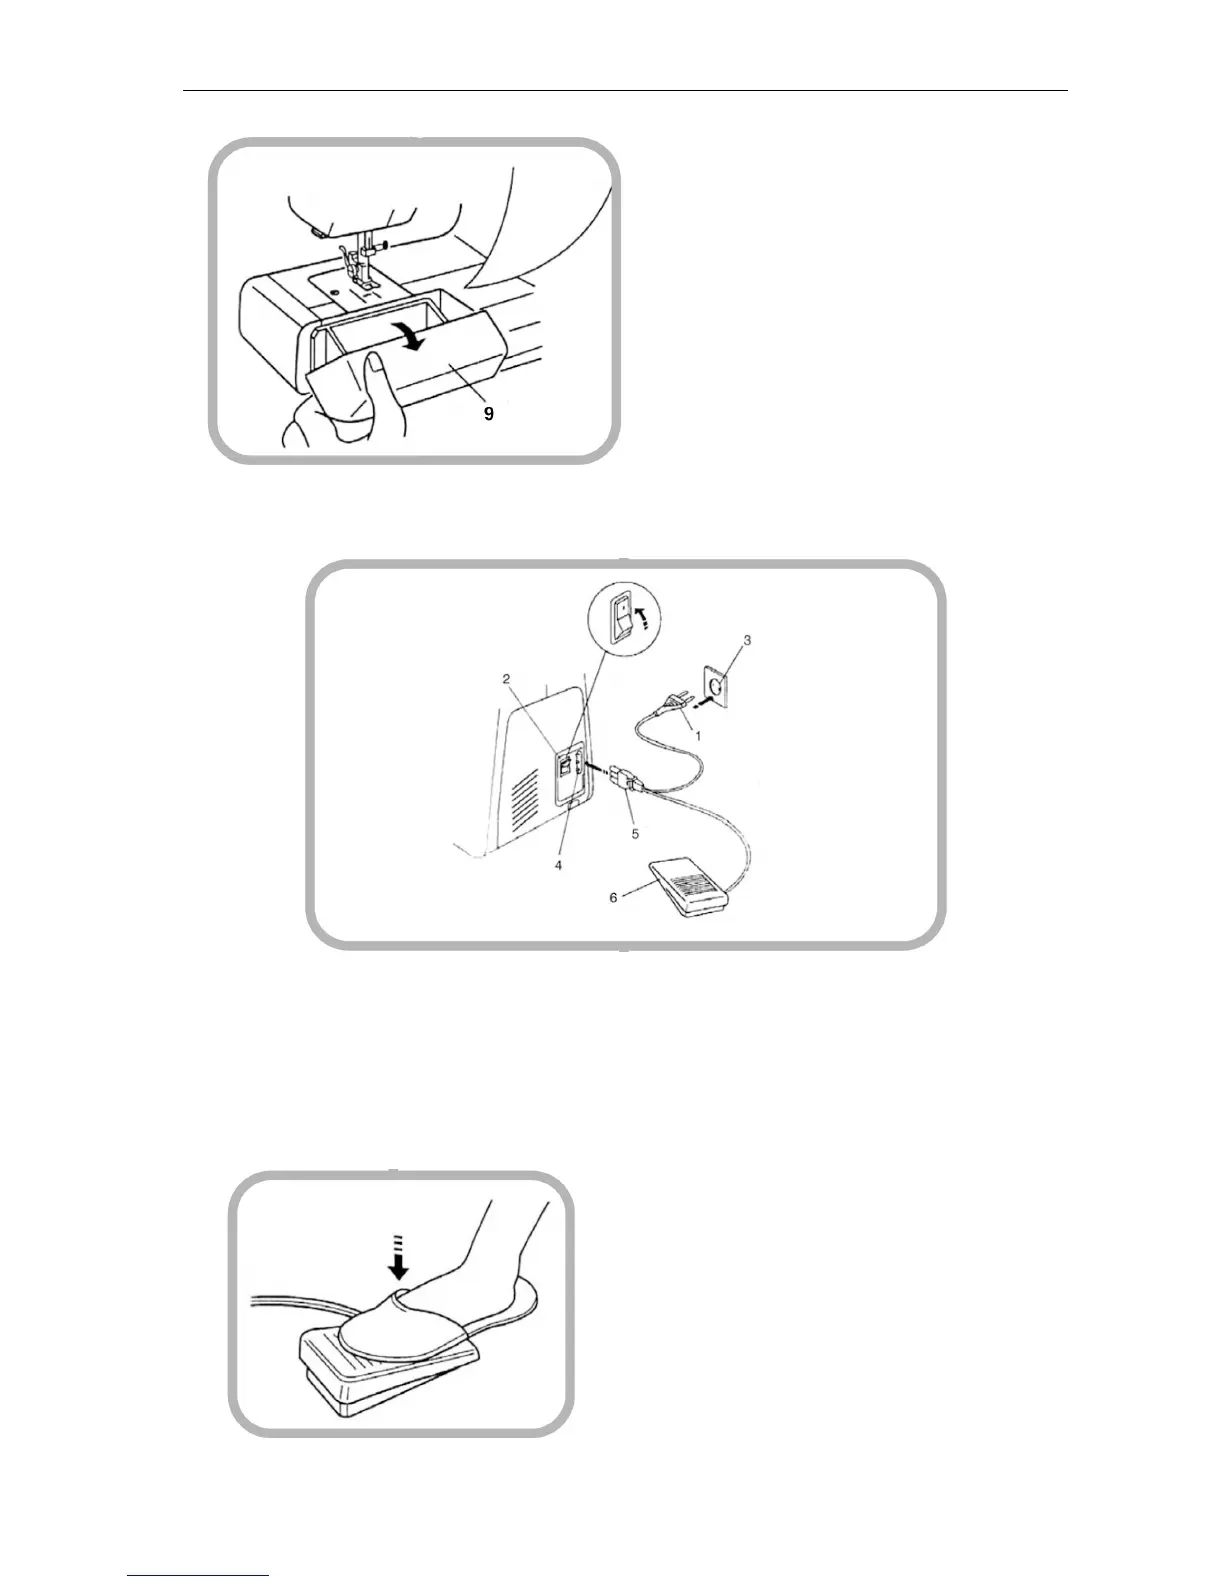
Power supply
IMPORTANT: Check that the machine’s rated voltage and rated frequency correspond to the voltage and
the frequency at the wall socket to which the machine is connected.
Switch (2) is not a switch for the actual machine, but only for the light. You must therefore always
disconnect the machine by removing the plug from the wall socket before performing maintenance and
service.
1. Connect the plug (5) to the socket (4) on the machine.
2. Connect the mains plug (1) to a wall socket (3).
3. Turn the switch (2) to position 1 to turn on the sewing machine’s lighting.
Foot control
The sewing machine’s speed is governed with the
foot control (6). The more you press the pedal, the
faster the machine will sew.