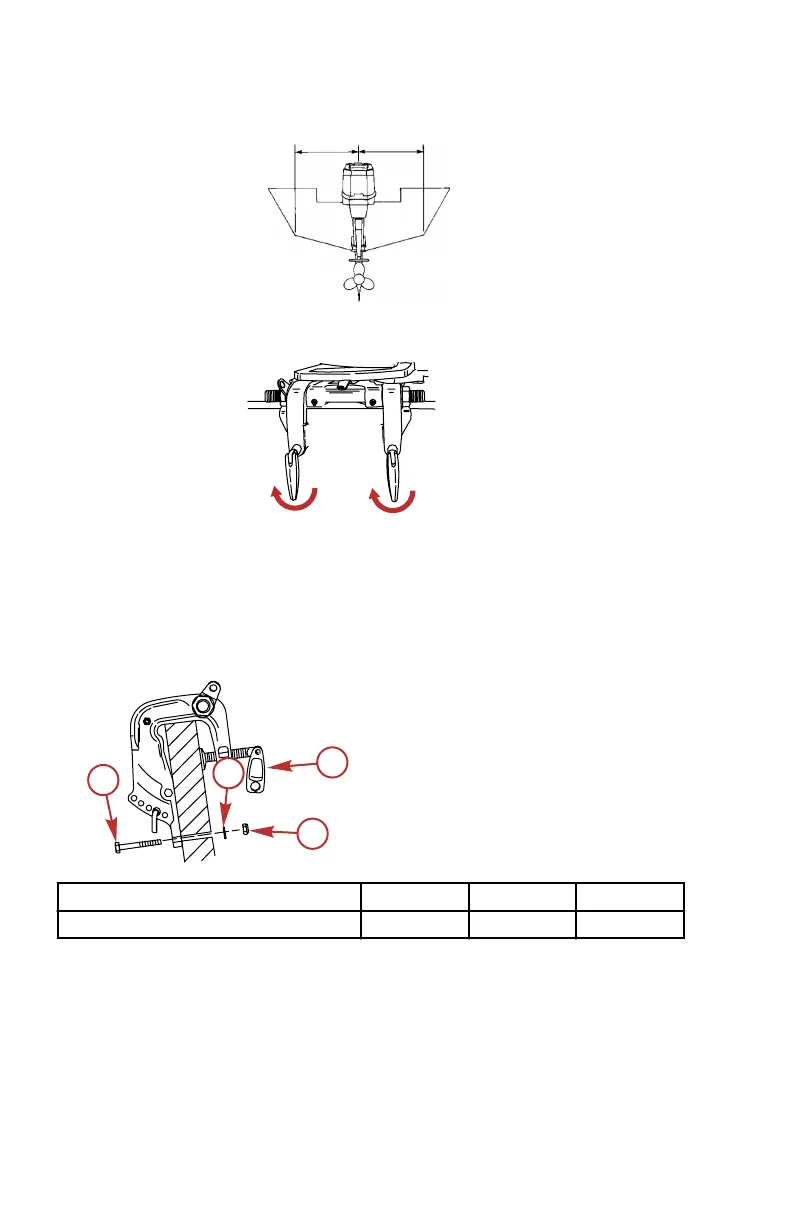
1. Place the outboard on the centerline of the transom.
2. Tighten the transom bracket clamp screws.
3. Nonpower tilt models ‑ To prevent a loss of the outboard, secure the
outboard to the transom with the two transom bracket clamp screws and
two mounting bolts. Drill two 7.9 mm (5/16 in.) holes through‑the‑transom
bracket mounting holes. Fasten with two bolts, flat washers, and locknuts.
Use a marine waterproofing sealer in the holes and around the bolts to
make the installation watertight. Tighten the bolts to the specified torque.
a - Bolts (2)
b - Washer (2)
c - Locknut (2)
d - Transom bracket clamp
screws (2)
Description Nm lb‑in. lb‑ft
Transom bracket mounting bolts 13.5 120 –
INSTALLATION
24 eng
 Loading...