11
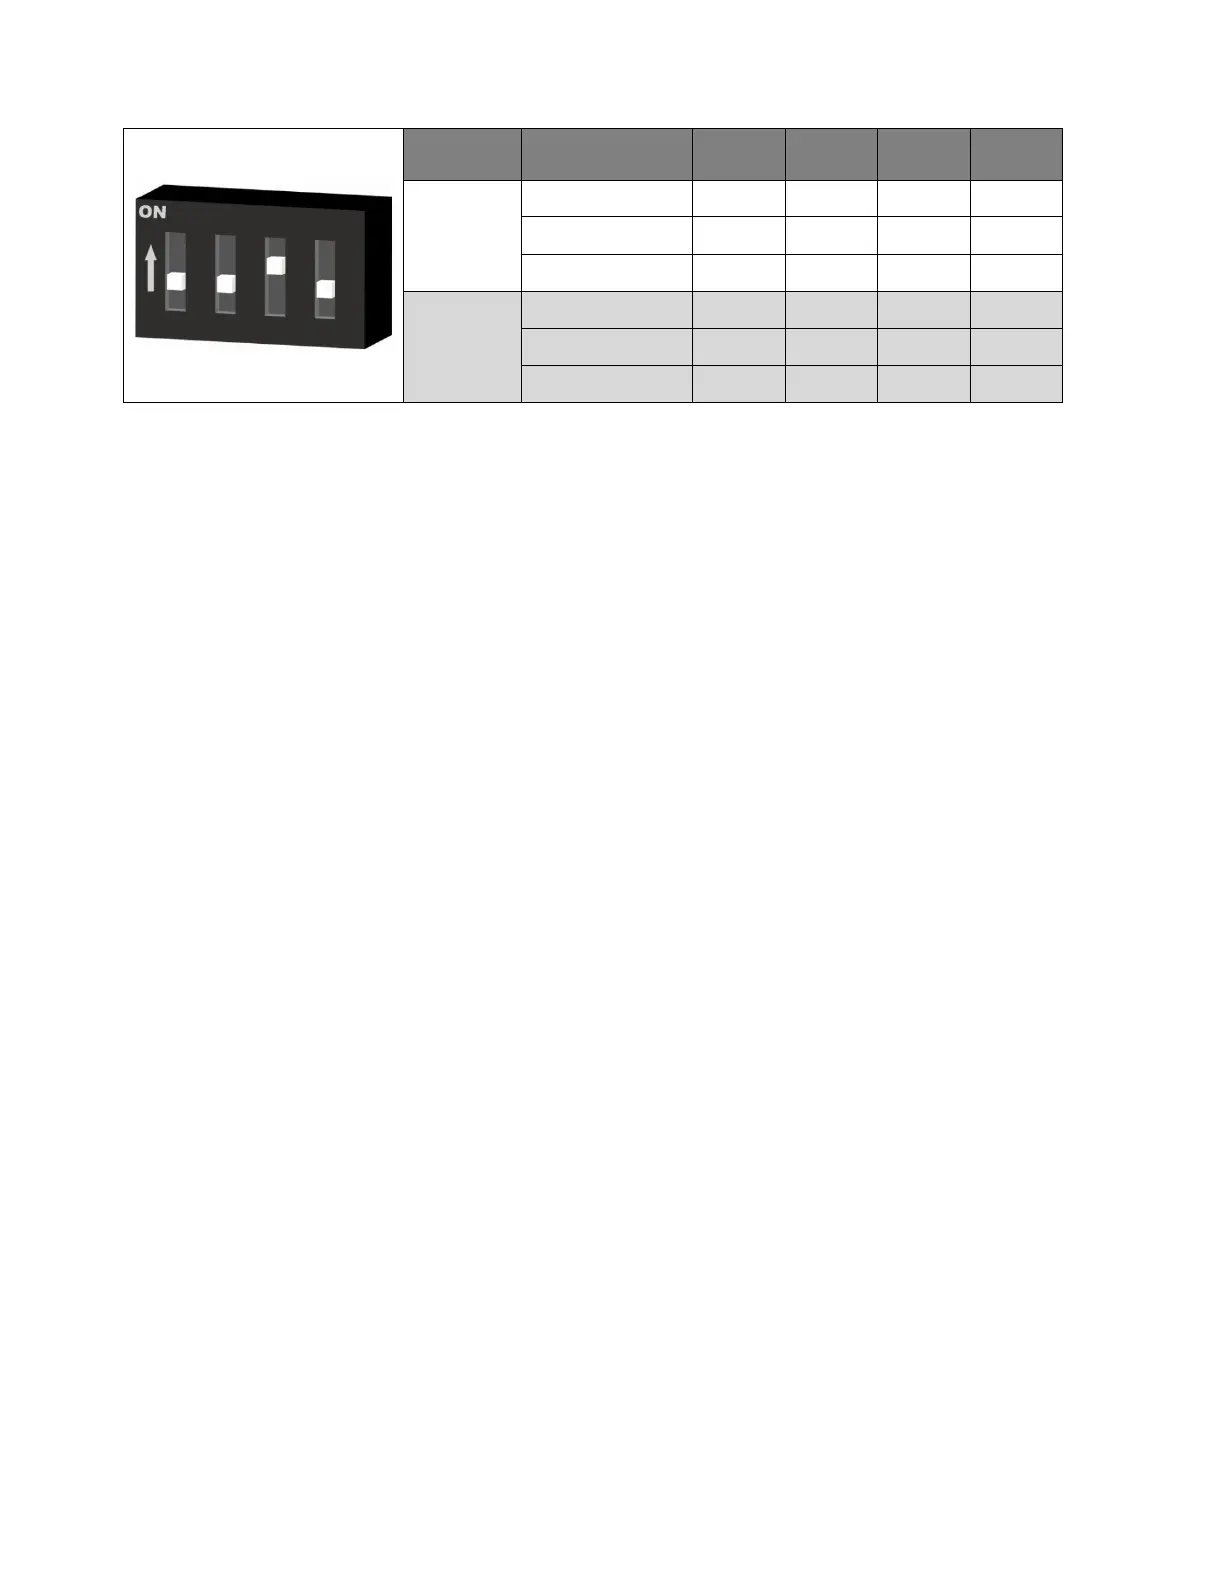
Operating
Positions
Wire Loop Off (↓) On (↑) On (↑) Off (↓)
Tube Loop/Flush On (↑) Off (↓) On (↑) Off (↓)
Cylindrical
*
Off (↓) Off (↓) On (↑) Off (↓)
Test
Positions
4mA Output On (↑) On (↑) Off (↓) Off (↓)
20mA Output Off (↓) On (↑) Off (↓) Off (↓)
4-20mA Sweep On (↑) Off (↓) Off (↓) Off (↓)
Table 2. Probe Switch Settings
*Cylindrical probe setting is illustrated.
b. Testing the Current Loop
i. Calibration
The MS2601E is fully calibrated when shipped from the factory. The calibration settings are fixed to
avoid accidental change which could result in erroneous data. In general no field calibration is
required. However, it is important to test the MS2601E upon installation, and during periodic
maintenance inspections, to ensure the unit is operating properly. Follow the procedure as below, if
calibration becomes absolute necessary.
Note1: Note down the switch settings before proceeding to the below procedure.
1) 4 .00 mA Calibration
a. Power down the instrument
b. Turn Off Switch 1 ,2 and 3
c. Turn On Switch 4
d. Connect meter in series to the instrument to measure current in mA.
e. Power-up the instrument
f. Check the Loop Current, No calibration necessary if the meter reads 4.00 mA, if
not proceed below.
g. To increase the loop current in steps of 0.025 mA , toggle the Switch - 2 to Up and
Down . Each Toggle will increase loop current by 0.025mA
h. To decrease the loop current in steps of 0.025 mA , toggle the Switch - 3 to Up and
Down . Each Toggle will decrease loop current by 0.025mA
i. Ensure current reading is equal to 4.00 mA.
j. Turn Off Swithc-4. Wait for a second
k. Turn off the Power.
2) 20 .00 mA Calibration
a. Power down the instrument
b. Turn Off Switch 2 and 3
c. Turn On Switch 1 and 4
d. Connect meter in series to the instrument to measure current in mA.
e. Power-up the instrument
f. Check the Loop Current, No calibration necessary if the meter reads 20.00 mA, if
not proceed below.