Insert a new module for the Multi Autolab Cabinet
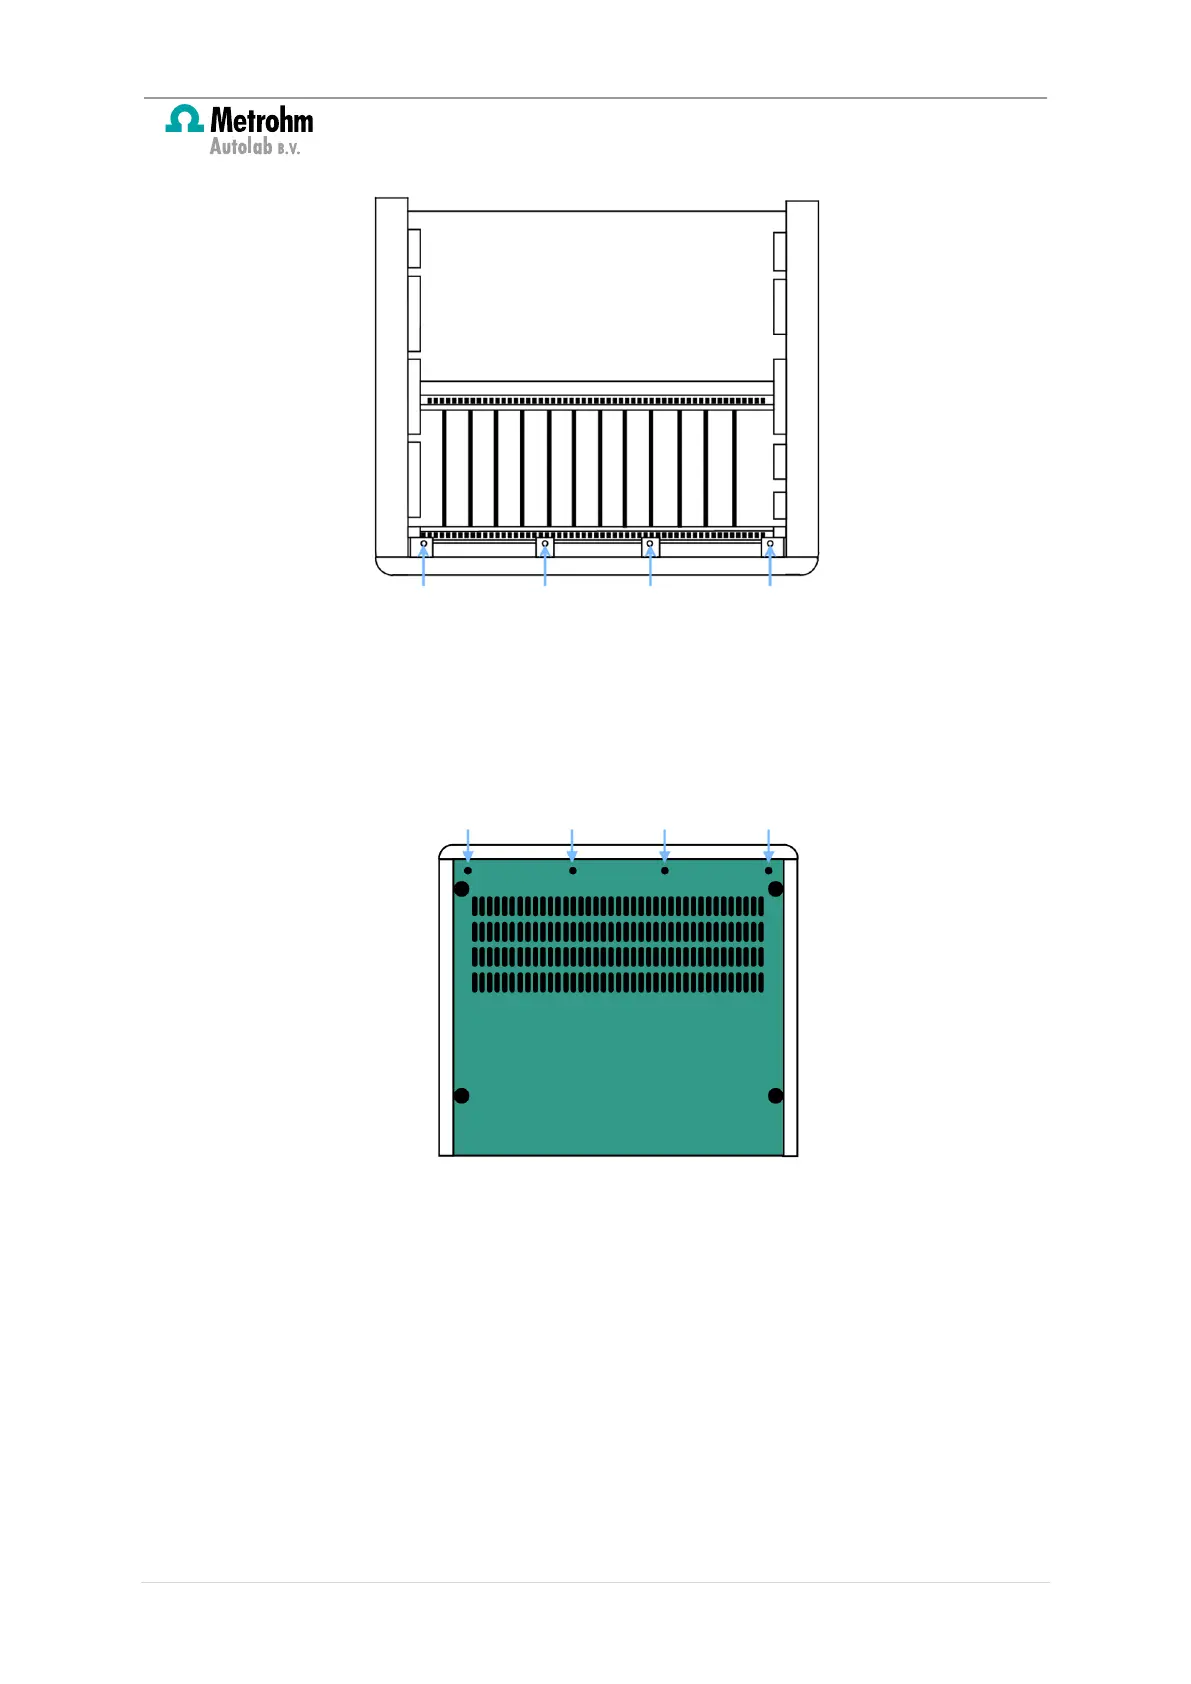
Figure 5 – Locate the four indicated screws holding the front panel
2. At the bottom of the front panel the same construction is used. The screws can be
reached through holes in the bottom cover. These screws must be removed
without
turning the Autolab upside down
. In order to do this, slide the instrument slightly
over the edge of the table and remove the four screws indicated in Figure 6 from
below.
Figure 6 – Remove the four indicated screws from below the instrument
3. Now the front panel can be shifted smoothly to the front and taken off (see Figure
7).
7 | Page
 Loading...