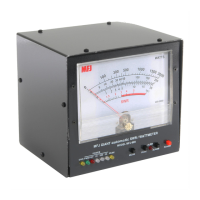
MFJ-869 MFJ Giant automatic SWR/Wattmeter Instruction Manual
© 2009-2010 MFJ Enterprises, Inc.
10
SWR Bridge Calibration
To calibrate the SWR Bridge, you will need a transmitter capable of 100 watts output, a precise calibrated
wattmeter, a 50-ohm dummy load, three 50-ohm SO-239 coax cables, a Phillips screwdriver, and a tuning
tool or small flat blade screwdriver.
WARNING: Do not touch anything inside the wattmeter during operation! Serious, painful RF
burns can result.
WARNING: Never operate the MFJ-869 with its cover removed; dangerous voltages and
currents can be present during operation. Never exceed wattmeter specifications.
1. Make sure the analog meter is calibrated. See “Wattmeter Calibration” section for the calibration
procedure.
2. Turn off the power to the unit and the transmitter.
3. Remove the cover from the unit (4 screws) with a Phillips screwdriver.
4. Connect the 50-ohm dummy load to the ANTENNA connector; connect the calibrated wattmeter
between the transmitter and the TRANSMITTER connector on the unit.
5. Turn on the power to the transmitter. Using a frequency in the middle of the HF band, such as 7.253
MHz, for calibration is recommended.
6. Press and hold both the [MODE] and [PEAK] buttons while turning the power on.
7. Release the buttons after the analog meter needle bounces.
8. The REF and 20 LEDs illuminate. Key the transmitter to output 100 watts and adjust trimmer
capacitor VC1 (located in front of the coax connectors) for minimum reflected power.
9. Press [MODE] button. The FWD and 200 LEDs illuminate. Key the transmitter to 100 watts output
and adjust the FWD trimpot VR1 until the 200-watt scale reads forward power of 100 watts.
10. Press [MODE] button. The FWD and 2000 LEDs illuminate. Key the transmitter to 100 watts output
and adjust the trimpot VR3 until the 2000-watt scale reads forward power of 100 watts.
11. Press [MODE] button. The FWD and 20 LEDs illuminate. Key the transmitter to 15 watts output
and adjust the trimpot VR5 until the 20-watt scale reads forward power of 15 watts.
12. Turn off the transmitter and reverse the ANTENNA and TRANSMITTER connections; that is,
connect the 50-ohm dummy load to the TRANSMITTER connector and connect the
transmitter/wattmeter to the ANTENNA connector.
13. Turn on the transmitter’s power.
14. Press [MODE] button. The REF and 200 LEDs illuminate. Key the transmitter to 100 watts output
and adjust the REF trimpot VR2 until the 200-watt scale reads reflected power of 100 watts.
15. Press [MODE] button. The REF and 2000 LEDs illuminate. Key the transmitter to 100 watts output
and adjust the trimpot VR4 until the 2000-watt scale reads reflected power of 100 watts.
16. Press [MODE] button. The REF and 20 LEDs illuminate. Key the transmitter to 15 watts output and
adjust the trimpot VR6 until the 20-watt scale reads reflected power of 15 watts.
17. Turn off the power to the unit and the transmitter.
18. Remove the transmitter/wattmeter and the 50-ohm dummy load from the unit.
19. Secure the cover back onto the unit.
20. Connect your transmitter to the TRANSMITTER connector and connect your antenna to the
ANTENNA connector on the unit.